Deconstructed

A Lovegrove portrait deconstructed - part 3

This is the third and last part in a series of guest posts by my good friend and lighting wizard Damien Lovegrove, in which he deconstructs a couple of his favourite images. If you find these posts inspiring, then make sure to register for next week’s two-part live online lecture, ‘Lovegrove Portraits Deconstructed, part III & IV’. Until January 21, there’s a 40% early bird discount and you also receive a downloadable recording of both sessions to rewatch at any time you want. So even if the date does not suit you to watch the event live, you’ll still have the recording. Below is what you can expect:


Damien goes Wild (West)

Yesenia-Wild-West-2018-163.jpg

I took this shot using a 250mm telephoto lens at f/4 in the baking hot desert wilderness near Paige in the USA. I lit Yesenia from the right with a Godox AD600 fitted with a 18cm reflector and was happy to find the flash trigger worked at the 100m range. I placed a walkie talkie on the ground behind the rock where Yesenia is standing so I could give direction from the camera position.

Wild West 2017-156.jpg

I also used a Godox AD600 with a 18cm reflector for this shot of Claire in Monument Valley. In both of these shots I rigged the flash directly opposite the sun and used it on full power. I love how f/4 renders the background beautifully out of focus yet supporting the narrative of this ‘follow me’ shot.

Damien has been using the Fujifilm GFX system for almost all his images from the past years, so if you’re interested in investing in one of the GFX camera’s, you’ll get a great idea of what they’re capable of.

A Lovegrove portrait deconstructed - part 2

This is the second part in a series of three guest posts in which my good friend and lighting wizard Damien Lovegrove deconstructs a number of his favourite images. If you find these blog posts inspiring, then make sure to sign up for next week’s two-part live online lecture, ‘Lovegrove Portraits Deconstructed, part III & IV’ that takes place on January 26 and 28, from 7 to 9 PM GMT. During those sessions, you’ll see and hear a lot more inspiring images and tips like these. Until January 21, you save 40 percent on the joint ticket price and pay only €30 for both sessions. Furthermore, every participant will receive a downloadable recording, so you can watch the sessions again as many times as you like, where you like and when you like! So even if you can’t make it to the live show, it’s still a good idea to book a spot!

The double exposure technique for when you can’t hide your light stand

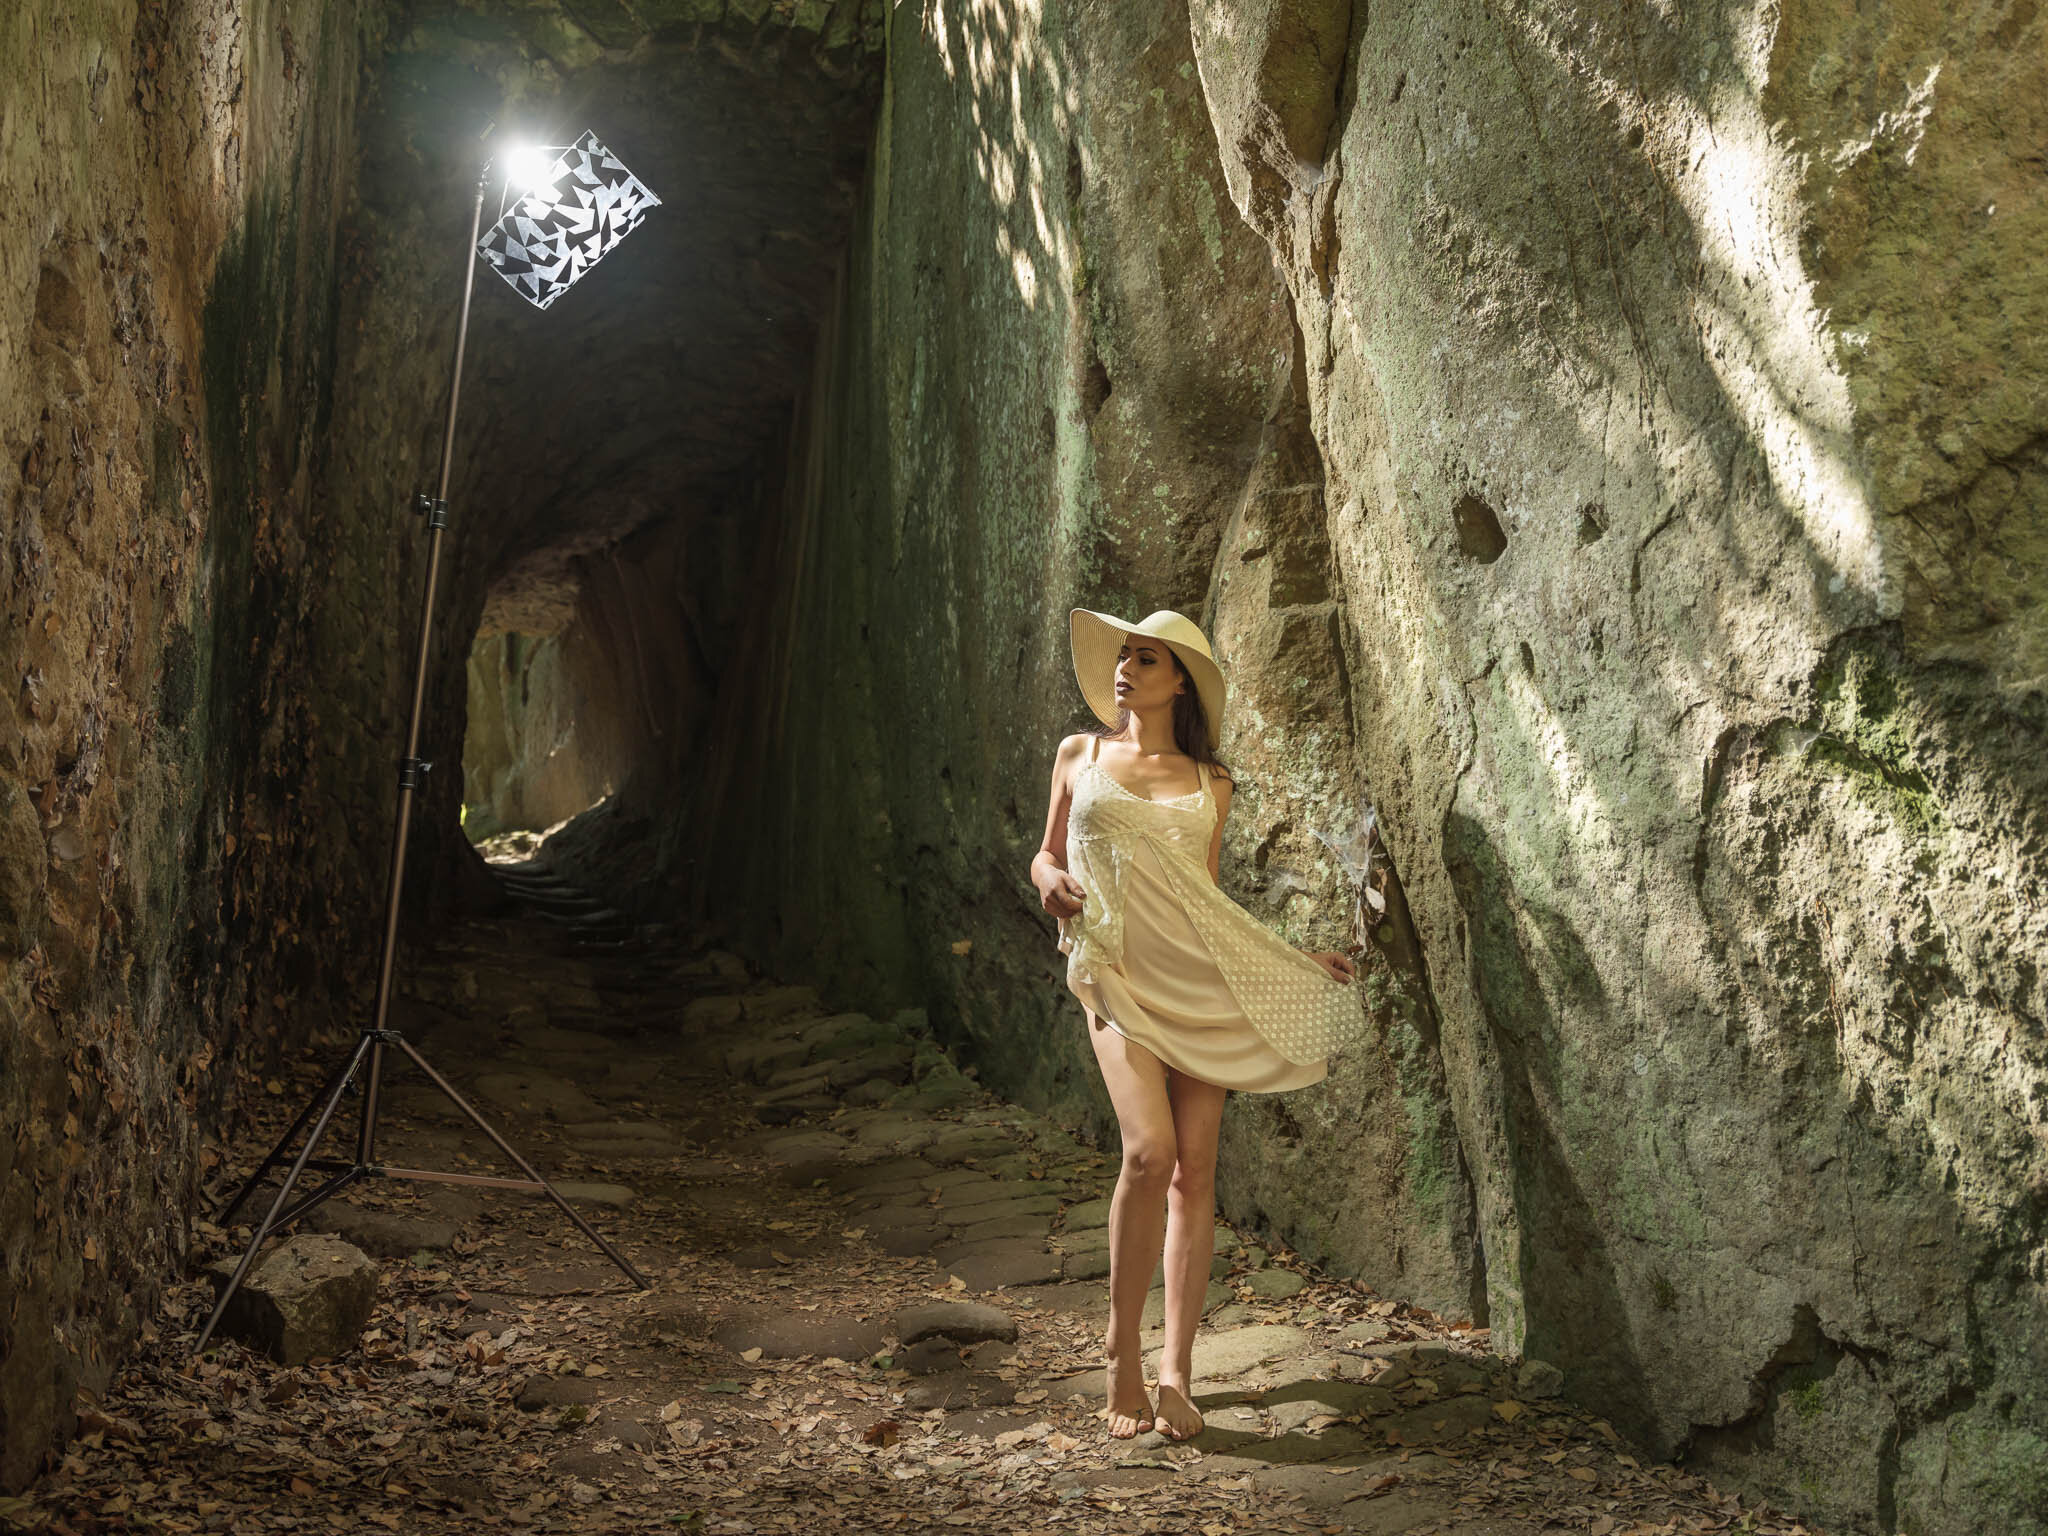
Martina in an interesting location about an hour from Rome. Damien shot this on his 2020 road trip between the lockdowns.

Sometimes I struggle to get the flash where I need it in the shot without it being in the frame, so I use a double exposure technique. I always use a tripod for my camera so this technique is a piece of cake for me. I place the light where it needs to be and capture my moment. Once I have the energy and pose that I need I shoot my master frame. Then without moving the camera, I derive the light and shoot a frame without the flash using the same exposure settings. I then join the two shots in post production. The modifier you see in the shot is the Scatterflash which I also mentioned in the previous blog post.

Urbex with Martina

Martina day2-006-Edit-2-4.jpg

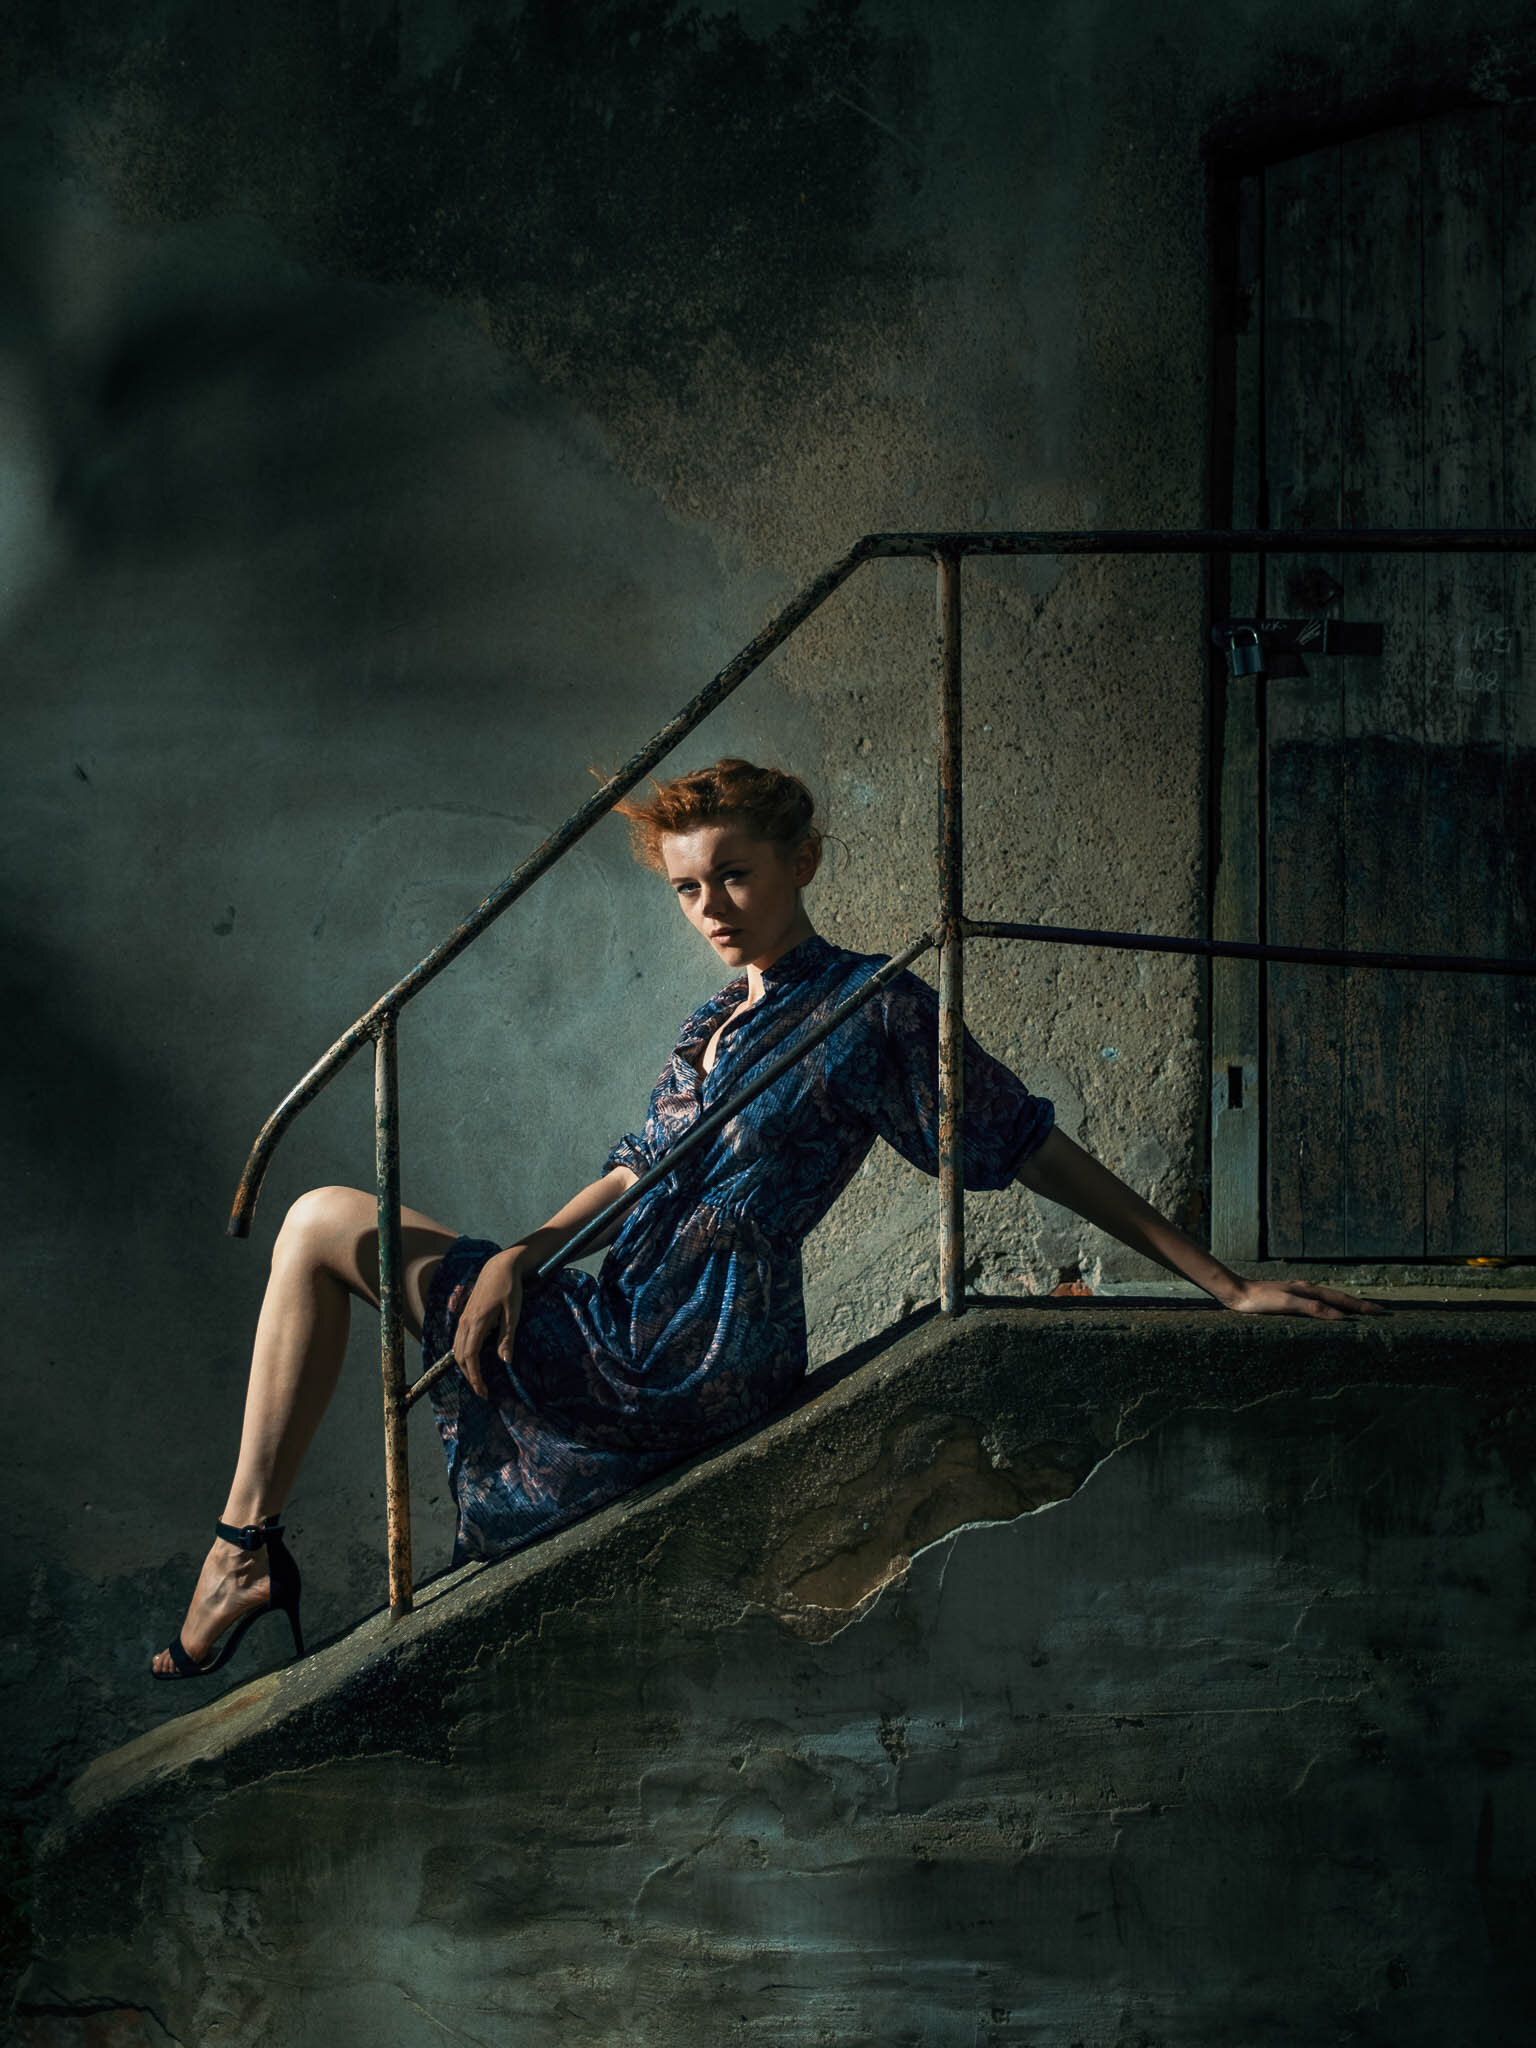
For this shot of Martina taken at an abandoned sugar factory in Italy also used a double exposure technique. This time though I used the more powerful Godox AD1200 Pro (editor’s note: here you can see Piet using the AD1200 Pro in Brussels) and a 70cm soft box and grid. Once I had the principal shot I took another without the flash and combined them.

You will notice that the sun is coming from a different direction to my flash light and this is quite deliberate. I had no intention of trying to make this shot look realistic. It is a stylised fashionable shot inspired by music album covers of the 1970s.

All these images were shot with a Fujifilm GFX 50S.

A Lovegrove Portrait Deconstructed

This is the first in a series of three guest posts by my good friend and lighting wizard Damien Lovegrove, in which he ‘deconstructs’ a series of his favourite shots. If you’d like to see and hear almost four hours’ worth of composition, posing and lighting tips and techniques like these, then sign up for the two-part inspirational live online lecture ‘Lovegrove Portraits Deconstructed, part III & IV’. Save 40% on your ticket until January 21st.

Working with a central composition

Amelia-020-4.jpg

I took this simple shot of Amelia in Switzerland between lockdowns last year. I chose a very central composition when I rigged my tripod. I was unsure about the patch of sunlight on the floor but I really wanted the boarded up window and sloping cobblestones to feature prominently.

I then placed a Godox AD200 high on a stand just out of shot on the right. It was rigged almost touching the wall and was fitted with a Scatterflash attachment. This gave the dappled look that I love so much.

I did a test exposure and settled on ¼ power for the flash and then I invited Amelia to come into the shot. I like to get all the faffing done before I introduce my subject otherwise they get bored.

Shooting 90 degrees to the light

Kate-Ri-day1-x100v-014-2.jpg

I used the same set up here for this shot of Kate taken in Poland in May 2020. I rigged my Godox AD200 high on a stand at 90° to the camera and scooted the light down the wall. A Scatterflash attachment completed the look.

When I asked Kate to take up her place on the steps I was keen to ensure that I have the ‘Hollywood triangle’ of light on her left cheek. 

I gave the finished image a bit of a ‘look’ in Lightroom using a LUT.

In this Set.A.Light 3D setup I simulated the lighting from above. The Scatterflash is not in the tools in Set.A.Light, but I simulated the effect by using a gobo. You can see that the camera and the light are at an angle of ninety degrees to each ot…

In this Set.A.Light 3D setup I simulated the lighting from above. The Scatterflash is not in the tools in Set.A.Light, but I simulated the effect by using a gobo. You can see that the camera and the light are at an angle of ninety degrees to each other and that the model looks about halfway between the two, so that you get the beautiful Rembrandt triangle.

All images shot with a Fujifilm GFX 50S.