Hello everybody, just a quick blog post to tell you that the details of the 2019 Location Portraiture and Lighting Masterclass have just been added on the site. If you want to improve your location portraiture and off-camera flash skills in one of the most photogenic cities in the world, check out the details now.
Lighting

Save 20 percent on 'Portraits' by Damien Lovegrove
I know very few professional photographers who manage to photograph at Damien Lovegrove's pace all while still sharing so much of their knowledge through live workshops, lectures and videos. Take a look at Damien's excellent lighting videos, I can recommend all of them, especially his latest Lumen release or his Portraits ebook, the subject of this blog post. In fact, I think if you'd go look up the word 'prolific' in a dictionary, chances are that after the description, you'll read 'see also: Damien Lovegrove'. I once jokingly asked Damien which pills he was on because I wanted to see the same pharmacist.

Shot during an urbex shoot with Damien and fellow X-Ambassador Ioannis Tsouloulis in Belgium. FUJIFILM X-Pro2 | XF16-55mmF2.8 R LM WR @ 17 mm | 1-160 sec at f - 8,0 | ISO 200

The master himself in action in this set-up shot: we used two Cactus RF60 speedlights and a Cactus V6 trigger. Modifier was an SMDV 70 Speedbox with a grid.
“I don’t know what vitamins Damien Lovegrove is on, but I want the same!”

The eBook is available in two different covers. This is one from Damien's 'Figure in the landscape' series which he shot in the USA.
Damien was in Gent (Belgium) recently for a highly acclaimed (and sold out) evening talk. He had a special discount code for his Portraits eBook. Originally, it was only for the participants but I asked if I could also share it publicly, and he agreed. As Damien says himself, everything he knows about portrait photography is in this book.
In Portraits, Damien takes you through his complete portrait making process. He starts at the planning stages and obviously covers capture in great detail, both using natural light and flash, but he also talks about how he delivers files to clients and how he archives them.
Portraits has 356 pages with 384 high-resolution photographs that have all the exposure and lighting details that were used to create them. Because it's so high-res, you actually get two download sizes to choose from: a high-res one (e.g. for on your computer or tablet) and a lower res one (e.g. for on your phone).
“Everything I know about portrait photography is in this book. I hope it helps you to achieve a lifetime of enjoyment from your photography.”
Imagine Damien sitting next to you in a bar, giving you 50,000 words worth of lighting and career advice. Believe me, that would cost you a lot more in beers than the 36 € / $40 (+ tax) Portraits is currently selling for. And better still, if you use code GENT€ (if you pay in €) or GENT$ (if you pay in $) upon checkout, you can get 20% extra off. On the eBook, not on beers! But hurry, because that code is only valid through the end of June 2018.
(Sneaky extra tip by yours truly... the ebook costs about 10 percent less in $ than in € due to exchange rate fluctuations - I think we can thank 'The Donald' for that... just make sure to use the right discount code!)

Mongolia with the Fujifilm GFX
A Postcard from Mongolia, Part 2

Previously on the blog: in April this year, travel photographer Matt Brandon, yours truly and a select group of adventurous photographers, accompanied by an expert team of guides and photographic fixers, embarked on a photographic journey to Mongolia. Our aim was to do people and location scouting and set an itinerary for a new Mongolia photo workshop that will take place in the first half of 2019. In the first postcard in this series, you could already get a glimpse of one of the highlights of this and next year's trip: an extensive visit to the world famous Eagle Hunters. In this second postcard, I've got some more Eagle Hunter shots for you, including some behind-the-scenes pictures and explanations on how some of these images were made.

The Bayan-Öglii Airport. It had been a while since I had flown in a propeller plane. Fujifilm X-H1 | XF16mmF1.4 R WR | 1/220 @ f/11 | ISO 200

Quite cosy, those orange curtains in our Russian 4 x 4 Forgon minivans! I wouldn't mind having a mobile office like this - bar maybe the fuel consumption!
The Eagle Hunters live in a hard to reach region in Western Mongolia. The choice between a three and a half hour flight or two and a half days of being tossed around in a car was quickly made. Not that we entirely escaped being the tossing part: from the airport to our final destination - a custom built gher (tent) camp - it was another three hours in those photogenic (and frankly more comfortable than expected) Russian 4 x 4 Forgon vehicles. We had access to a family of Eagle Hunters for four full days. This gave us ample time not only to get to know them, but also to photograph them both indoors and outdoors, at various times of the day and in various locations, as you'll see below. We've already told them we'll be back next year!

Eagle Hunter Silou and his four year old eagle Tirnek. As long as the eagle has his protective leather cap on, which is beautifully adorned, by the way, he is generally quiet...
Fujifilm GFX 50S | GF32-64mmF4 R LM WR @ 54.6 mm | 1/30 @ f/5.6 | ISO 200

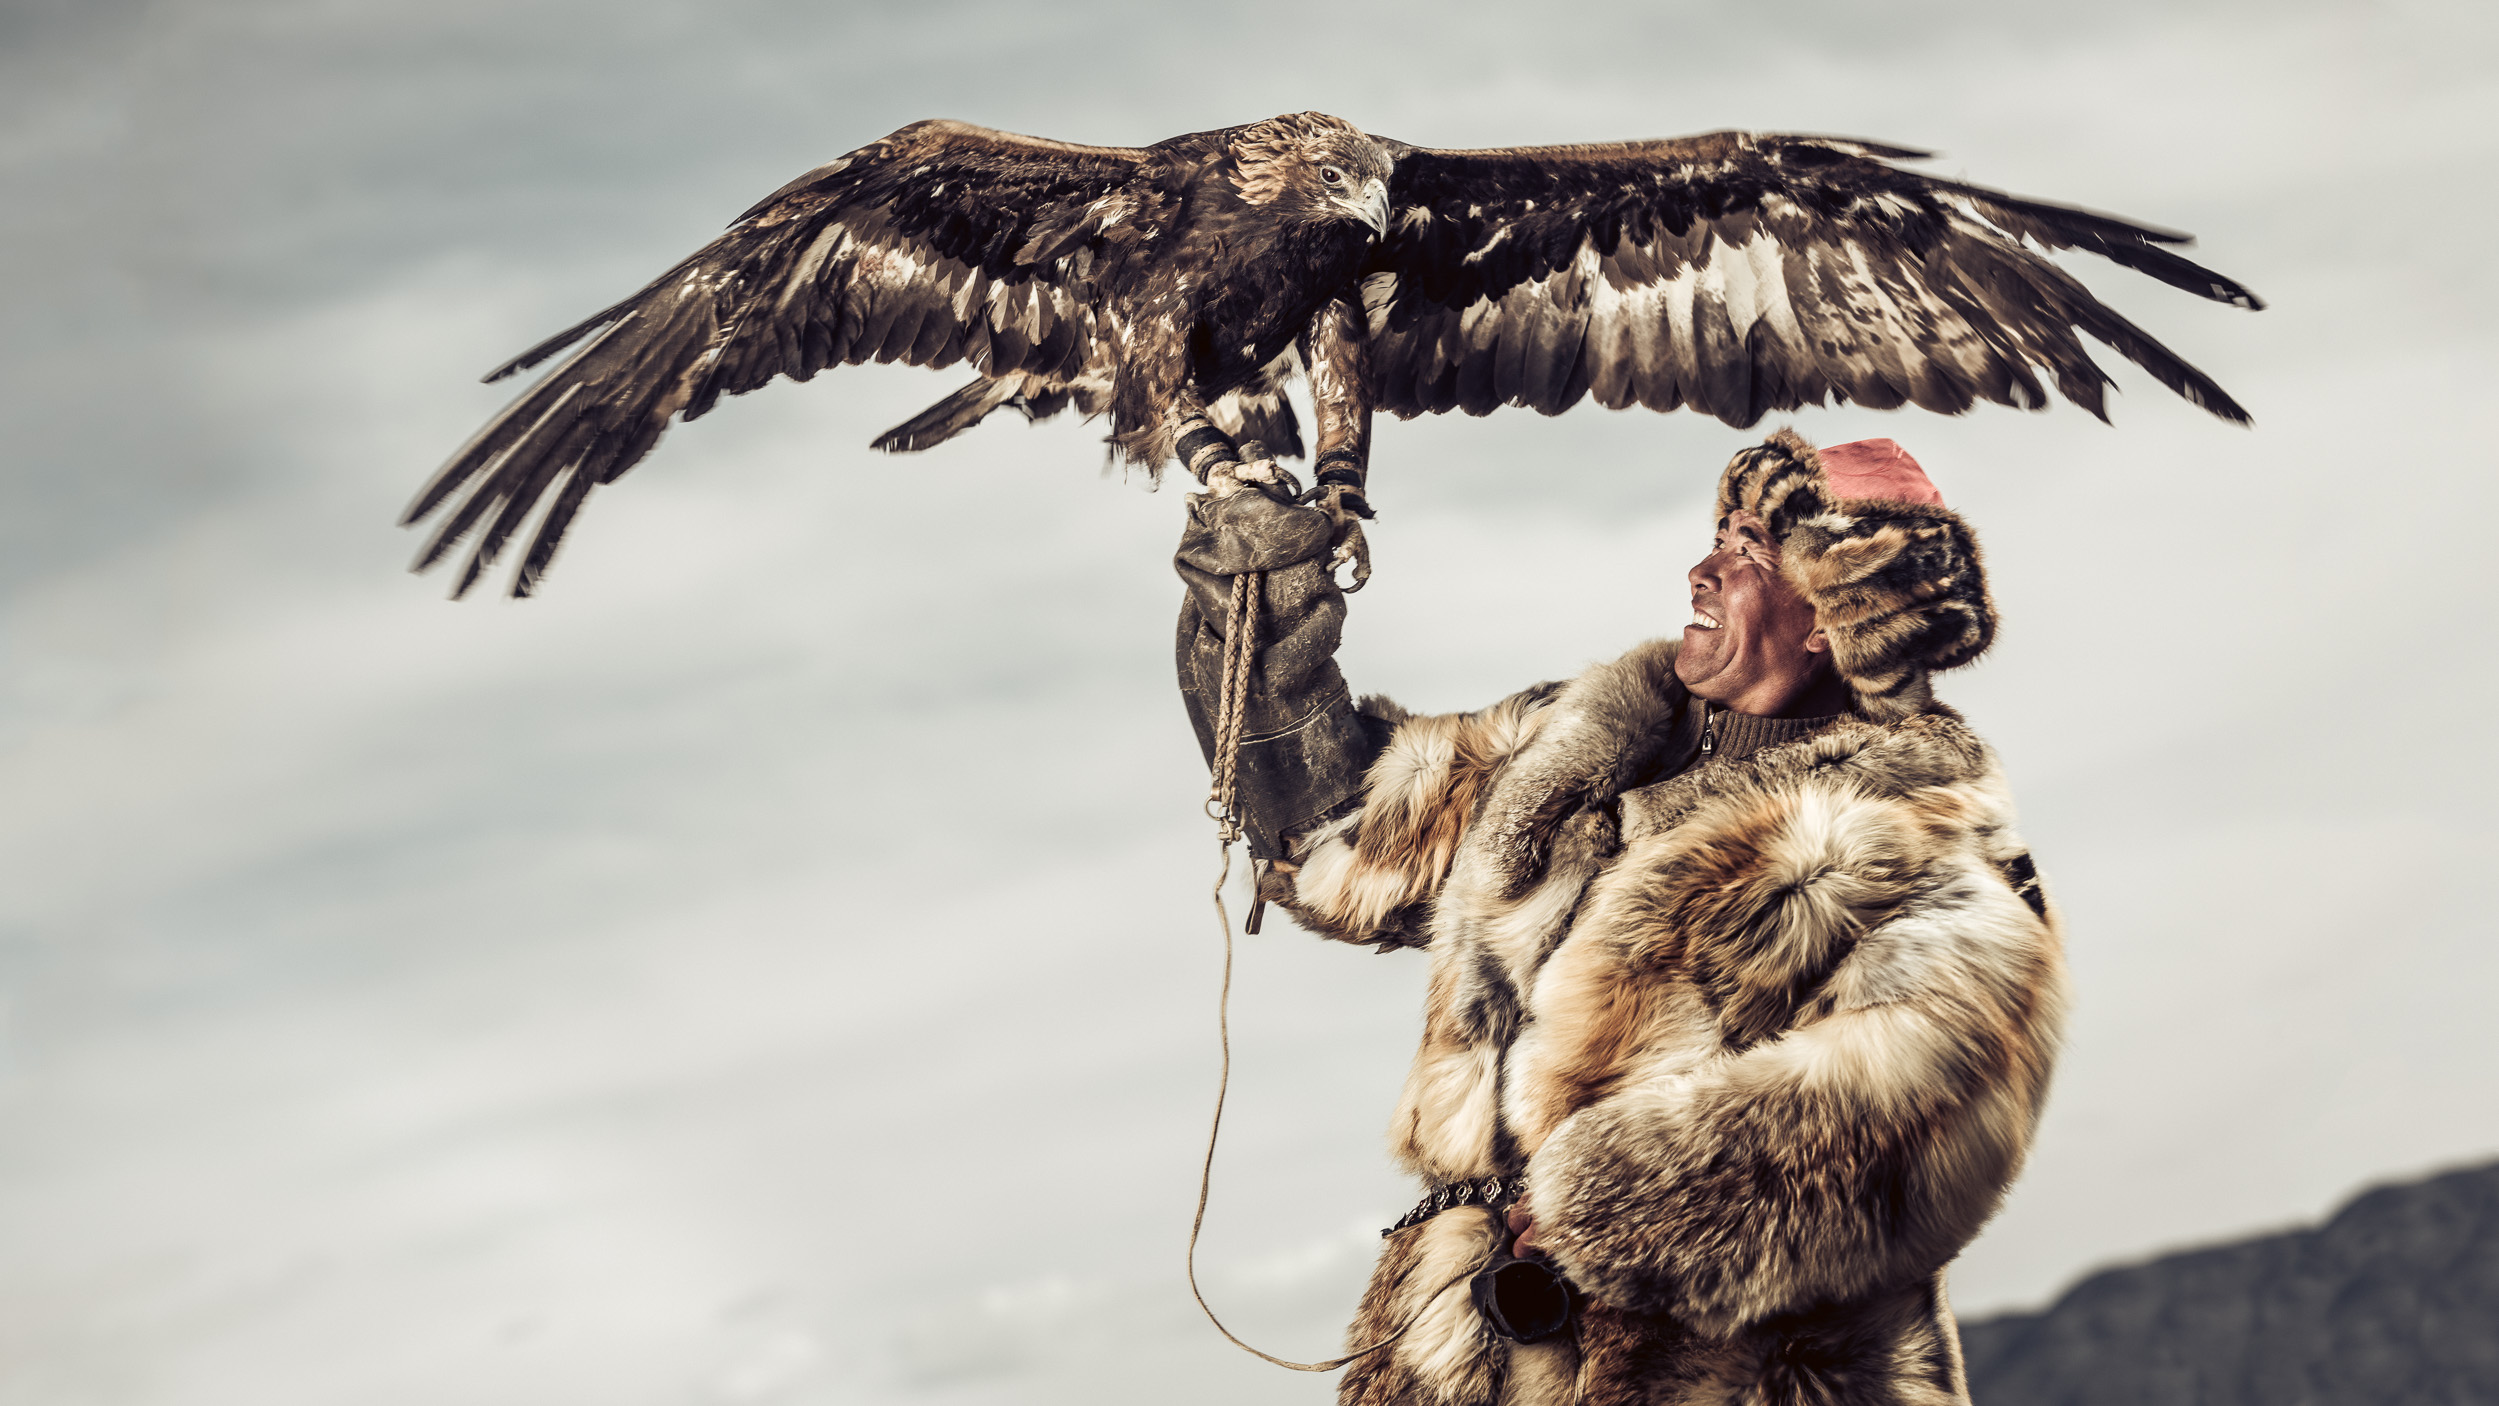
... but when the cap is taken off, he wants to spread his wings from time to time. Luckily, Silou doesn't budge. He's used to more than that...
Fujifilm GFX 50S | GF32-64mmF4 R LM WR @ 47.3 mm | 1/60 @ f/5 | ISO 400
Below is a close up of one of the family's eagles. Here you can see how exquisitely decorated the caps are. I used the 110 mm f/2.0 GF lens for the GFX, which I had purchased specifically for this trip. I know, excuses, excuses :-) At f/2, the depth of field is razor-thin, comparable to f/1.4 on an 85 mm fullframe lens. That's why on this shot, I opted to work at f/4, to buy me some margin.

Fujifilm GFX 50S | GF110mmF2 R LM WR | 1/1000 @ f/4 | ISO 100

The camera gear used on this trip: a Fujifilm GFX with three lenses (not to scale): the GF23mmF4 R LM WR, GF110mmF2 R LM WR and GF32-64mmF4 R LM WR.

I consider myself a wide-angle shooter and up to now, the 32-64 was by far my most used lens on the GFX. Yet, the 110 mm lens definitely changed the statistics on this trip, much to my own surprise...

Fujifilm GFX 50S | GF110mmF2 R LM WR @ 110 mm | 1/4000 @ f/2 | ISO 100
The first day, we photographed Silou and his son Ayu in the neighbourhood of our camp site. When you've got an important subject to photograph, you don't want to waste time prepping everything when they're already on set. That's why we often use a stand-in to try out poses and lighting. In the image below, you see Matt taking on this role. And no, he doesn't have a broken arm... he's just pretending he's carrying an eagle!
Although it was only spring, there was an enormous amount of light - almost more than in India, it felt. Because of that, our trusted Godox AD600 pretty much had to work on full power all of the time. Although it held up well, next year we're probably going to bring the AD600 Pro because of its much faster recycle time at full power: 1 second versus almost three! The image of Matt also shows you another trick I often use when I need to squeeze more light out of my flash, and that I also cover in my Light It Up! ebook on off-camera location flash. I just let the flash enter the frame. As long as it doesn't cover anything important or anything that has much fine detail, the softbox can generally easily be removed with Photoshop's Content-Aware Fill. Especially when you're working in High-Speed Sync (this particular image was made at 1/4000 of a second) and therefore you're losing a lot of flash power, this technique can make the difference between a well-exposed and an underexposed image.

Matt as a stand-in for the real talent: the Eagle Hunter!
Fujifilm GFX 50S | GF32-64mmF4 R LM WR @ 36.2 mm | 1/4000 @ f/4,0 | ISO 400
As there was also considerable wind, our drivers came up with the brilliant idea to park two of the Forgons in a V-shape, creating a windbreaker. This made it easier to aim the SMDV Alpha 110 softbox at our model and get consistent light on them.

I already introduced you to Silou's son Ayu and his eagle Ana in the first part of this series. Below you see some more images of them. In order to waste less flash power, I worked at the sync speed of the GFX (1/125th of a second) and I used a six stop ND filter by Formatt-Hitech to keep my aperture wide open. The result is that at 1/125th, the action isn't completely frozen but in this case I don't mind. On the contrary, I think it actually shows the interaction between the Eagle and the Hunter better and I like the contrast between the sharp beak and the motion-blurred wings.
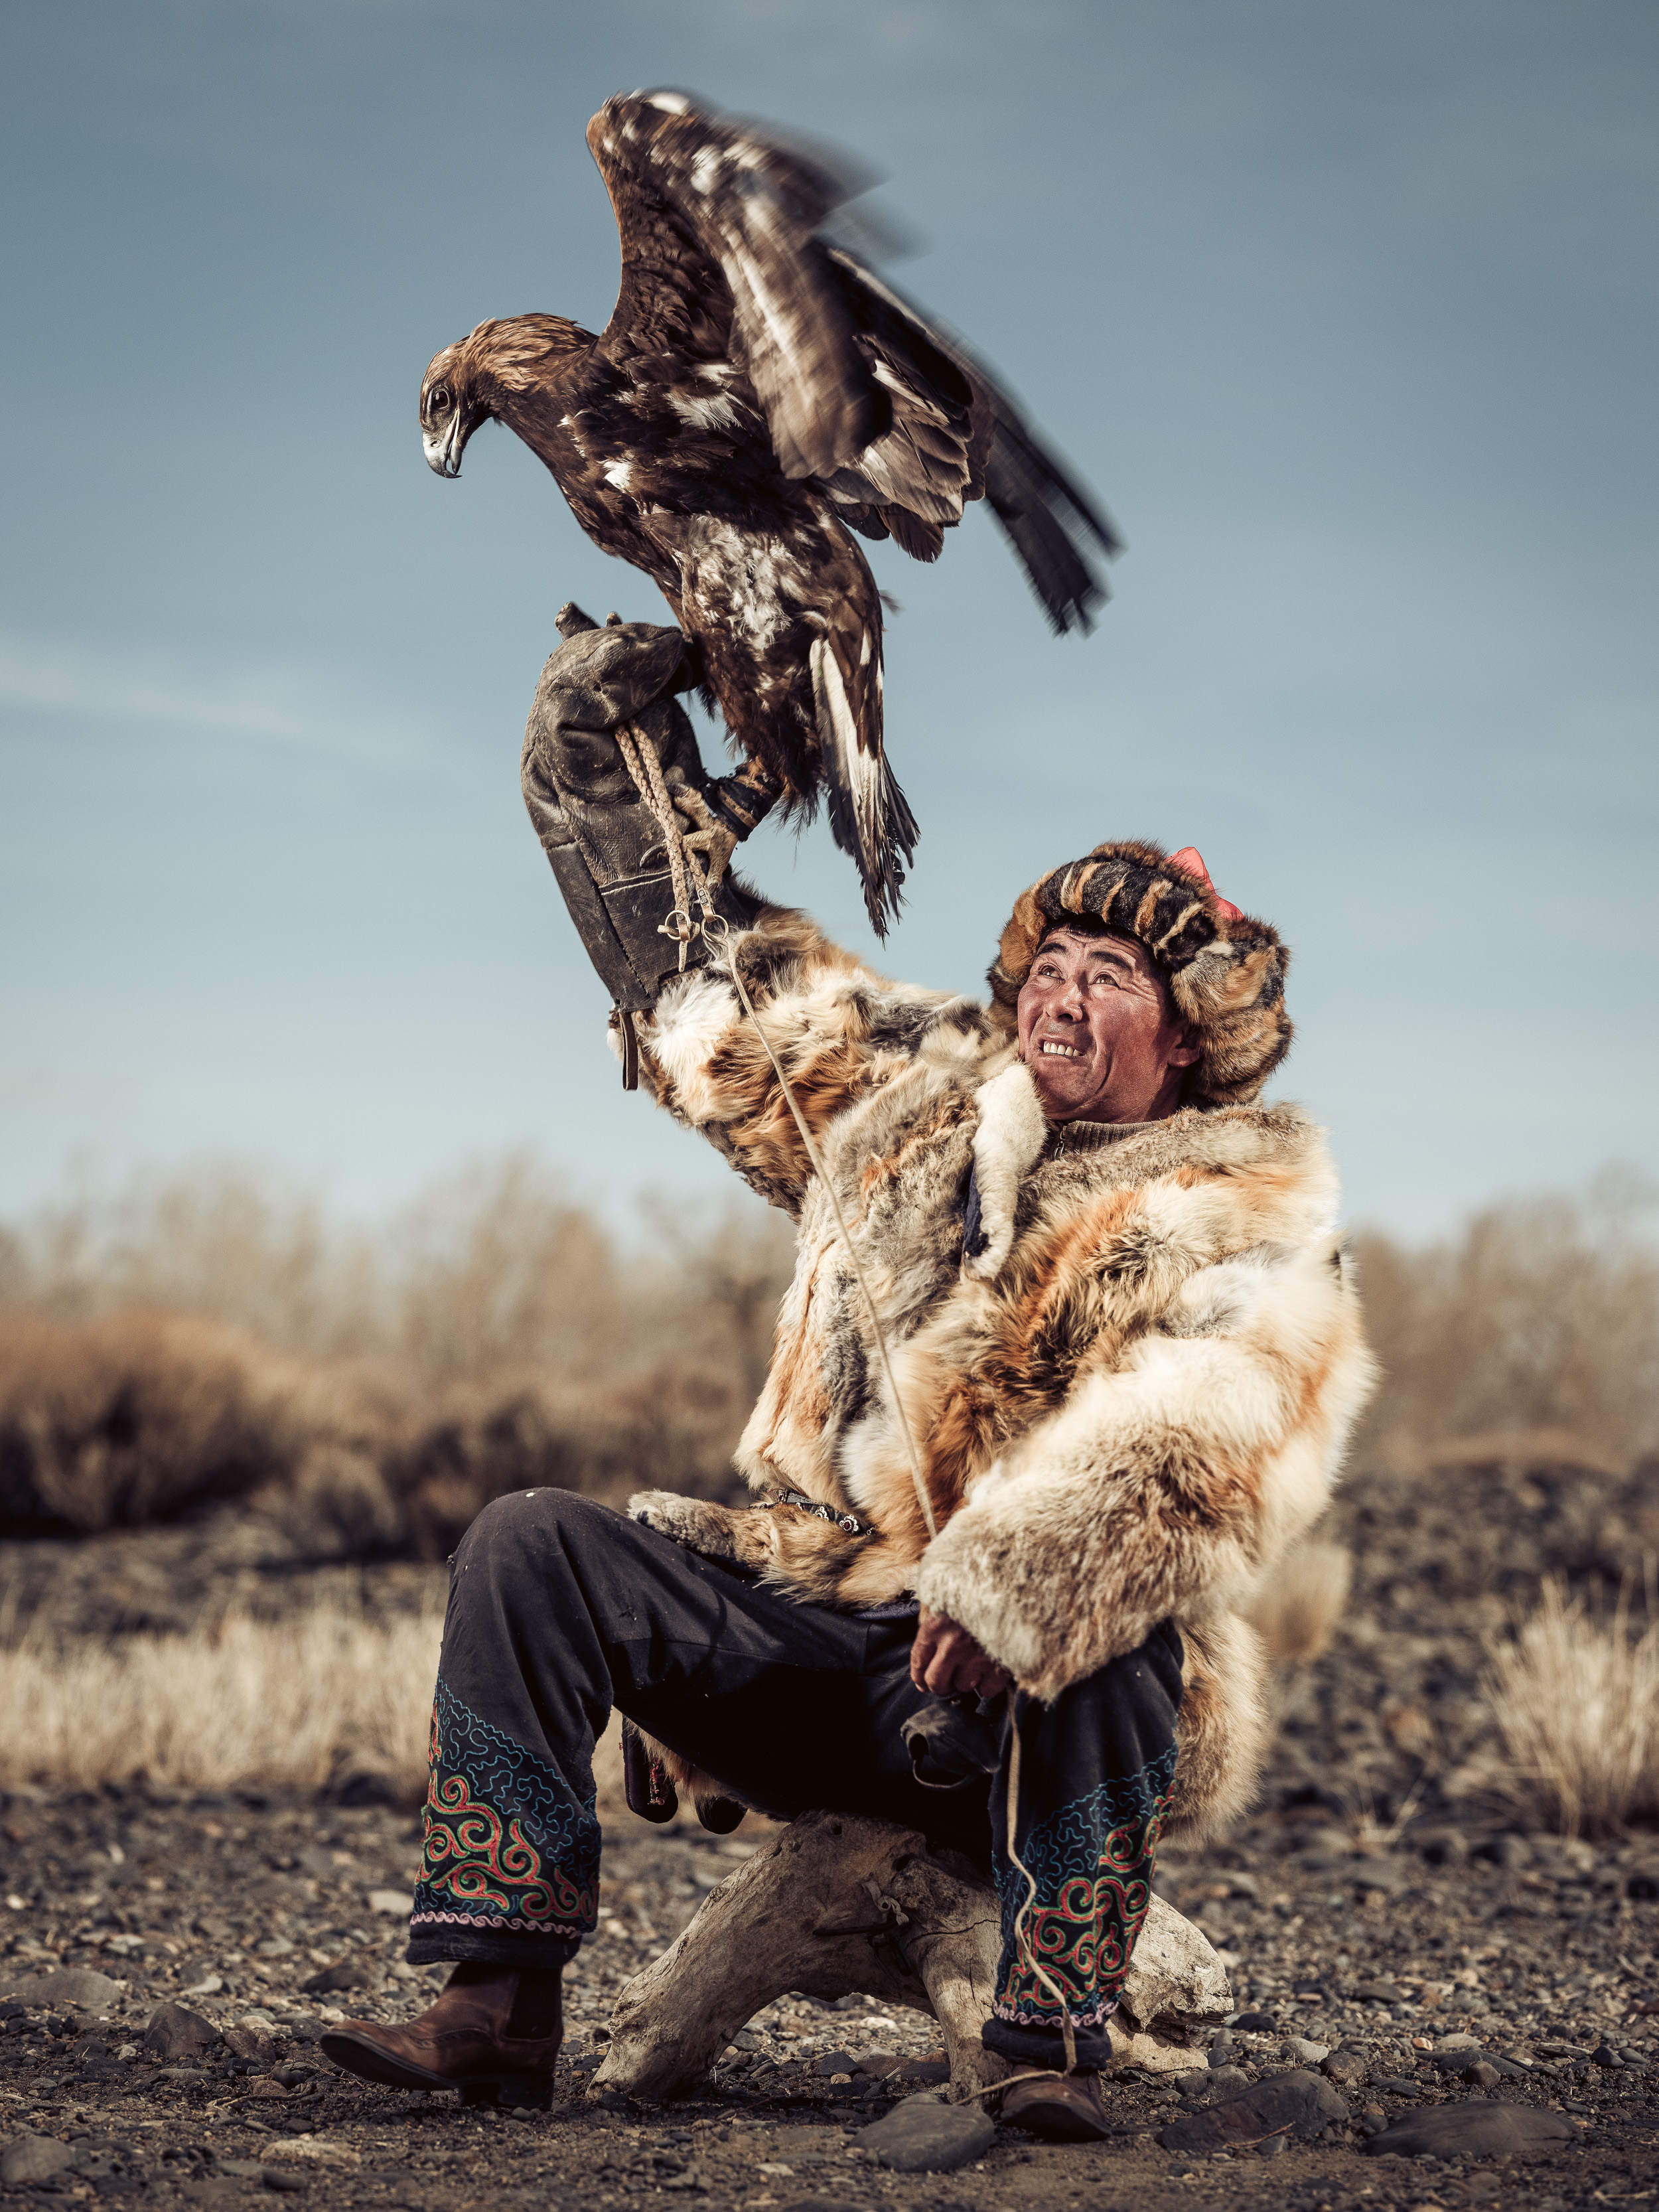

Normally, I'm a wide-angle fan, but the 110 mm is such a fantastic lens that I used it a lot more than I expected to. Above are two more 110 mm shots. Below is a comparable image, shot with the 32-64 (comparable to a 25-50 zoom lens on a fullframe camera). The feeling is different. Not better or worse, I think, just different.

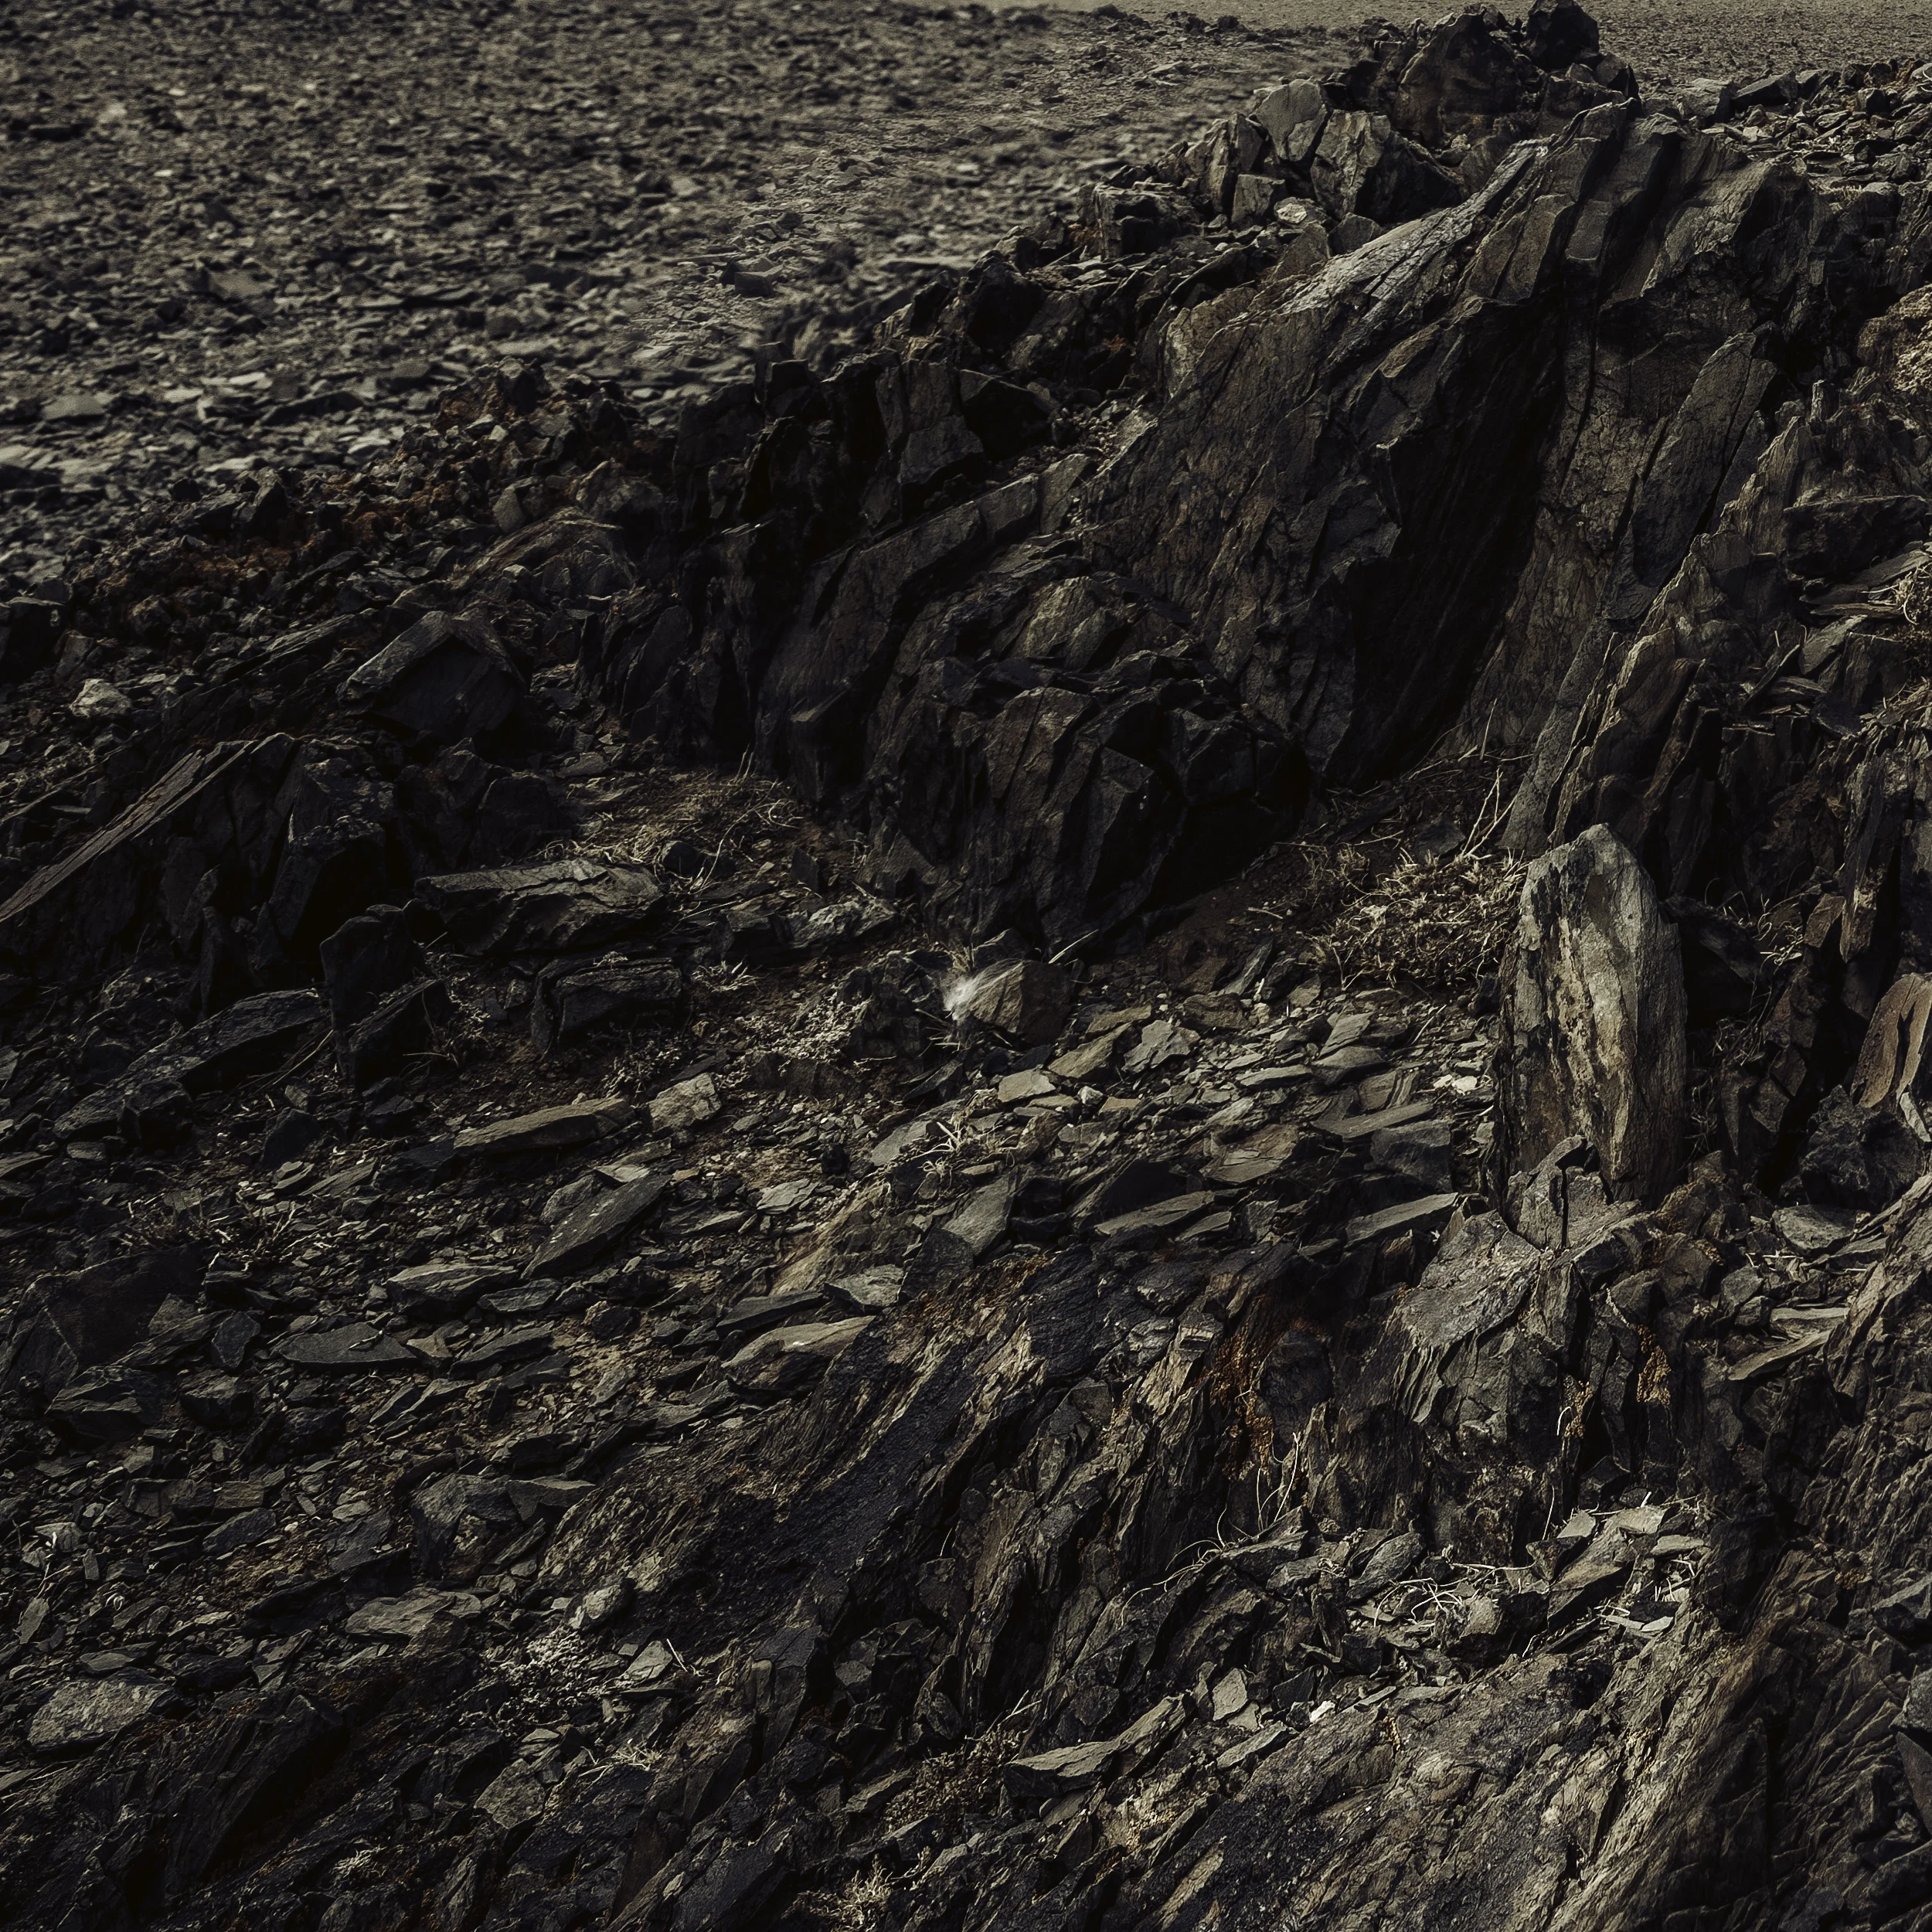
After this introductory shoot, the next days we wanted to include the ruggedly beautiful Mongolian landscape in our shots as well. For someone like me who lives in one of the most densely populated countries in the world, the vastness of Mongolia is simply impressive. For the image below, we climbed up a rocky hill about half an hour's drive from the camp. This website and the compressed JPG images don't do the GFX's fine detail justice, but on my monitor, they're so sharp I could shave myself!

Below you see a couple of full-size 1:1 crops at 2,500 x 2,500 pixels. Click on a miniature to see the crop at full-size. The eagle looks slightly unsharp, but that's because of the motion blur caused by the 1/125th shutter speed.


One of the unique aspects of this workshop, compared to others, is that we use a lot of flash (and we obviously share not only our expertise but also our gear with our workshop attendees). Especially with high-texture subjects like Eagle Hunters with fur coats sitting on rocks, the flash light, when used from the right angle, helps to bring out so much more detail and punch, regardless of the camera brand and type you're using.

The Sirui XL Traveler extends all the way up to 160 cm if necessary.
In this image, I deliberately let the softbox enter the frame to get more light and to also make my light as soft as possible. I had put my camera on my trusted Sirui Traveller tripod and made a second image without the softbox in the frame, so that I could combine both in Photoshop into the final image you see above. In order to get a similar image in-camera, I would have had to put my light twice as far, which would have required four times the power (that's the Inverse Square Law working against you). On top of that, putting the light further away would have caused it to be relatively smaller and therefore would have created harder shadows. Getting similarly soft shadows would have required an even bigger softbox, which in turn would demand a more powerful flash. Since the wind was blowing so vehemently at the top of this ridge, it was already quite an achievement that we managed to keep the 110 cm SMDV Alpha in place without going kite-surfing!

The SMDV Alpha 110 softbox and the Godox AD600 portable battery-powered studio flash are my favourite heavy-duty lighting items when traveling.
On shoots like these, I also try to photograph people when they're less camera-aware. The pictures below have the otherwise strong looking Silou actually smiling! These images were also made with the 110 mm.

Fujifilm GFX 50S | GF110mmF2 R LM WR | 1/250 @ f/9 | ISO 100

Fujifilm GFX 50S | GF110mmF2 R LM WR | 1/250 @ f/9 | ISO 100
From one extreme to the other: for the photo below, I used the 23 mm GF lens (comparable to an 18 mm fullframe) and I went flat on my belly to make the eagle look even more impressive than he already is. The downside is that the mountains look less impressive this way, too.

Fujifilm GFX 50S | GF23mmF4 R LM WR | 1/125 @ f/13 | ISO 100
Normally, Eagle Hunters travel by horse, which is how we photographed them the next day. Below is one of my favourite images from the trip: Silou and his son on their horses, dominating the impressive landscape behind them. This location will also be on next year's agenda, unless... our fixers come up with something even more spectacular!

Fujifilm GFX 50S | GF32-64mmF4 R LM WR @ 56.5 mm | 1/125 @ f/ 13 | ISO 100
One of the default crop options you find in the GFX, is 65 x 24. This is a tribute to the X-Pan aspect ratio. Obviously, you could crop any image from any camera to this aspect ratio in Lightroom or Photoshop, but the nice thing about the in-camera-crop of the GFX is that you can actually see it in the viewfinder and... you still retain approximately 24 megapixel images. Furthermore, if you shoot RAW, you can always change your mind (and your crop) later on.

Fujifilm GFX 50S | GF110mmF2 R LM WR | 1/4000 @ f/4 | ISO 200
This may sound strange, coming from someone who's a true flash-aficionado, but one of the more important lessons of working with flash is probably knowing... when not to use it. Originally, I had the plan of photographing this sunset shoot with flash, but it looked really artificial. So I decided to let the ambient light do its magic and shoot into the available light.

Fujifilm GFX 50S | GF32-64mmF4 R LM WR @ 42.5 mm | 1/125 @ f/22 | ISO 400
On our last day, we were invited to have dinner at Silou's place, together with his family. This experience also involved quite a number of vodka shots that kind of got in the way of shooting... Luckily, just moments before, we had the occasion to photograph what might possibly become the next generation of Eagle Hunters...

Fujifilm GFX 50S | GF32-64mmF4 R LM WR @ 44.9 mm | 1/500 @ f/8 | ISO 200
This picture also officially wraps up these two blog posts dedicated to the Eagle Hunters. However, we also photographed our fair share of monks, herders, nomads and other photogenic people on the second part of the trip and I tried a couple of Brenizer panorama's with the GFX. More about that in the soon to be published part three of this series.
Want to join us next year in Mongolia? Subscribe to the newsletter via this link (or update your preferences) to be amongst the first to hear when we've finalised the details.


All images on this website © Piet Van den Eynde, unless otherwise noted.
OTHER ARTICLES YOU MIGHT ENJOY


A Postcard from Mongolia, Part 1
Matt Brandon and I have just returned home from teaching our first ever photo workshop in Mongolia and boy what an unforgettable experience it has been! We're already scheming a second edition in the first half of 2019 (sign up for my newsletter if you want to be notified) but while we're finalising those details, here's a couple of my favourites from this first edition.

Fujifilm GFX 50S | GF23mmF4 R LM WR | 1/125 @ f/11 | ISO 100
Our tour kicked off in Ulaanbaatar, Mongolia's capital, and home to half of the country's population of 3 million. One of the must-sees is the Soviet Zaisan monument, situated on top of a hill overlooking the city. As luck (or rather our highly talented team of fixers) would have it, a couple of retired army colonels happened to drop by.

Fujifilm GFX 50S | GF23mmF4 R LM WR | 1/500 @ f/8 | ISO 100
From the capital of Ulaanbaatar (UB for friends), we took an early morning flight to the town of Ölgii, near the border with China and Russia. From there, it was another 3 hours in those highly photogenic ex-Russian military 4x4 Forgon minivans to our gher (tent) camp. We were now in the region of the impressive Altai mountains, home to one of the tour's highlights: the famous eagle hunters.

Fujifilm GFX 50S | GF32-64mmF4 R LM WR @ 54.6 mm | 1/30 sec @ f/5.6 | ISO 200
The image above portrays eagle hunter Silou and his four year old eagle Tirnek, photographed inside a gher.

Fujifilm GFX 50S | GF110mmF2 R LM WR @ 110 mm | 1-125 at f/4 | ISO 400
To give our workshop participants as much shooting time and variation as possible, we will often try to arrange two subjects. Luckily for us, eagle hunting is a tradition that is passed on from father to son. In the image above, you can see Silou's son Ayu holding up his two year old eagle Ana. These birds can easily weigh up to 8 kilograms, something he only told us after patiently holding his arm up for minutes! I used my Fujifilm 110 mm GF f/2 portrait lens for this image. This lens roughly corresponds to an 85 mm f/1.4 on a full-frame camera system. By choosing a low shooting position, I made the eagle hunter and his eagle look even more impressive than they already are. Including some out-of-focus foreground helped to add extra depth to the photo. A Godox AD600 with an SMDV 110 softbox was used to reign in the harsh Mongolian midday sun. Postprocessing was done with one of the presets from my free Lightroom Freesets package (sign up for the newsletter to claim your copy).
In the image below, you see Silou's other son Berikjan with his eagle Tastulek putting up quite a show for us!

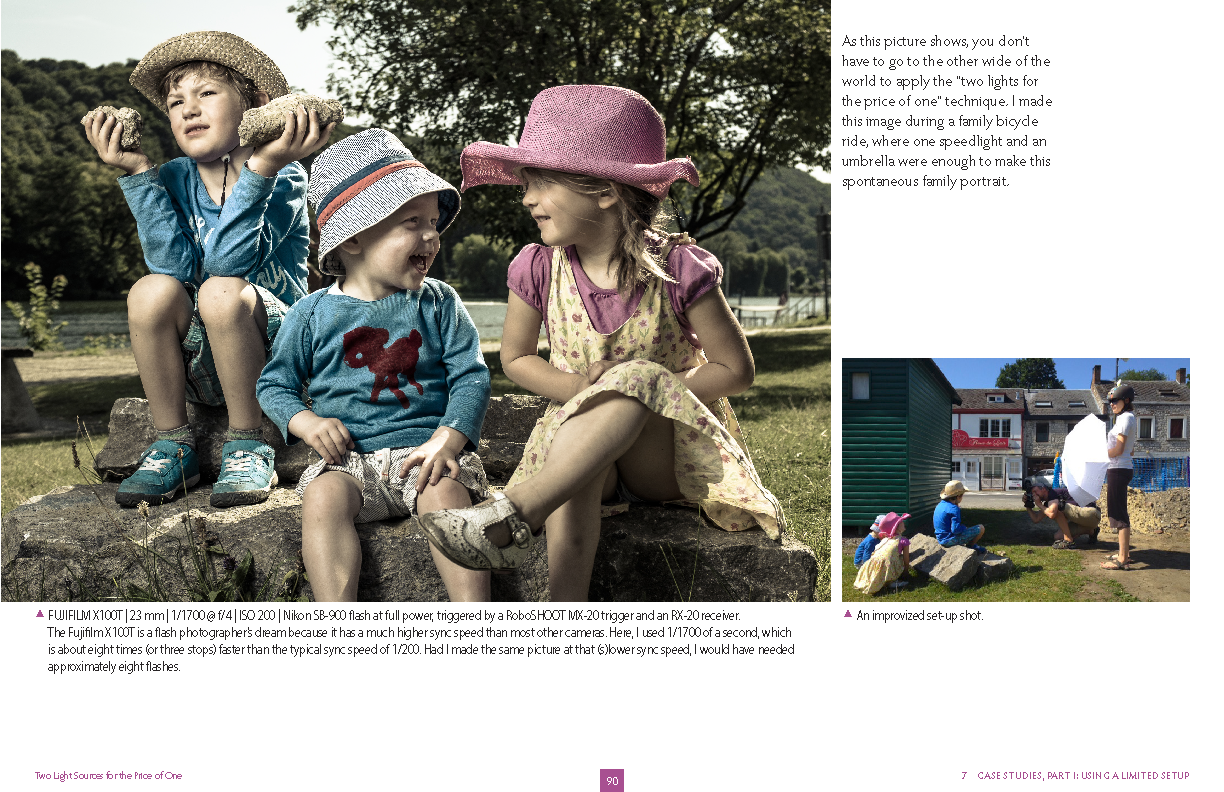
Eagle hunting may be a beautiful and photogenic tradition, it does not feed a large family. In his everyday life, Silou and his family are farmers. Below you see the same Berikjan with one of the family's camels. In the background, the other camels are taking advantage of the situation to quietly wander off. Luckily, our herder has a motorcycle to quickly bring order into chaos. Watching Mongolian herders herding their cattle while navigating their motorcycles through the rough terrain is an impressive sight!

Fujifilm GFX 50S | GF23mmF4 R LM WR @ 23 mm | 1/125 @ f /18 | ISO 100
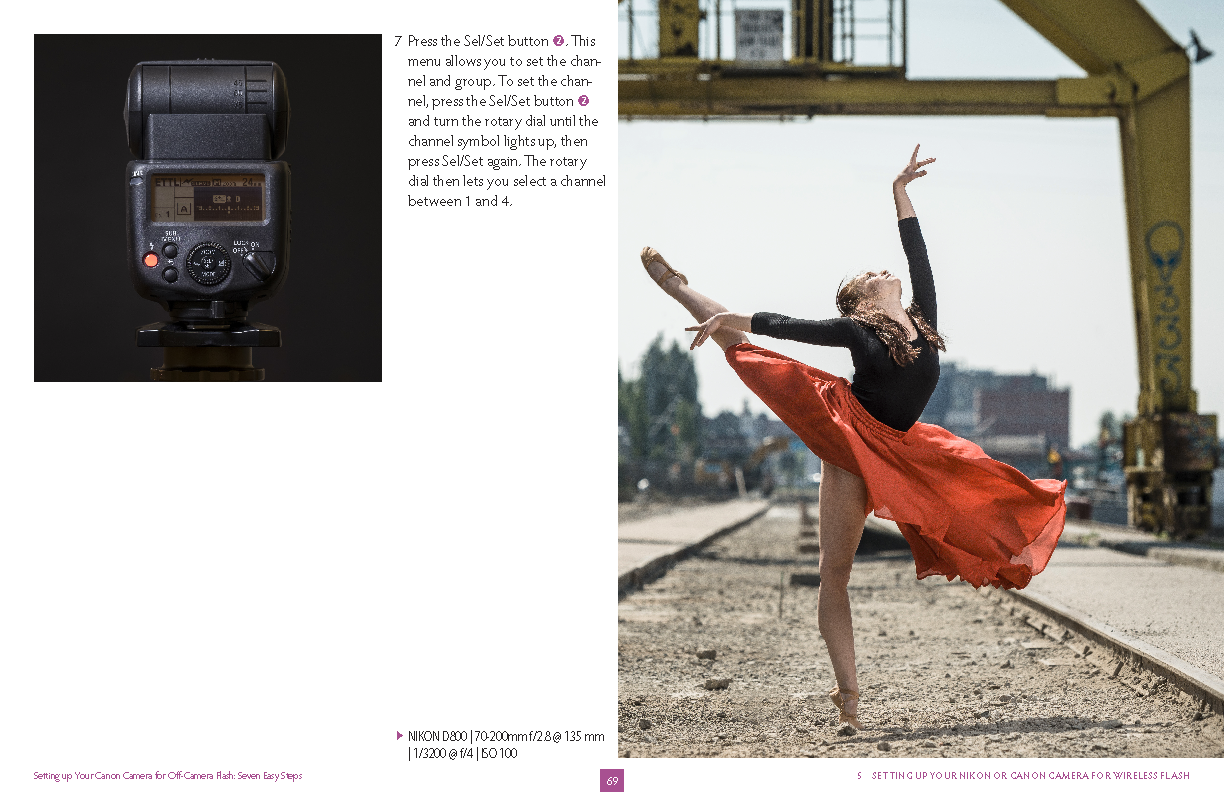
Photographically speaking, this image was lit with my 'two lights for the price of one' technique. This consists of using the strong sunlight as a rim light and filling in the shadows with flash. This gives a dramatic, 3D feel to the image which can further be enhanced by putting the flash slightly behind the subject, pointing back at him or her. Combined with the right position of the subject's face, this lighting scheme will predominantly light the far away side of the face, leaving the larger part that is closest to camera in the shade, except for a small triangle under the closest eye. This lighting style is called short lighting and its one of my preferred lighting styles. If you want to learn all about off-camera flash, check out the just released second edition of my ebook Light It Up. You can save 10% with code light10.
That's it for now. I'm still working through dozens of more Mongolia images in Lightroom and I'll be back when I have some more to show you. Talk soon!


What do these two images have in common?
in Lighting
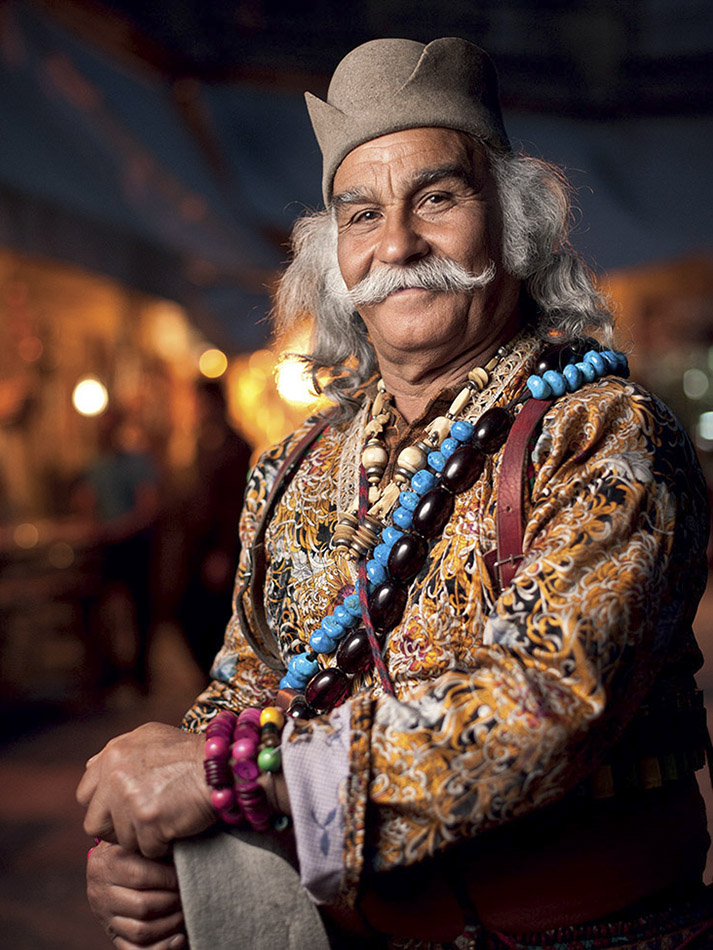
Well, you might argue that one is a divine statue and the other has a fairly divine looking mustache, but that's not the answer I was looking for...
The image on the left is by my good friend, travel photographer and co-workshop leader Matt Brandon. He made it recently while on assignment for National Geographic in China. The one on the right is by me. I made it almost ten years ago, on a bicycle journey through Iran. Yes, I used to do some weird stuff back in the day. But I digress...
If you think both images share the same lighting pattern, you're already getting warmer... Both are indeed an example of short lighting, where the main light falls on the side of the face that is turned away from the camera. It's a lighting style that throws a relatively large part of the face in shadows, which adds depth and drama. It's one of my favourite lighting styles for character faces. But there's more. I won't keep you in suspense any longer...

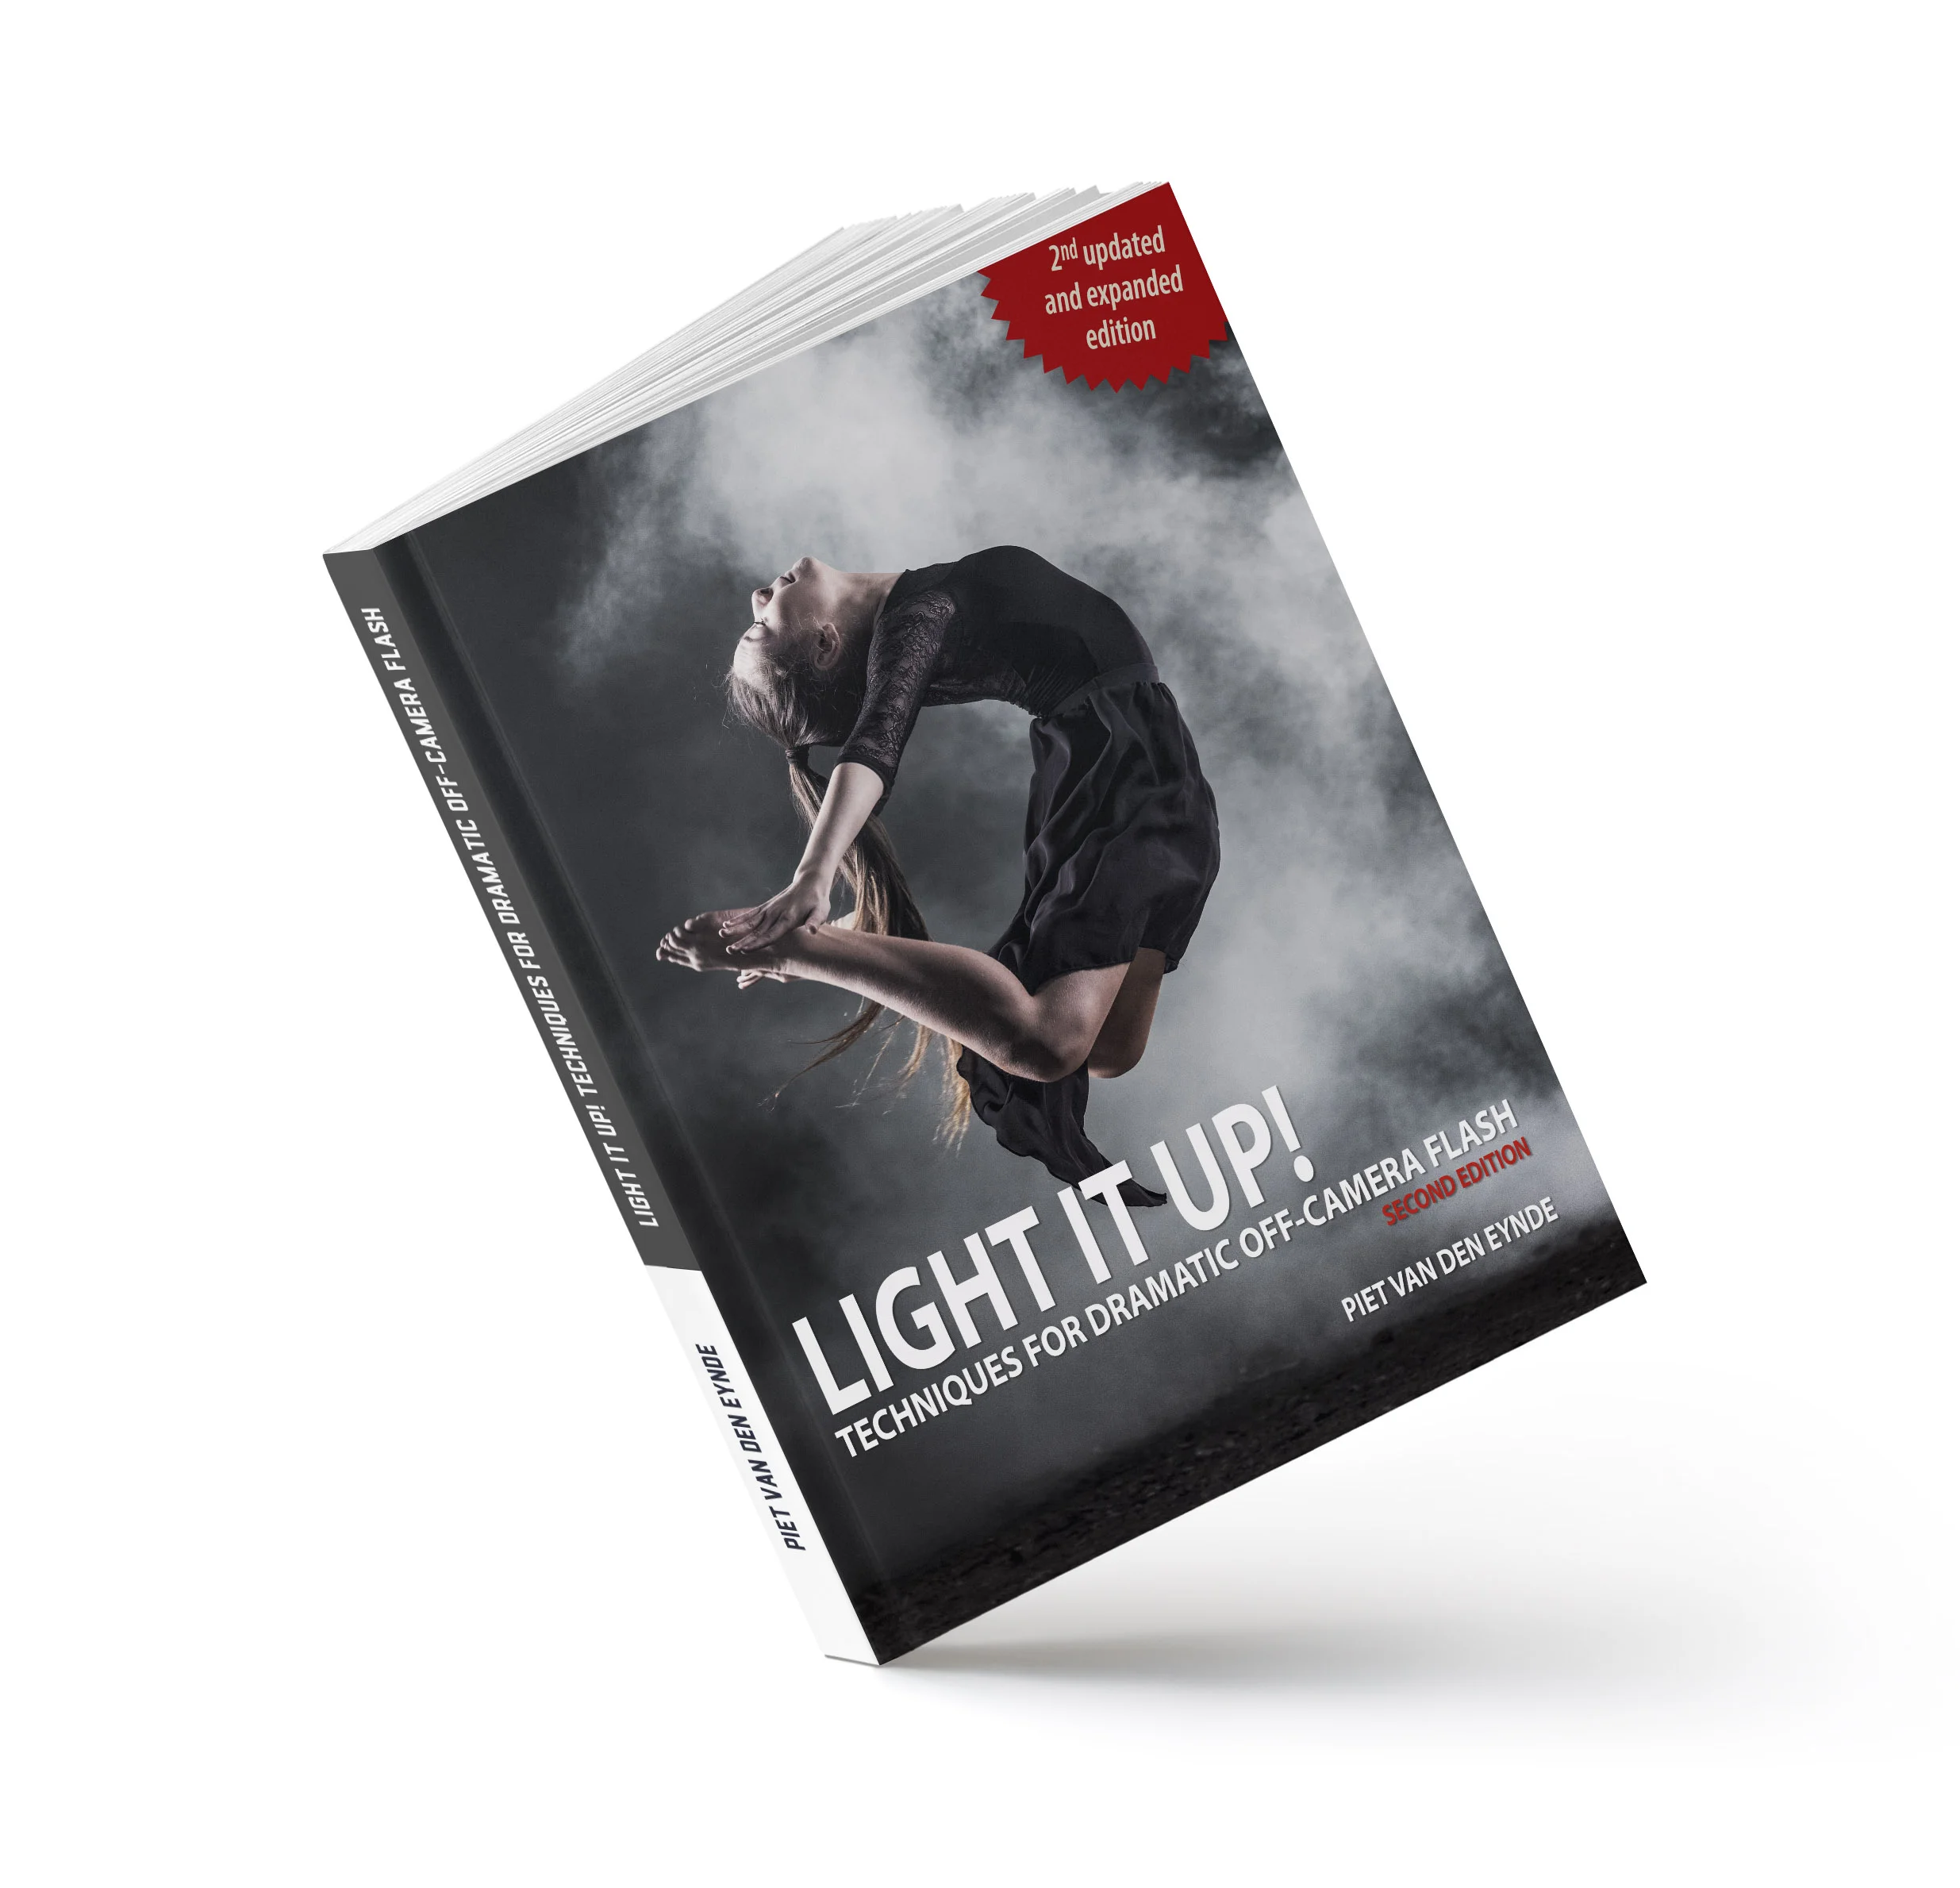
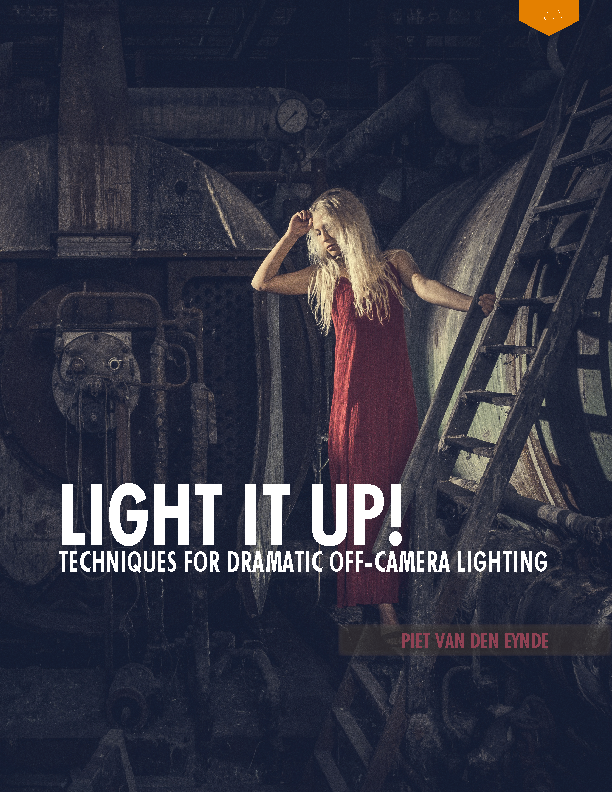
An excerpt from the just released, 185 page second edition of my PDF ebook 'Light It Up! Techniques for Dramatic Off-Camera Flash'. This particular page talks about the difference between short and broad lighting.
Both images were lit using flash. Not because we particularly wanted to use flash, but because the available light at the time we made the images just wasn't good, in fact, it was awful. It's thanks to the fact that we had a flash with us, and that we knew how to use it off-camera, that the resulting images were deemed good enough to be used as a cover - in Matt's case for one of National Geographic's magazines, in my case for Shoot, Belgium's biggest photo magazine. These images would never have been published inside the magazines, let alone on the cover if we hadn't known how to change the crappy available light to our advantage. In fact, they probably wouldn't even have been made in the first place... Matt's written a really interesting blog post on how his attitude towards flash has changed from fear to excitement and how getting familiar with flash has opened up a lot of possibilities. Check it out, it's a great and motivating read!

There's ten years between these images, but they share on thing...

... they wouldn't have been used as a cover if we hadn't used a flash to make them look more interesting than they did just with the available light.
“Piet’s approach to lighting is simple and effective. He took me from frozen in fear to receiving compliments from the editors of the National Geographic.”
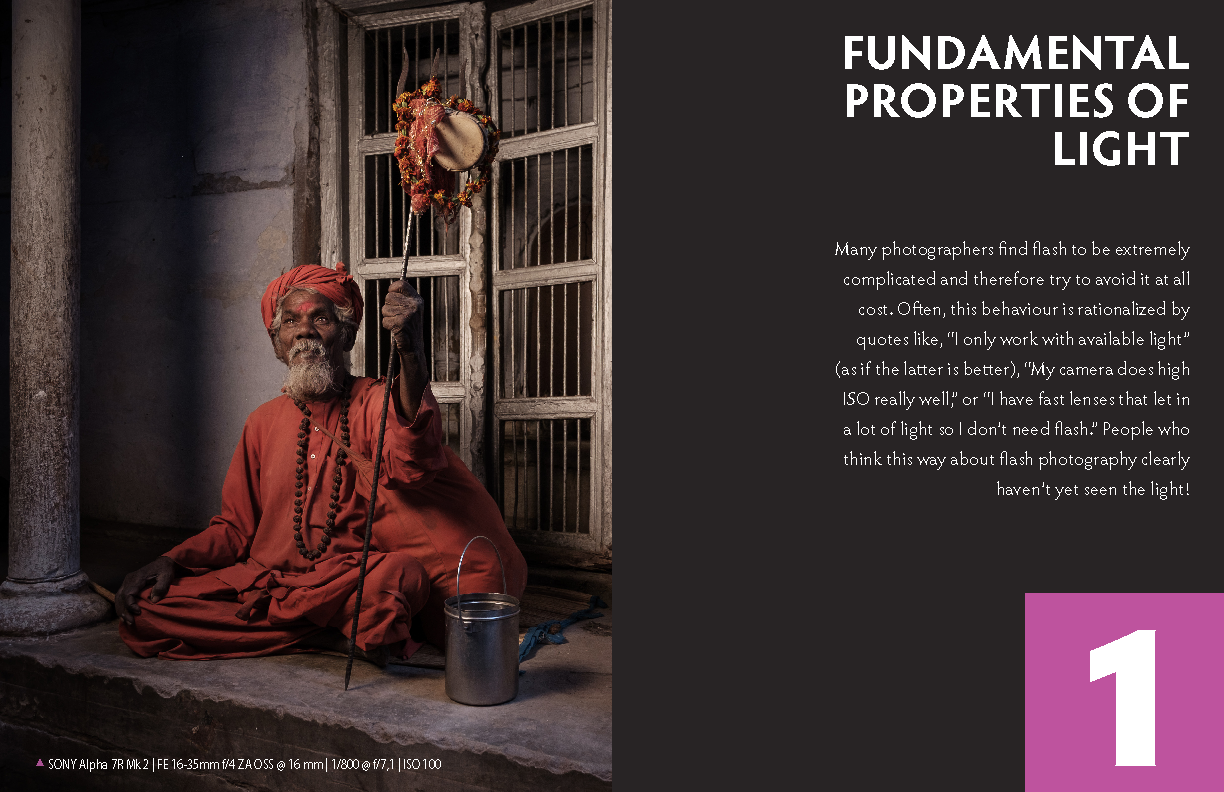
I guess this is what I want to get at with this email. All too often I hear photographers say they 'don't need flash, because their camera does ISO 1.2 zillion' or 'because they use fast primes'... Very often though, remarks like these seem to hide a deep-rooted fear for flash more than anything else.
I know, I've been there, too. But the beauty is that now is probably the best time to overcome those fears: your camera LCD will provide instant feedback on your progress, lowering the learning curve and the price of flash gear itself has come down considerably, too. In fact, I'm convinced that learning how to use flash will do a lot more for your photography and cost a lot less than buying another shiny new lens or another new camera that you don't really need.

If you want to take the plunge and get started with flash, I've got a great companion for you: the just released second edition of my ebook Light It Up! will teach you all you need to know. It starts off simple, with an overview of essential concepts, but over the course of its 185 pages, it builds up to more powerful and complex setups. It's an ebook that grows with you while you discover the opportunities of flash in general and off-camera flash in particular.

Light It Up! will probably even save you money, as it offers a lot of good-quality third-party alternatives to the expensive brand-name flashes that the camera manufacturers sell.
The book also contains loads of gear advice, so if you haven't bought any flash gear yet, I recommend you check out Light It Up! first: you'll probably save the book's price many times over because I recommend not to buy the flash gear from your camera manufacturer, but third-party gear. Generally it costs about half and is as good if not better. Almost all the examples in my book were made with third-party gear. I'd rather spend the money I save on lighting modifiers or traveling.

The difference between left and right lies in a flash, a $25 umbrella and a Lightroom preset.
Save 10% on both the Standard Edition (185 page PDF ebook) or the Deluxe Edition (ebook + 3 tutorial videos + 5 Lightroom Presets) with code light2018.
How to Light without Looking Lit
in Lighting
Making your light look natural
There are two ways you can use flash: in an inconspicuous way or in a way that clearly says “this was lit”. To me, as with just about anything else in photography, there is no right or wrong. It’s a matter of personal taste, preference and also a matter of what you want your photo to say. While I’ve done my fair share of images that clearly looked “lit” (and I still love doing this kind of work), I sometimes also try to use my flashes in a more subtle way. The great Gregory Heisler, whose fantastic book 50 Portraits shows you some great examples of flash photography, calls this “motivating the practical”: you have to motivate your light, make it look authentic, believable. The use of colour gels will also help a lot to make your (fake) flash light look real.

An interesting scene… lit by boring light.
I was traveling through Swedish Lapland when this nice scene caught my eye. I liked the patina on the wall and the old bike with the reindeer skin on it. The only problem was again that the available light was too nice, too soft. It did not bring out the patina the way I wanted it to. So I added an orange filter to my flash and put it parallel to the wall, outside of the frame on a tripod (I use my tripods (I use my tripods - like the Sirui Traveller T2204XL I'm currently using - more as light stands than I do as camera stands)more as light stands than I do as camera stands), aiming slightly down. The result is a picture that looks like it was made with the setting sun. The orange filter helps to motivate that.

The same photo with an orange-gelled flash lined up parallel to the wall, simulating golden evening light. The light brings out the texture in the wall and adds some interesting shadows.
The image of the taxi driver below was shot at noon. So the only available light was coming from above him. The roof above him completely blocked the light, so he was completely in the shade. Had I only used available light, the background would have been completely overexposed if I wanted to light him correctly. I chose to add a flash, coming in from the left, to simulate the effect of late afternoon light coming in through the windshield. I then asked him to slightly turn his face towards me to create a nice 'Rembrandt' look.

Fujifilm GFX 50S | GF32-64mmF4 R LM WR @ 44 mm | 1-125 sec @ f - 4,0 | ISO 100

Combining both approaches
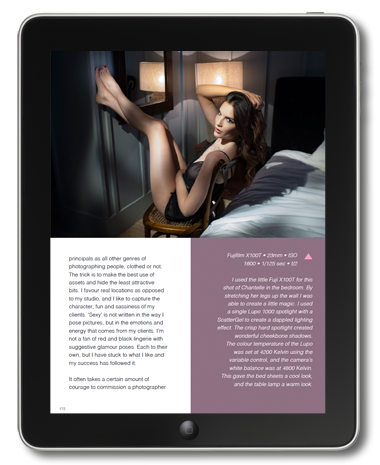
In this picture below I took of model Cato, I combine both approaches. To the left of the boiler room we were photographing in was a window. I placed a bare strobe outside, and aimed it through the window as to simulate sunlight falling in.

FUJIFILM X-Pro2 | XF16-55mmF2.8 R LM WR @ 20 mm | 1/30 sec @ f/9 | ISO 1000
The opening in the wall motivates the light. However, I also put a flash way back in the room to add some rim light to the boiler tanks to prevent that part of the picture from going totally black. There’s nothing really there to motivate that there would be a light over there, other than my artistic choice to put one there.

The lighting setup to the image above. Taken from my latest eBook 'Light it Up! Techniques for Dramatic Off-Camera Lighting
Want to improve your flash skills?
The image I discussed above is also in just-released eBook: Light it Up! Techniques for Dramatic Lighting. This eBook teaches you everything you need to know. Everything explained in plain English with lots of behind the scene shots or lighting diagrams. For those who already have some flash experience under their belt, there are also more advanced chapters on gear and light setups. The book also contains plenty of buyer's advice (did you know that some brand flashes cost up to three times as much as third party alternatives, while not offering more power or features - sometimes even less).
Light It Up! (including bonuses) is available in two versions: the Standard Edition (185 page PDF ebook) retails for $24.95 + applicable taxes. The Deluxe Edition is $10 extra and also includes three tutorial videos (totalling 45 minutes) and five Lightroom presets. On both editions, you can save 10% with code light10.
P.S. If you speak Dutch, this book is also available in Dutch (both as a print book and an eBook). I also have a Dutch video course on off camera flash over at my Dutch online photo training website www.photofactsacademy.nl.

5 Tips to get started with off-camera flash
Nederlandse versie? Klik hier.
I know, this sounds like the start of an AA meeting, but I have a confession to make: flash used to scare the (insert your own power term here) out of me. That's mostly because I learned it back in the analog days, where more than a week would pass between making a shot and seeing the mess I had made on the contact sheet. As a result, I was an available light shooter for a long time. Not so much by conviction as by lack of an alternative. Luckily, things have changed a lot over the past ten years or so. Currently, technology has evolved to the point where using off-camera flash is as easy as baking an egg. Or, if you’re the kind of kitchen hero I am, probably even easier than that! With the technology issues (mostly) out of the way, this means that you can now focus on getting the shot you want. The following tips will help you be successful with your first ventures into off-camera flash.
1. Start indoors and with people you know
When you’re starting out, start indoors. No wind to knock over your precious, new-bought gear. No sun popping in and out of the sky to mess up your ambient exposure (more on that later), no people to run into the frame or worse... run off with your stuff while you're figuring out the buttons and dials… Once you feel confident with your gear and you have gotten some good results inside, then take your gear (and your model) for a walk outside! I found it helpful to start with people I knew. There's always a family member in need of a picture!

It does not replace actual hands-on practice, but the cool Elixxier set.a.light 3D STUDIO software also lets you plan shoots ahead and understand how light and modifiers behave. In my upcoming ebook Light It Up!, I'll have a couple of examples of how I used this software to my advantage.
2. Always determine your ambient exposure first
When you use flash, you’re basically mixing two light sources, flash and ambient light, and you can determine how much (if any) of both light sources you let into your final picture.

The total brightness of this image (left) is the sum of the available light that was let into the camera (middle) and the flash light that was let into the camera (right).
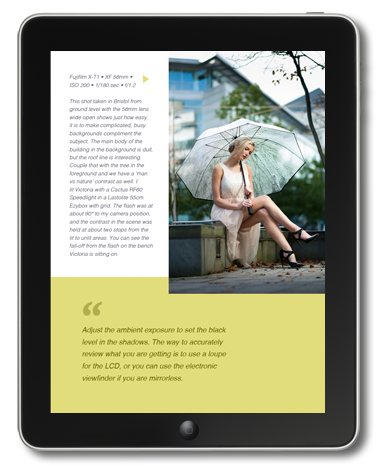
Because the background is generally not (or less) influenced by your flash light (unless your model is close to it, see the next tip), you should always set your background exposure first. Especially when you’re working with a model outside, it’s a good idea to slightly underexpose that background compared to how you would expose it if you were photographing it without a subject. That makes sense: the background isn’t the subject, therefore it shouldn’t be too bright or otherwise it will detract from your actual subject. For example, when I have a sky in my background, I will generally set my exposure so that I still have detail in the sky.

This is an example of a shot where I set my ambient exposure for the background. It is slightly underexposed so that I maintain detail in the sky…

This is the same image after having added a flash through an umbrella (and some creative postprocessing using one of my free Lightroom presets.
As a result, your model will generally be underexposed, but that’s not a problem… After all, that’s what you have the flash for, right? After having successfully determined your background exposure, fire up your flash and your trigger and adjust the flash power until your subject is correctly exposed. As a side-note, this is why I love to work with mirrorless cameras like the Fujifilm X-series. If you are working with a DSLR, you always see a bright image in the viewfinder, you never see your actual exposure. For that, you have to take a shot and then chimp at it on your LCD screen. On my Fuji camera's, when I'm working in manual exposure, I can set up the Electronic VIewfinder in two ways: either to show me a nice and bright exposure (which is helpful for framing) or the actual exposure (which is helpful to determine how bright or dark I want my background to be). I have even assigned a Function button to easily switch between the two views. So I no longer need to waste a shot (and waste time) to determine my background exposure. Furthermore, when I make the actual exposure with the flash, I have set up my viewfinder to display the image I just made for 1.5 seconds (or shorter if I press the shutter again). This lets me determine if I need to adjust the power or the direction of my flash, again without chimping!
3. Want more control over your background exposure? Move your subject farther away from it.
If your model is close to a wall, the flash light that lights her will also light that wall, so it will be hard to control the exposure of both independently. If you want that wall to be darker, there's a couple of things you can do: first, you can add a grid to your light: this will limit the amount of stray light or spill light. But what if you're on a budget? In that case, just move your model (and your flash) further away from that wall. As light loses a lot of power quickly, the bigger the distance between the model and the wall, the less flash light will light that wall.

Same camera and light settings, but in this image the model was much closer to the background...

... than in this image.
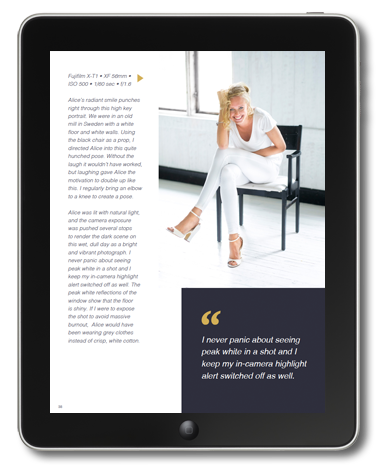
This photo was shot in a white studio. Yet the ambient light was completely eliminated by a judicious choice of aperture, ISO and shutter speed. I kept the power on the softbox the same. In the picture on the left, the model was standing fairly at 9 feet from the background, so there’s still some flash light illuminating that background. In the picture on the right, the distance between the model and the white background was twice the original distance. The distance between flash and model (and hence the flash power) was kept the same as in the first shot. As a result, a lot less light reaches the background and it turns darker.
This is the reason why it's always good to have a lot of space, even if you're not planning on doing full body shots. The more space you have, the more you can play with the distance between your subject and the background and the more you can light them separately, even with just one light.
4. Use the sun as a free rim light
In a studio, I love working with at least two light sources: one as a main light and one as a rim light, coming from the back. This rim light will create a nice highlight on the back of your subject, separating it from the background and adding a nice 3D feel to the image.
On location, I don’t always have 2 lights with me and even if I do, I don’t always have the time to set up a second light. Nor do I have to. I’ll often use the biggest light source of them all, the sun, to my advantage and put the subject with his back to the sun. This kills two birds with one stone. Not only does my subject not have to squint, but I also get a free rim light. Then it’s just a matter of using the flash to bring my subject up to the desired brightness.

ujifilm GFX 50S | GF120mmF4 R LM OIS WR Macro @ 120 mm | 1/125 sec. @ f/5.6 | ISO 100
In the image above, I placed two strip lights behind Rosalinde to separate the leather jacket from the grey background. By the way, one of the things that you'll also find in my upcoming Light It Up! ebook, is loads of gear advice. For example, I really love the Nicefoto strip lights as they're affordable and super quick to set up on location.

FUJIFILM X-T1 | XF56mmF1.2 R @ 56 mm | 1/180 sec @ f/2.8 | ISO 200
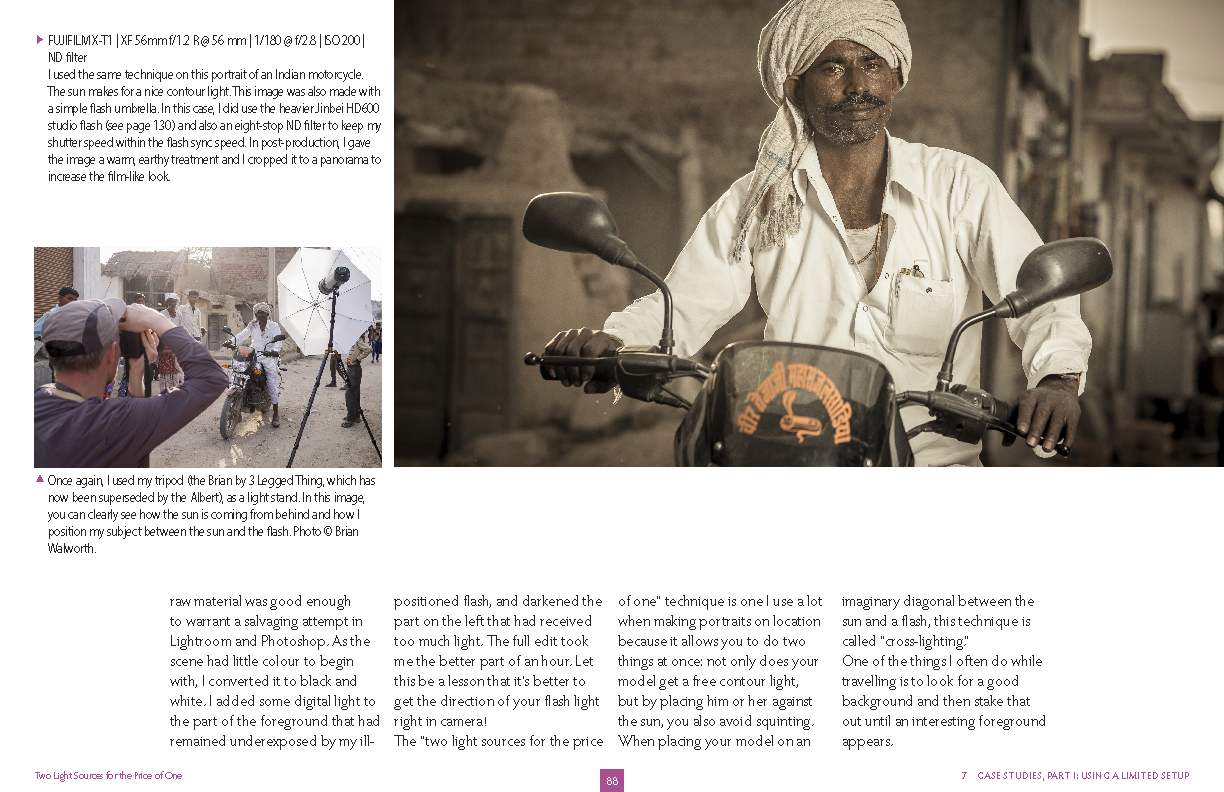
In this case, I placed the motorcycle man against the sun. The result is a nice highlight around his outline, which nicely separates him from the background, along with the open aperture I chose for this shot.

The setup shot for the motorcycle image: a relatively cheap ($500) but very powerful 600 Ws portable studio flash (the Jinbei HD600) and a $25 flash umbrella.
5. Experiment with the placement triangle of light - subject - camera
When you start out with off-camera flash, you’ll probably put your light at a 45 degree angle to your subject, with your subject facing the camera. It’s a great starting position but don’t leave it at that. Experiment with the angle of your subject’s face towards the camera and with the angle of the light source towards the camera and the subject…

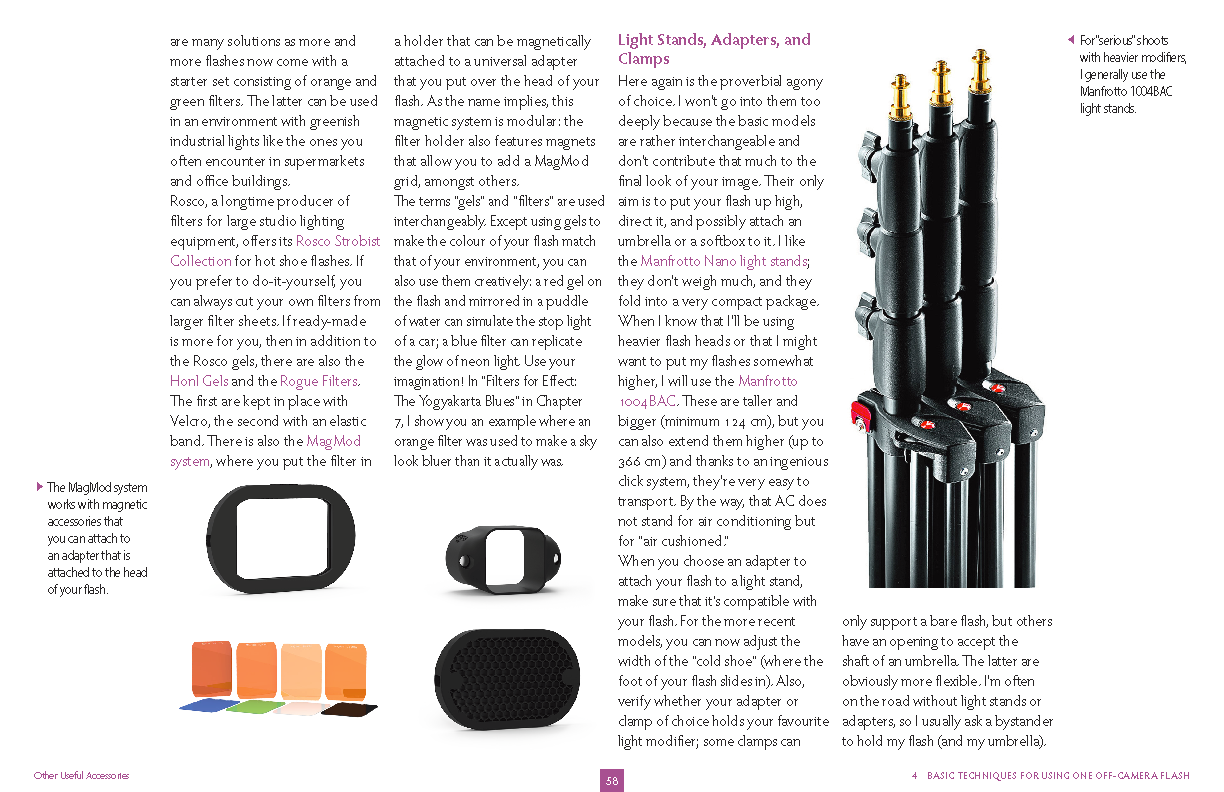
A couple of sample pages from my just released eBook Light it Up! The relative positioning of your light, camera and subject towards each other can greatly influence the atmosphere of your image.
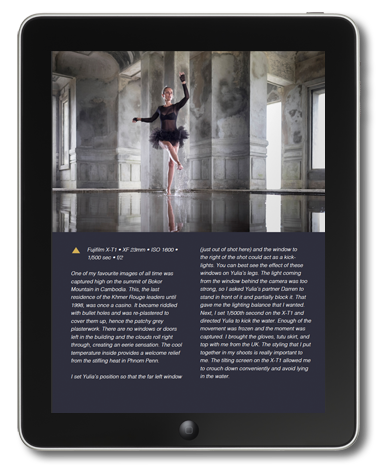
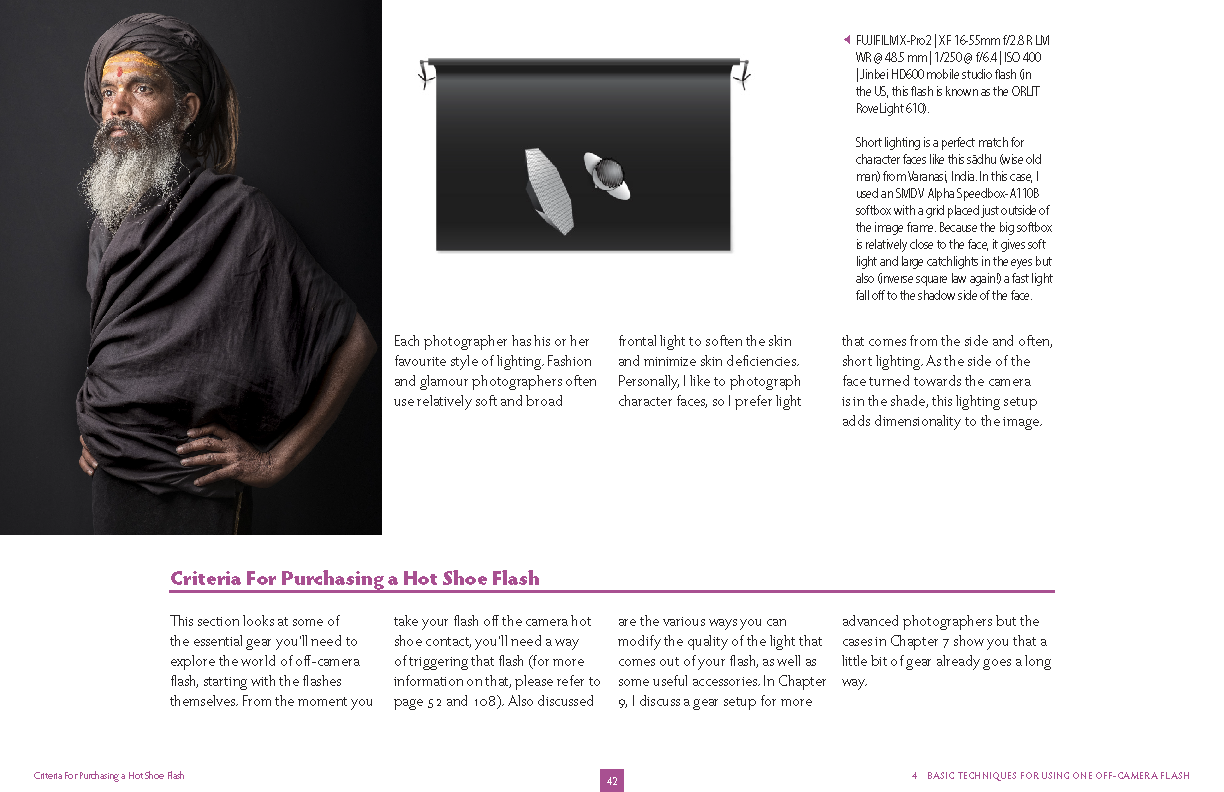
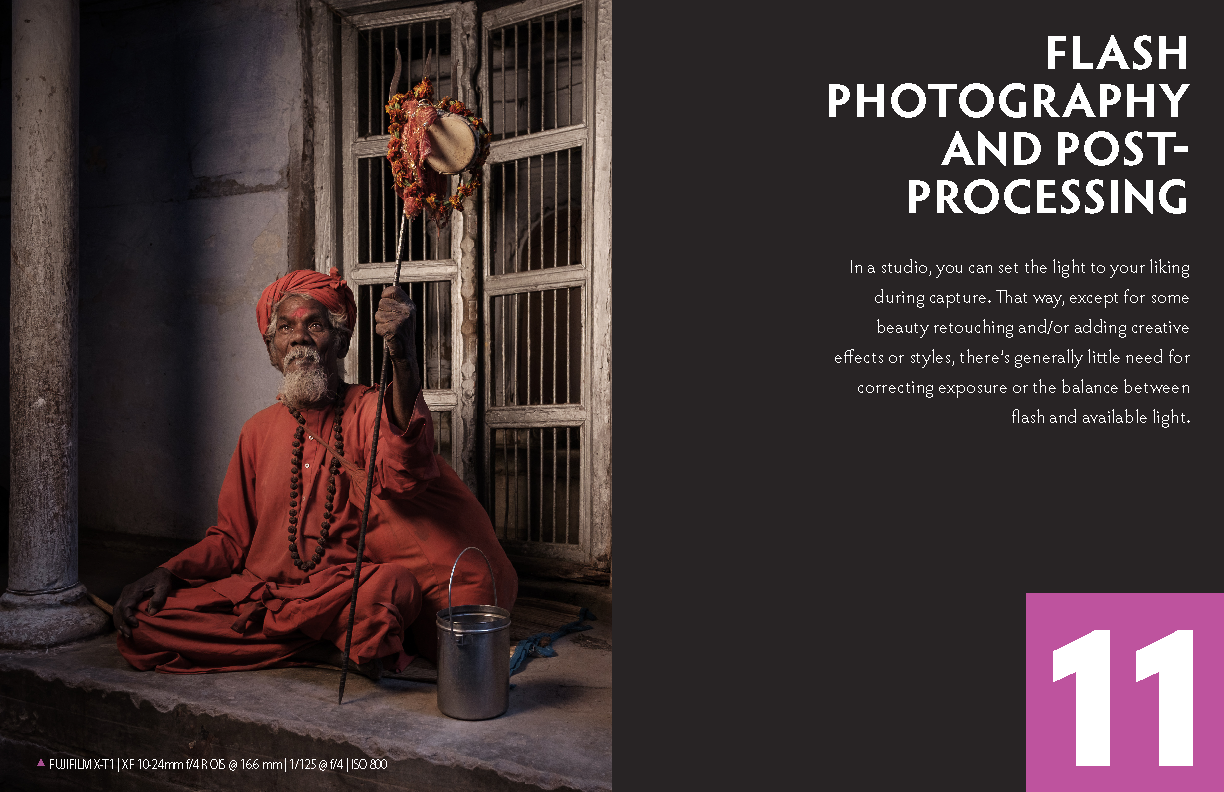
One of my favourite lighting schemes is pretty straightforward. It is called ‘Short Lighting’ and it lights the side of the face that is turned away from the camera. This results in a more threedimensional portrait and works great with character faces, of which there are many along the shore of the Ganges in Varanasi, where this image was taken.

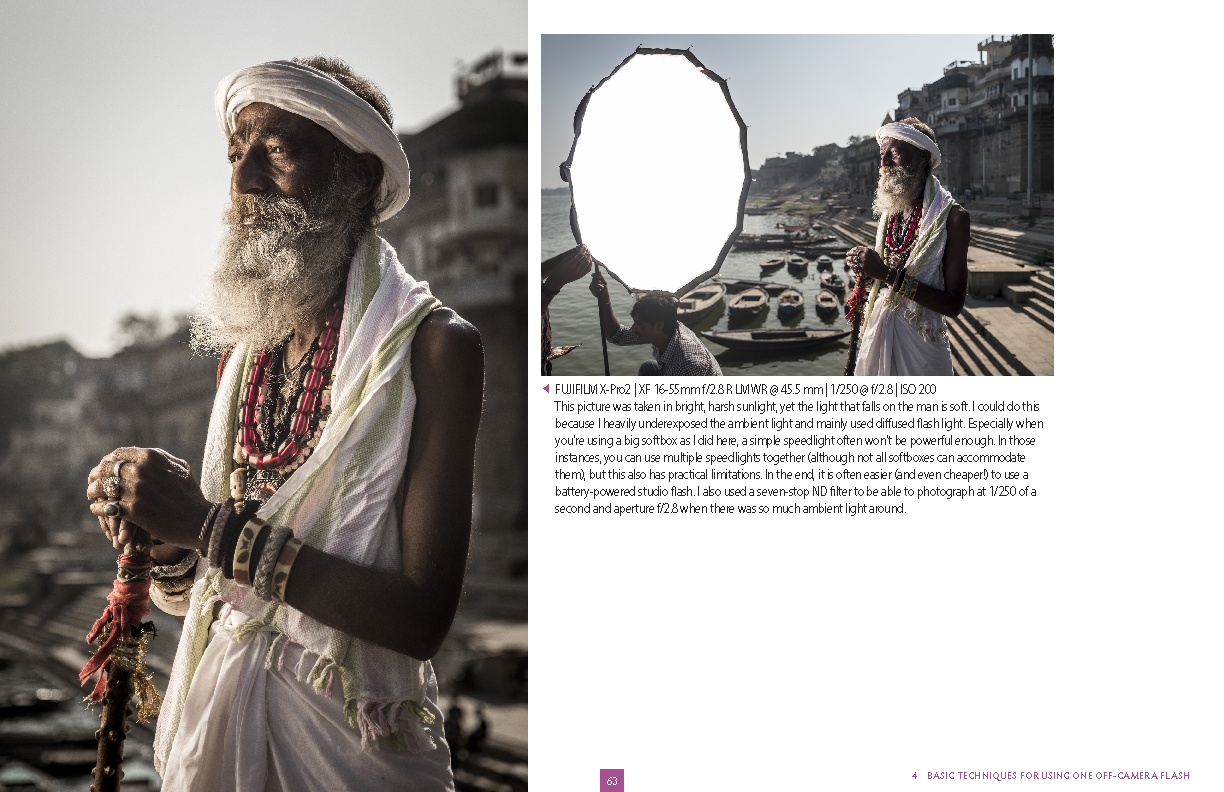
FUJIFILM X-Pro2 | XF16-55mmF2.8 R LM WR @ 45.5 mm | 1-250 sec @ f / 2.8 | ISO 200

Short lighting with a free bonus rim light from the bright Indian sun. Two great lights for the price of one!
Don’t let the softbox fool you into thinking you need a big budget to pull of a shot like this. I could have achieved 90 percent of this look with a $25 umbrella. The reason I prefer a softbox is that it gives me more control over my light, especially in confined spaces, where I can add a grid to it.
Want to improve your flash skills?

On April 1st 2018, the second, revised and updated edition of Light it Up! Techniques for Dramatic Off-Camera Flash, will be released with a couple of cool but time-limited bonuses. If you want to get a reminder when it launches, sign up for my newsletter. You'll even receive a set of ten free Lightroom presets, on the house!
P.S. If you speak Dutch, there's no need to wait as this book is also available in a Dutch print and ebook version! Check it out here.
Choose your Cover, Flash-lover!
What's up, guys?
I'm frantically working on the second edition of my English ebook on off-camera flash, Light It Up! The first edition was released less than a year ago but as I am going to self-publish the book from now on, I decided to update it to celebrate this new direction. The first edition was already meaty and loaded with tips and tricks, this upcoming second edition promises to be even better! It's been completely checked and new tips, gear, cases and techniques have been added. I've even included a tip on how to combine panoramas and flash photography, resulting in a whopping 20,000 pixel wide image! As a result, the page count will grow to a whopping 185 but it's an ebook, right? So no extra costs involved. On the contrary, Light It Up, 2nd Edition will be cheaper than the original! I'm scheduling to release it early May, but before I can do that... I need your help!
I need your help!
It's become somewhat of a tradition that I let readers of my books co-determine the cover. I could of course have left the cover the same as the first edition, but because I'm now publishing it myself and because this it's a second edition, I thought I might as well change it. So... below you have 5 cover options. One of them is very similar to the original cover, the others are different. You can vote for your cover by filling out the form below. You need not enter your email address, but know that I will draw three random names from the entries who will receive a free copy of Light It Up, 2nd Edition and I obviously need your email address to inform you if you've won. If you're not subscribed to my newsletter, it might be a good thing to check that checkbox, too, as new newsletter subscribers receive 10 of my best Lightroom presets, absolutely free! (please allow up to a day to receive the presets).


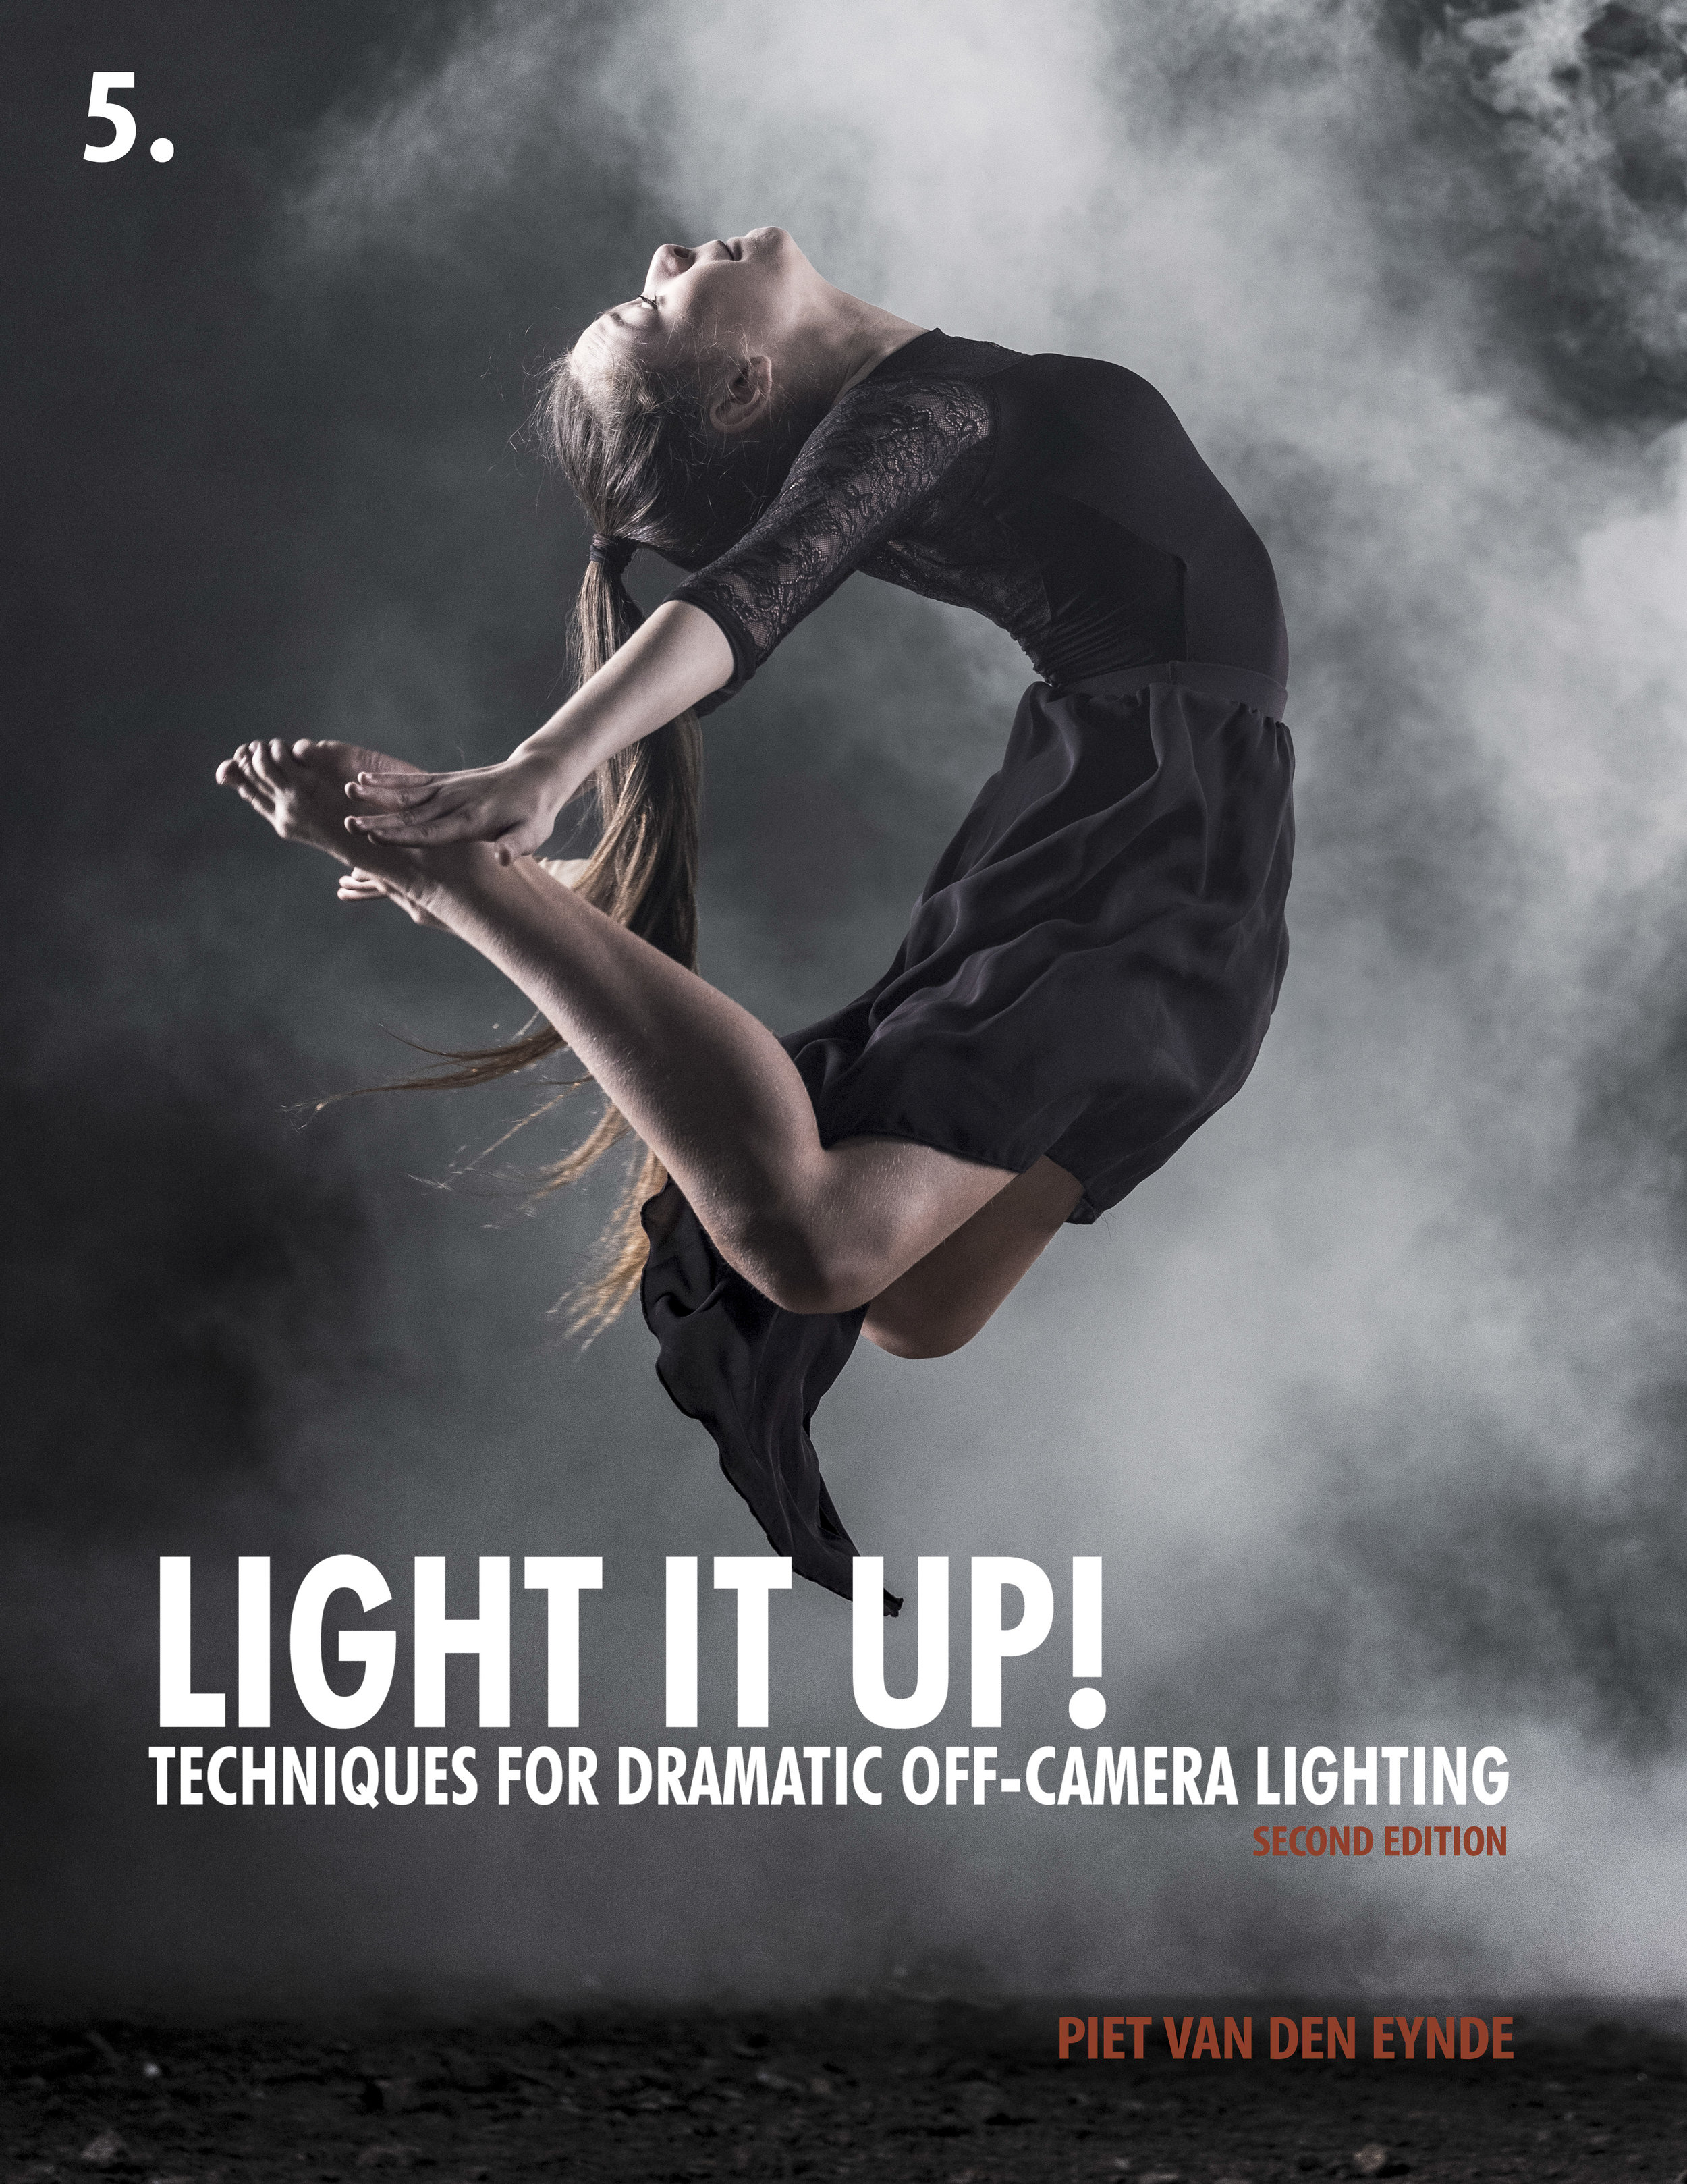
Click on a cover to see it larger. Alternatively, scroll through the images below to see them up close. Don't pay too much attention to the subtitle as it might still change.
Vote here
You can vote using the form below. If you're already subscribed to my newsletter, there's no need to subscribe again - you should have received the free presets already! You can vote until Thursday, March 22nd, 1 PM Brussels time.


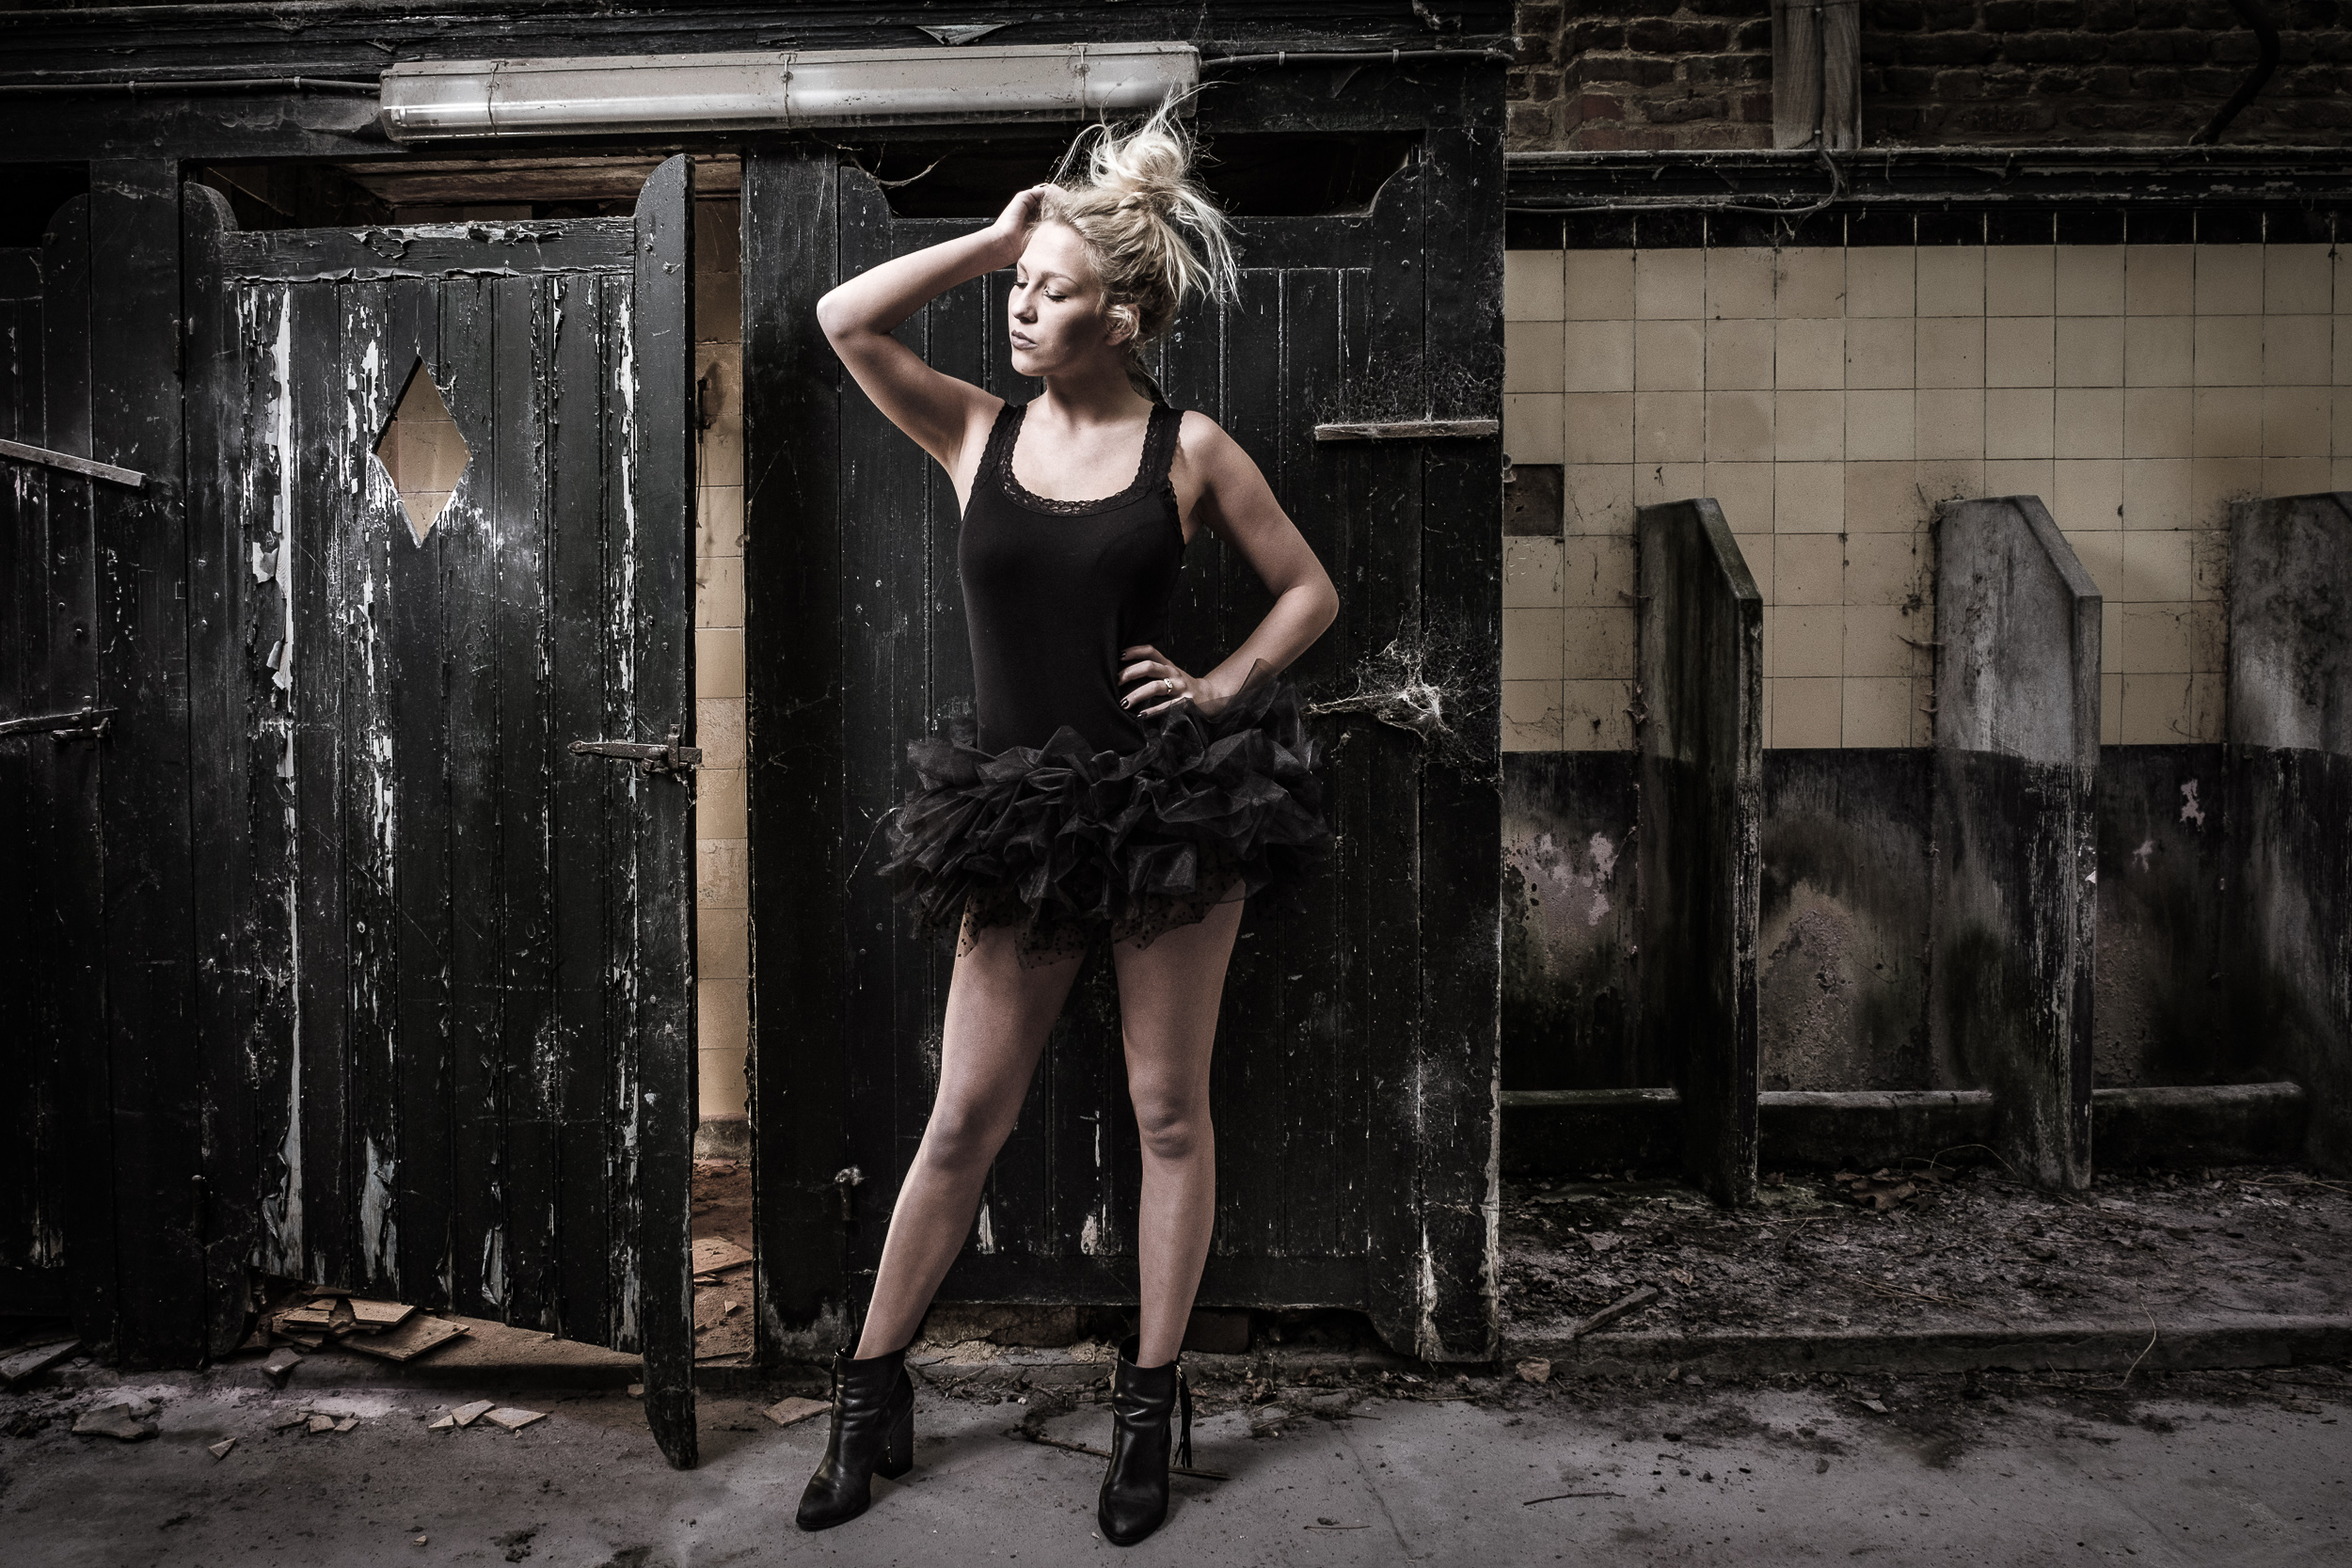
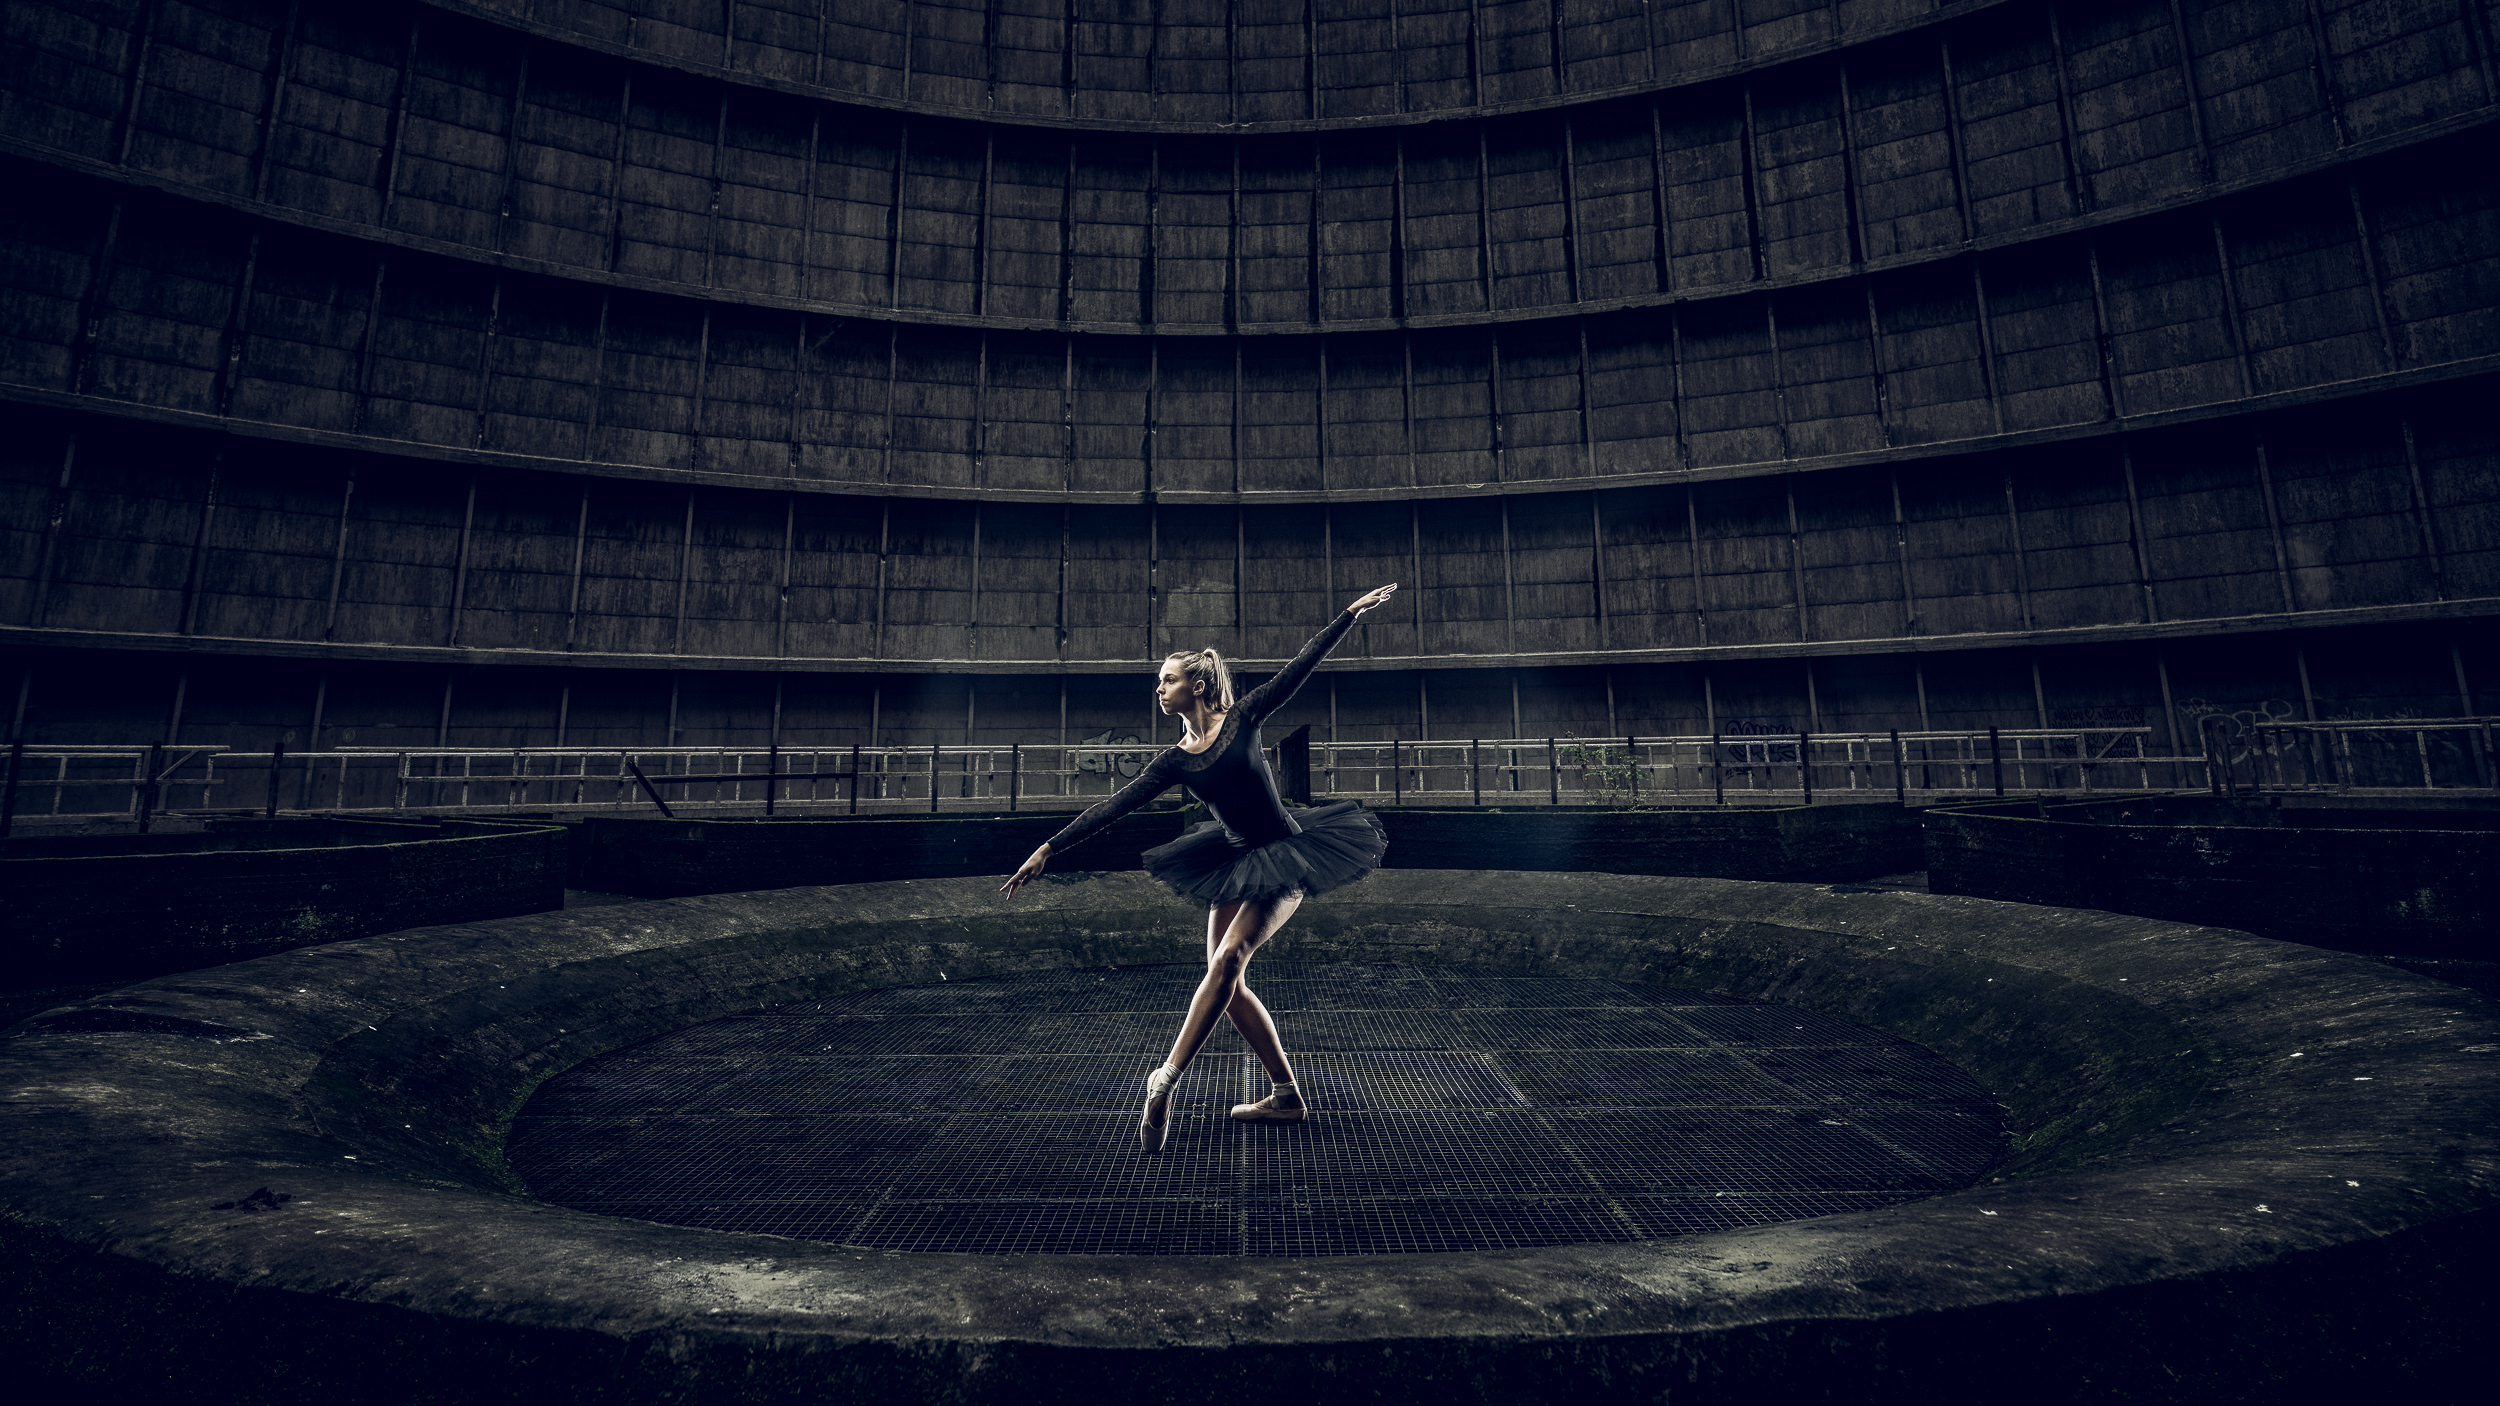
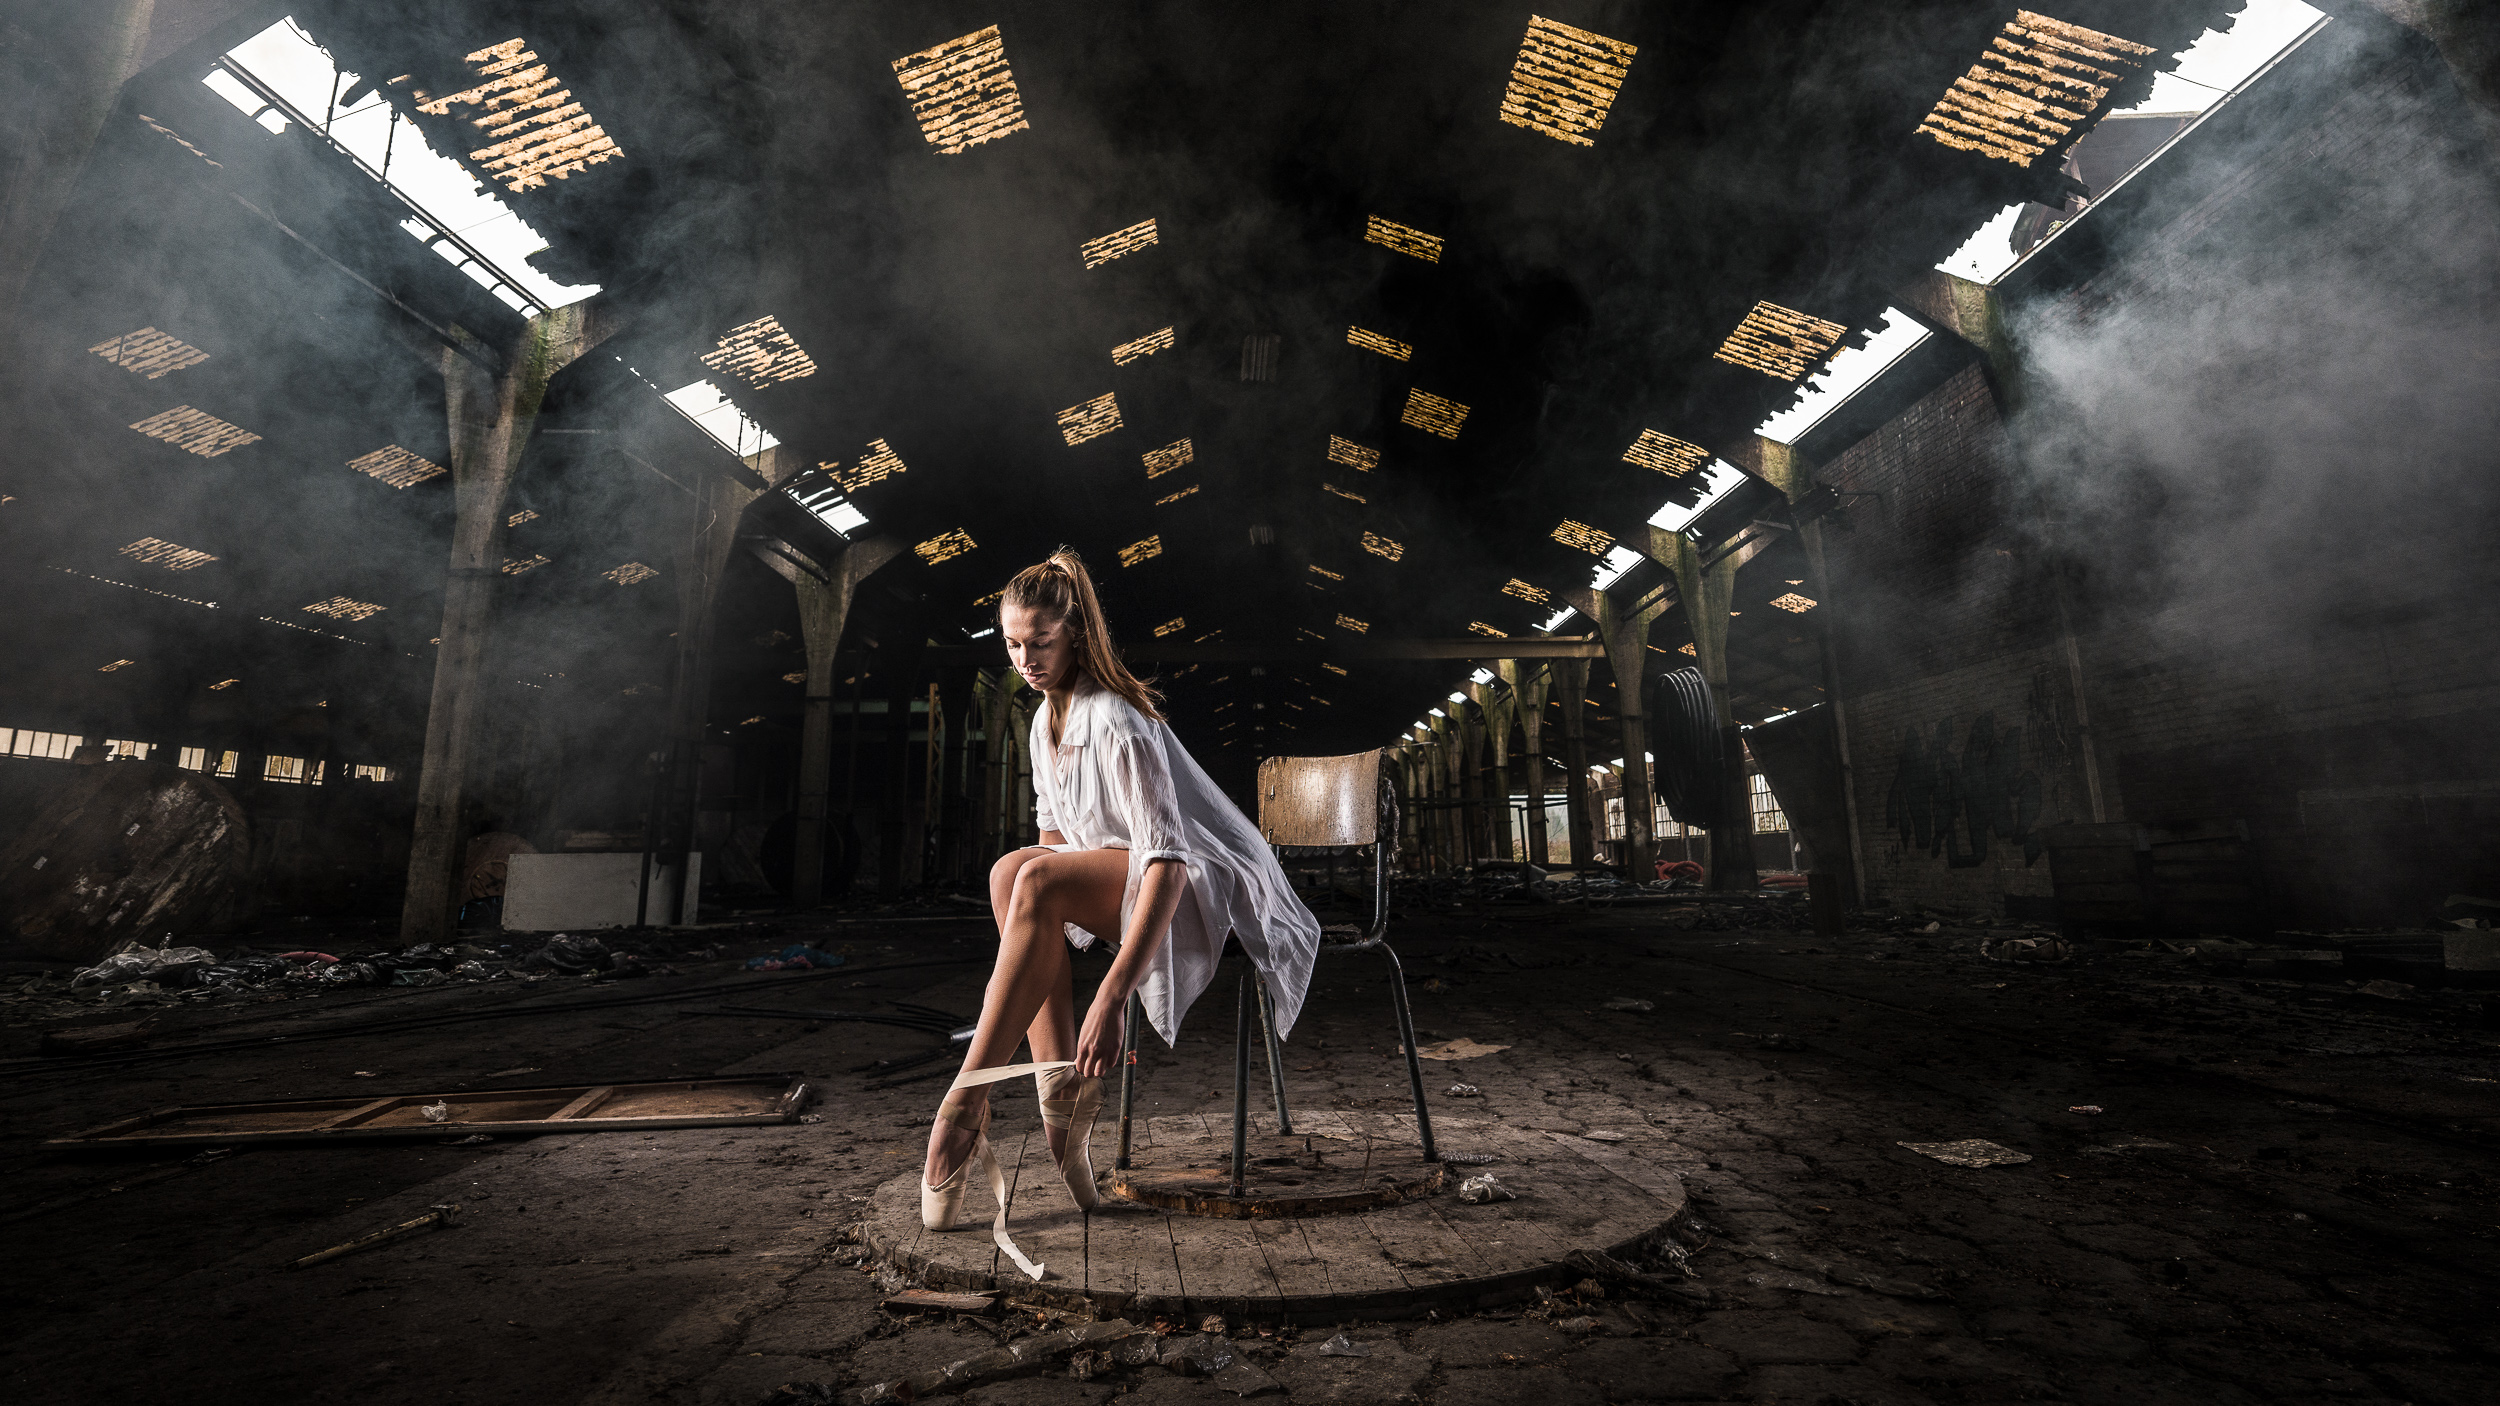
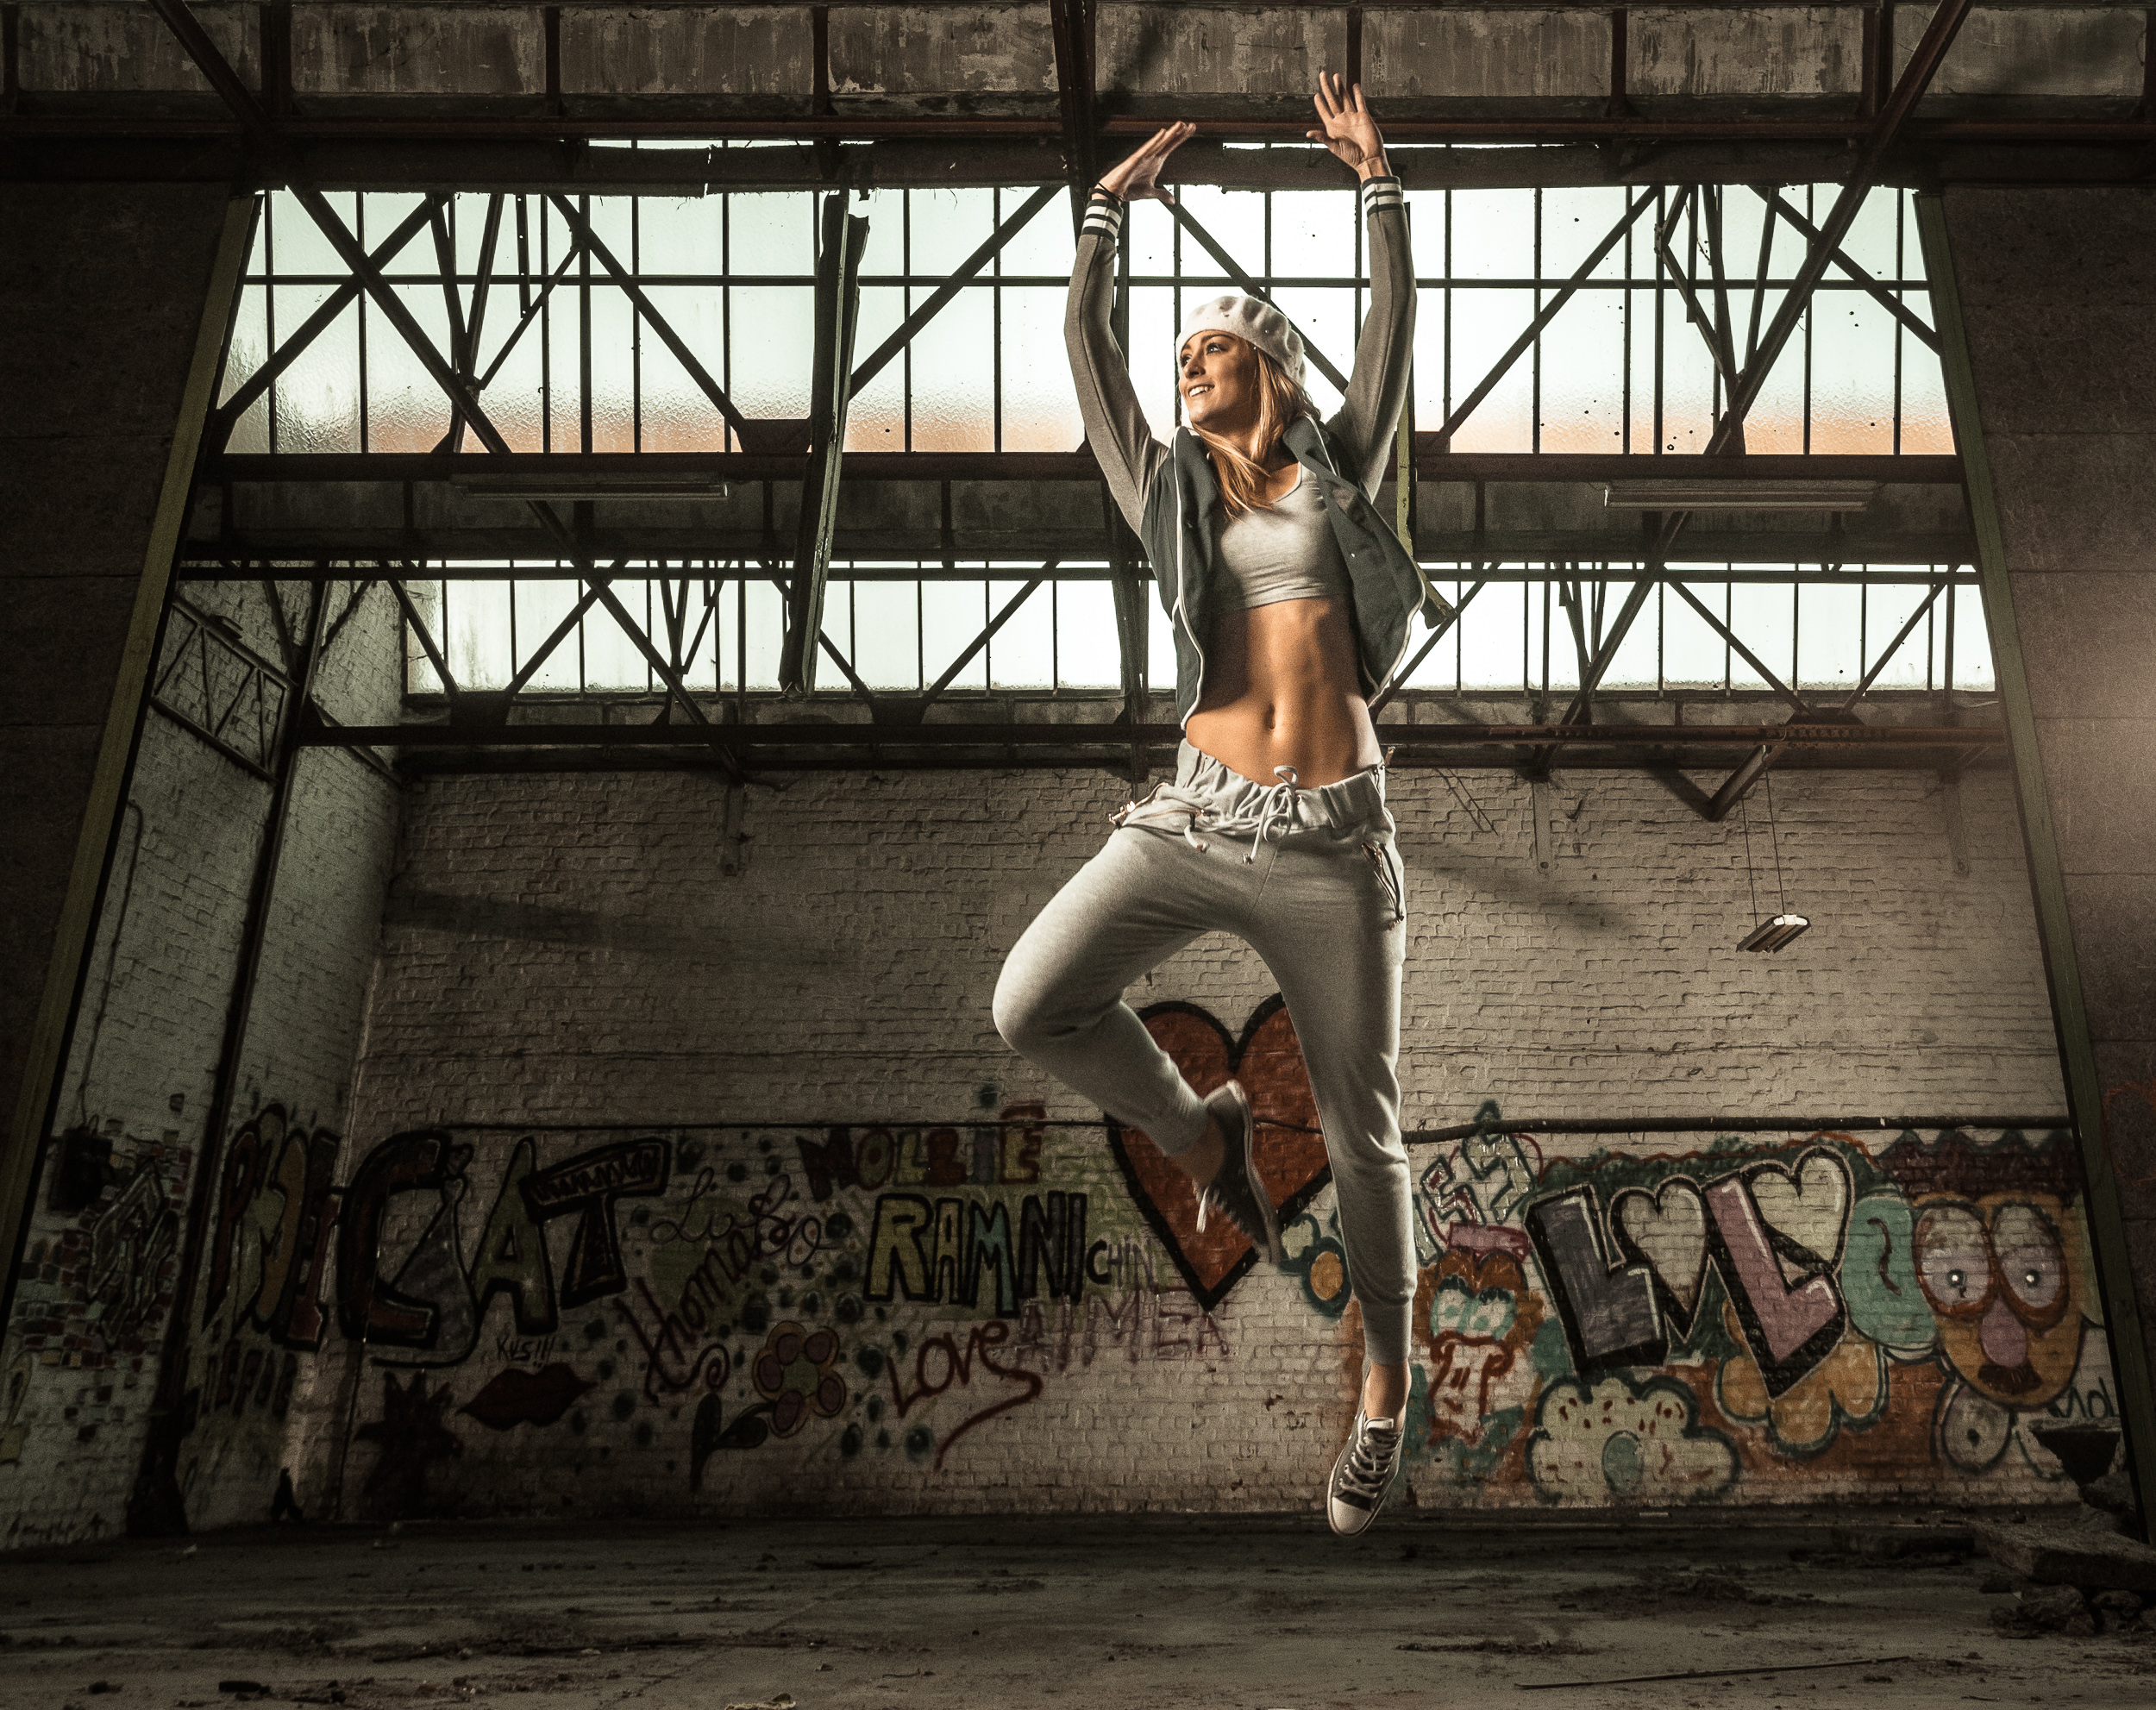
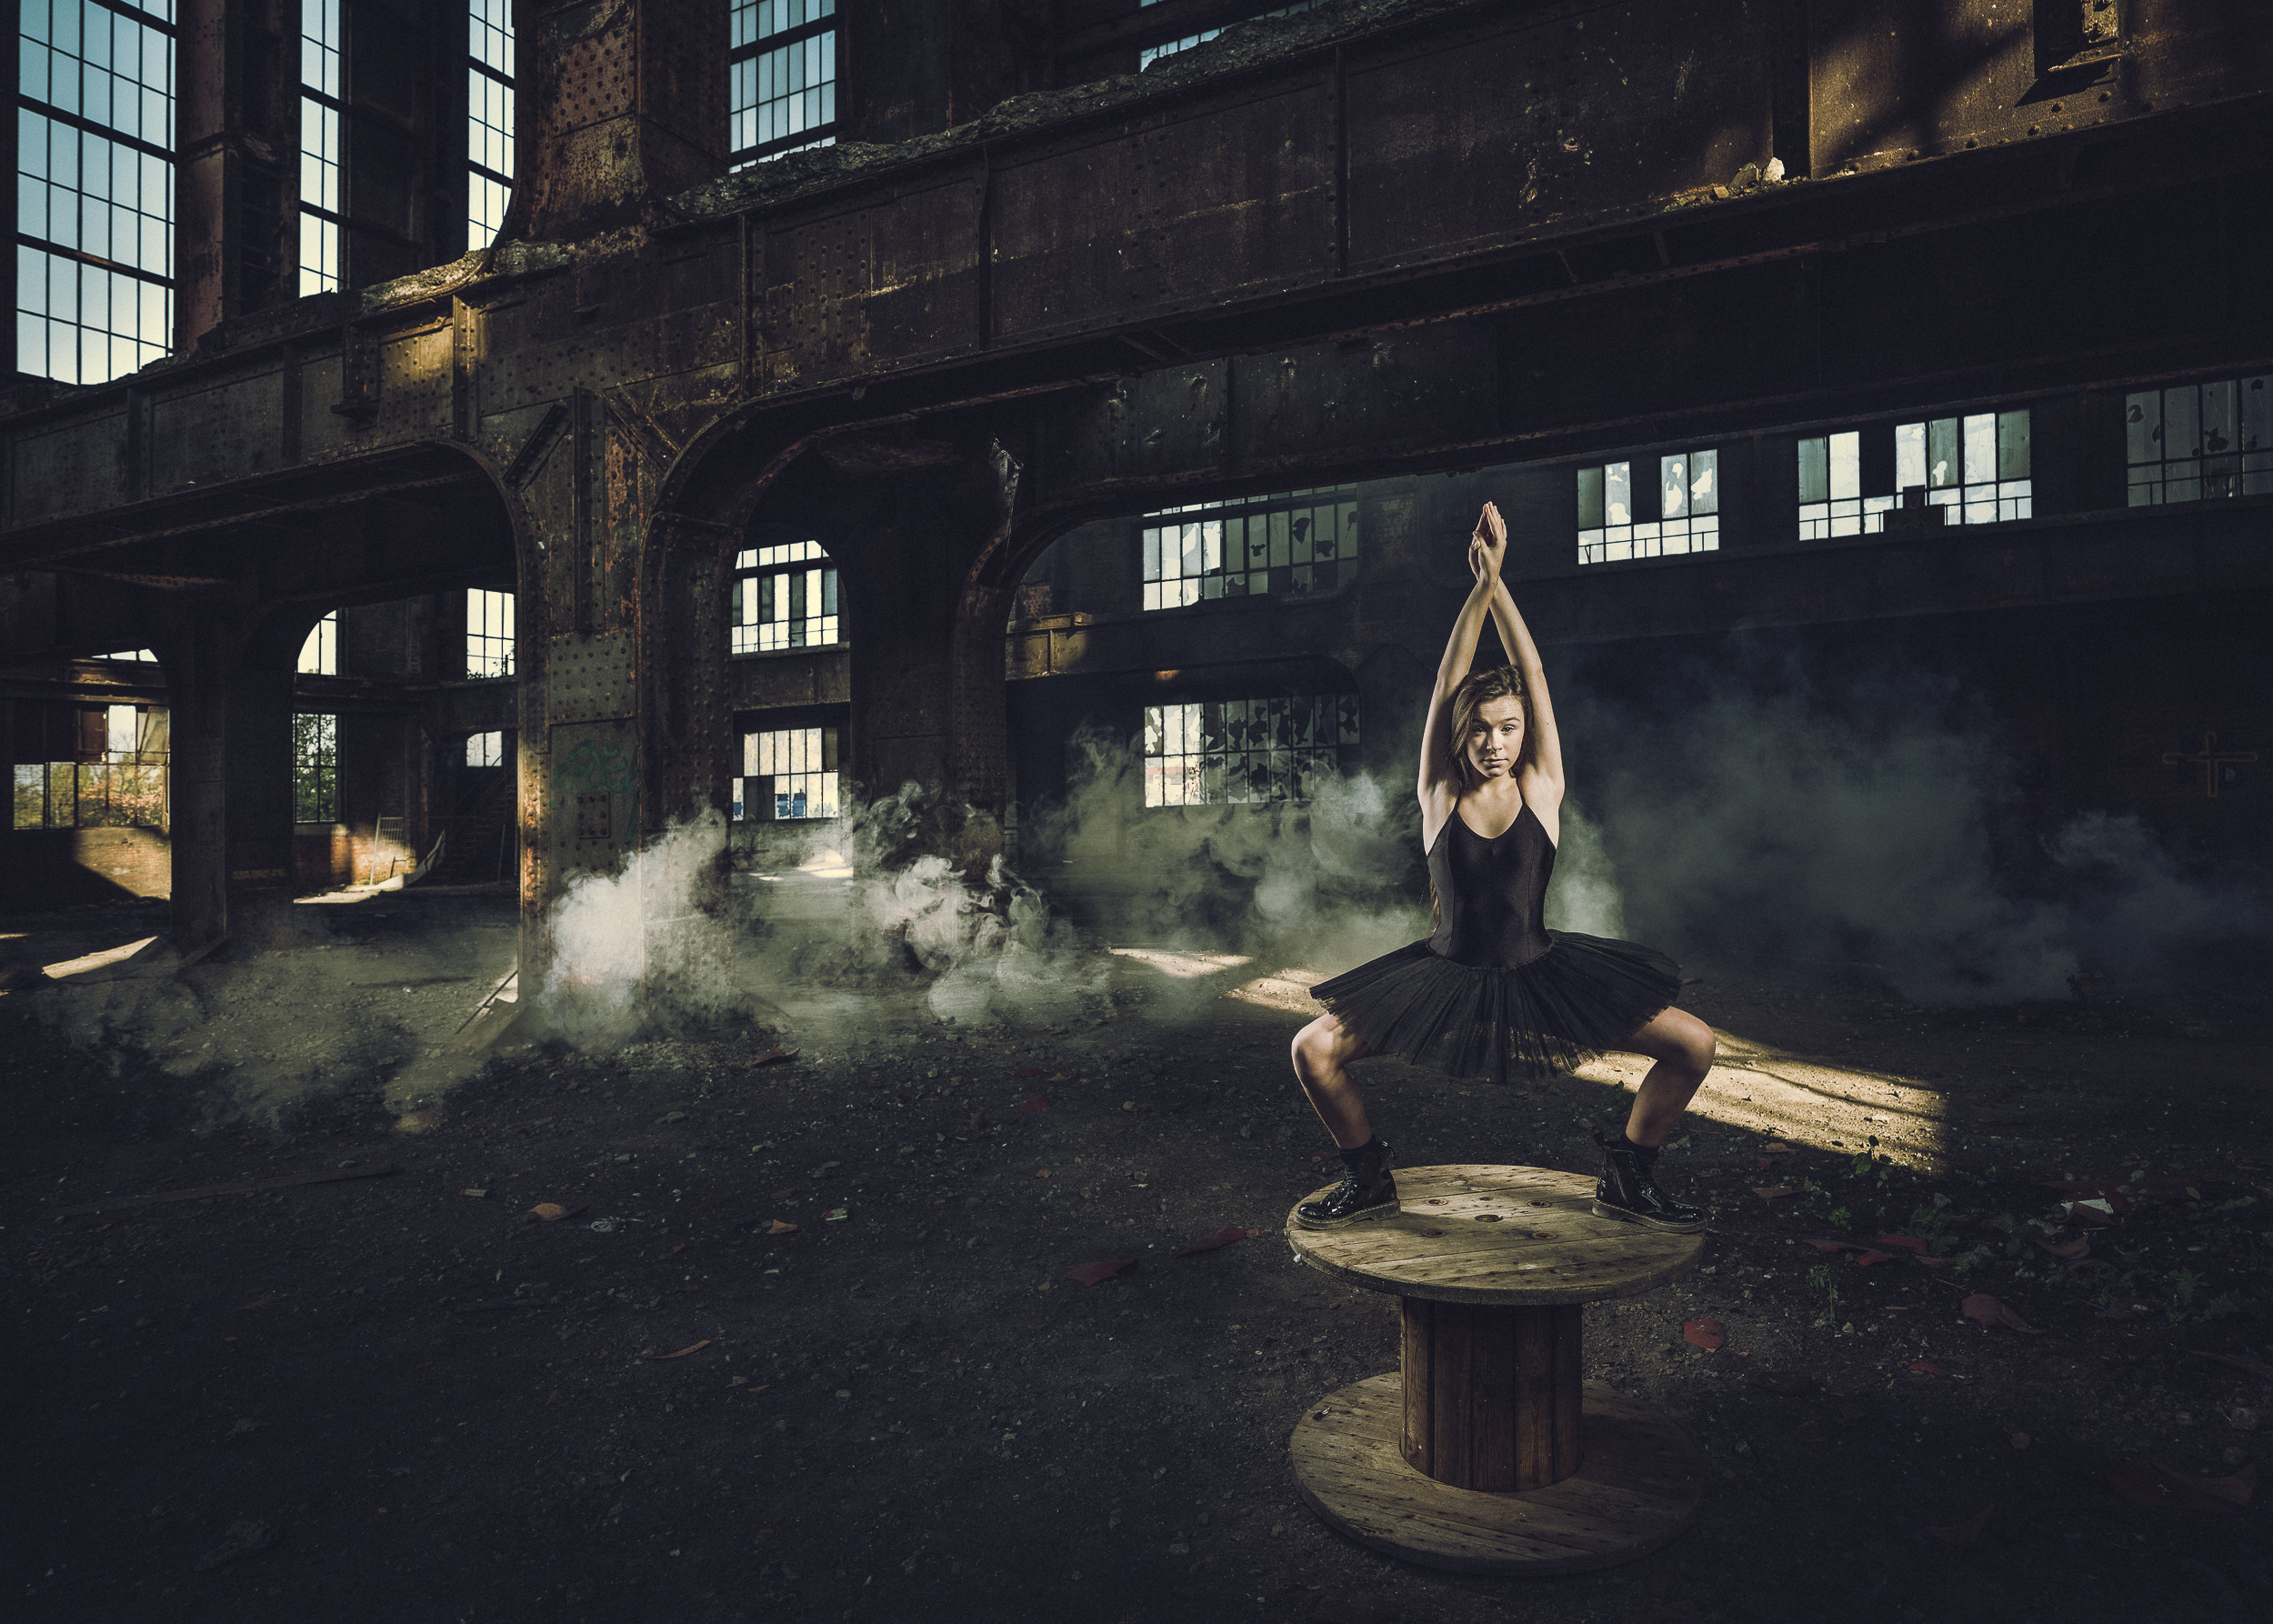
What do these 5 images have in common?
So, I've got a little quiz for you. What do these five images have in common (other than the fact that they show models or ballerinas in a dance pose and that they were taken in industrial environments)? Let me give you a hint: it has to do with the way they were lit.
The answer is... in this video!
I'd like to thank the people over at Photoshop Becker for supplying me with a review unit (they speak English, btw). Here's the full link to the product on their site.
Want to improve your own lighting skills? Check out the 2-day Fine Art Portrait Workshop with Michael Schnabl (English) or the Control Your Flash workshop with Tom Museeuw (Dutch)
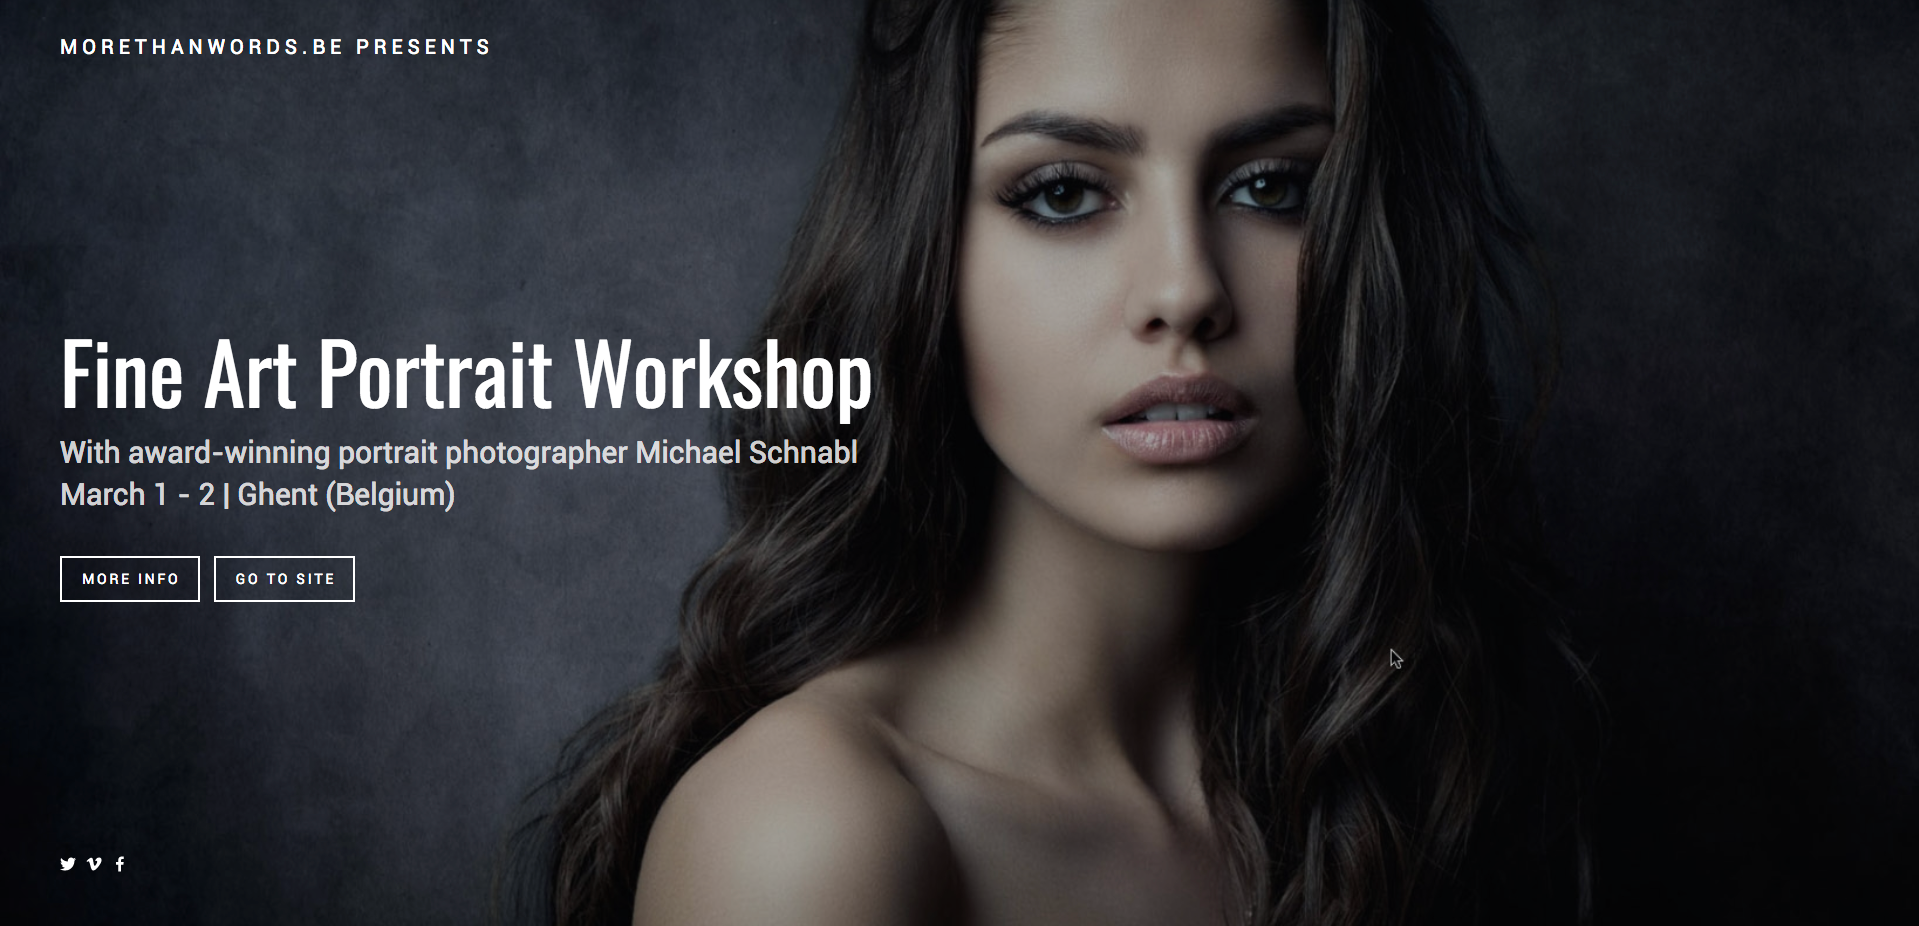
The Fine Art Portrait Workshop is an in-depth, hands-on two day workshop in which you'll be producing portfolio-worthy images and learning lighting and postprocessing skills that you can use in your own portrait work.

In Control Your Flash (Dutch) you will learn everything you need to know about mixing flash with available light.
1 Spot Left - Join Matt Brandon and me in Mongolia in April
Update: the 2018 edition workshop is sold out (wait list here). However, we are planning on doing this workshop again in 2019. Subscribe to the newsletter to be notified when we have the dates and prices.

As you may know, travel photographer Matt Brandon and I have been successfully running travel workshops in India for the last couple of years. And while we intend to keep on doing that, we wanted to broaden our horizon, too. So, we invited a select group of five adventurous photographers to join us for the first Mongolia Photo Adventure. Everything is set for a phenomenal trip of photographing nomads and eagle hunters!
We are are using one of the country's best fixer and travel agencies, who have worked with various film and photographer crews. They have assisted in productions for world-renowned companies like BBC and Red Bull, so they know what photographers want. This won't be no tour bus bouncing around the country side with 5 minute photo stops. This wil be a trip by photographers, for photographers.

This is just a small selection of the flash gear we will be bringing along on this trip (I'll leave the jacket at home, though). We'll have umbrellas, softboxes and everything we need to make beautiful portraits. You can use our gear and if you're new to this, don't worry: we have scheduled class time on how to use it, too!
Although we will also use available light, Matt and I will be bringing our flash gear with us to Mongolia, to enable participants to make the same striking and dramatic portraits that we are known for from our India workshops.
If you've ever wanted to explore Mongolia, guided by two seasoned travel photographers, a fixer and a local guide and explore the use of location flash photography, this is the trip for you!

Eagle huntress
Practicalities
2019 Dates: To be announced
2019 Cost: approximately $6,750, but final pricing has to be announced. This price includes a $1,400 deposit payable within two days after registration. The cost includes food, lodging in hotels and tent camps where applicable (see Itinerary below), assistance of vehicles, drivers and cooks, an internal flight and obviously tuition from Matt and me. As this is an international group, it does not include your international flights to and from Ulaanbaatar, Mongolia. More details about what's included and what not at the bottom of this post.
Itinerary
Please note that this itinerary is the one from the 2018 edition and is subject to change. However, it gives you an idea of what we're planning to do.
Day 1:
Welcome to Ulaanbaatar! Ulaanbaatar (UB), meaning ‘Red Hero’, was developed during Soviet times and is now a fascinating and bustling city of brand new sky-scrapers beside ancient monasteries and sprawling ger (the Mongolian term for 'yurt' or round tent) districts. You'll meet the team and be taken on a city tour, followed by a delicious dinner at one of UB’s best restaurants.
Day 2:
Domestic flight to the western provincial capitol of Ölgii. We’ll have a chance to pick up any last minute supplies before heading off into the mountains and then set off to meet one of our subjects, a Mongolian Eagle Hunter and his golden eagle. Overnight in ger (yurt).
Day 3-4:
Wake up at the winter / spring eagle hunter’s family camp and have breakfast followed by a photography lecture on how to mix flash with available light for dramatic environmental pictures. Subject photography and possible transfer to another hunter family. Overnight in ger.
Day 5:
We’re planning one more full day around the western mountains and eagle hunters, since so many sights are challenging to get to. Specifics TBA. We’ll likely have dinner in Ölgii and overnight at a hotel in town.

Day 6:
Morning flight back to Ulaanbaatar arriving midday. This will be a big travel day, as we'll plan to get right out of the city and arrive at our next subject's home in time for golden hour. Approximately 3.5 hour drive.
Day 7:
After an early breakfast we’ll plan a morning shoot session with our local subjects, who are herders of horses, camels, goats and sheep. We’ll be in Central Mongolia, surrounded by broad valleys, mountains and sand dunes.
Day 8-9:
More photo lectures on composition and storytelling and of course more portrait shooting. We’re planning to have several subjects at your disposal for the day, with opportunities to shoot in the ger, around sand dunes, steppe and even an old monastery surrounded by older monastery ruins. Overnight in ger.
Day 10:
We’ll spend the morning finishing up our explorations and shooting around Khogno Khan and then travel northwest to Kharkhorin, Mongolia’s ancient capitol. Our next destination will be the largest active monastery in the country, Erdene Zu.
Day 11:
After morning photo ops and a relaxed breakfast in Kharkhorin, we’ll head out of the valley and continue our journey, to meet a horse herder family. Opportunities for portraits of the family working with animals. Overnight in gers.
Day 12:
Some more time for family portrait photography. Whenever we’re finished, we’ll start back towards UB, staying one more night in Khogno Khan, the dune area we visited earlier. Overnight in gers, tents.
Day 13:
Return to UB, check in to your hotel for a well deserved hot shower. Possible city photography in afternoon / early eve. We’ll plan on a farewell dinner together at one of our favourite places.
Day 14:
We'll meet for coffee and breakfast together (depending on flight times), after which (if time permits) we’d love to see your favorite shots, in a late morning photo review session. Transfer to airport for your departure.
Any questions?
Just shoot Matt or me an email.
Pricing for this Photo Adventure is inclusive of all in-country Mongolia travel*, 1 night Ulaan Batur hotel stay between Day 1 & Day 2 of the itinerary, 1 night hotel stay between Day 13 & Day 14, all countryside accommodations, non-restaurant meals and transport, in-country airfare between Ulaanbaatar and Ölgii, photo-pro sessions while in countryside, use of inverters and other charging equipment. Tents and sleeping bags will be provided. Expedition participants must provide own camera equipment, lenses, data storage cards/devices, computers (if desired), any specialty camera accessories and personal effects. Personal expenses (laundry, alcoholic beverages, ...) are excluded. Participants must have medical, evacuation and cancellation insurance. A list of suggested insurance companies will be given after registration.
*Airport transfers will be provided at no additional charge if arriving on Day 1 of listed itinerary and/or departing on Day 14 of itinerary. For arrivals and departures at other times, airport transfers can be arranged for a nominal fee.
The 5DayDeal is back! $2.500 worth of photo education and tools for only $117
From now until October 18th, noon PDT, it's 5 Day Deal time again! The 5 Day Deal is a unique bundle of photographic training content. If you were to buy every item separately, you'd be looking at a total bill of over $2.750. Now, you're only paying $117 (+ European VAT unless you have a VAT ID), a savings of more than 95 percent! The total bundle contains over 75 hours of video training, several eBooks and over 1400 Lightroom presets, Photoshop actions and other digital tools. In total several gigabytes worth of training goodness.

Yes, but what's in it for me?
Of course, the real question is: 'What is this bundle worth to you?' Unless you're really into all genres of photography, probably not the full $2.500. But I can guarantee you that even if you're only remotely interested in photography, the 5 Day Deal bundle is certainly worth more than the measly $117 it's selling for. In fact, this bundle will do more for your photography than the umpteenth camera bag or a shiny new UV filter.
To help you determine if it's worth your dollar, I've broken the bundle down into three typical areas of interest: general postprocessing, landscape photography and portrait photography. You'll see that even if you're only really into one of those three areas, the bundle is a steal. Heck, if you're into two or more, you should already be ordering!
1. You're into Lightroom, Photoshop and Postprocessing

Postprocessing seems to be the main theme of this year's bundle, so if image editing is your thing, you're in for a treat. The bundle is ideal to hone your editing skills over these cold winter months and get you ready for a great start in 2018. There's hundreds of Lightroom presets and Photoshop actions, overlays like smoke and sun flares and loads of training videos. As you can see, I'm very honoured that my own Black & White Lightroom Preset pack is included in the bundle. But even if you already have that, there's still $2.767 of other stuff :-) The total value of the highlighted items alone is over $1.500. The 5 Day Deal price is less than ten percent of that. If you're a Lightroom or Photoshop user, this bundle really is a no-brainer.
2. You're mainly interested in nature photography, landscapes, cityscapes and how to postprocess these
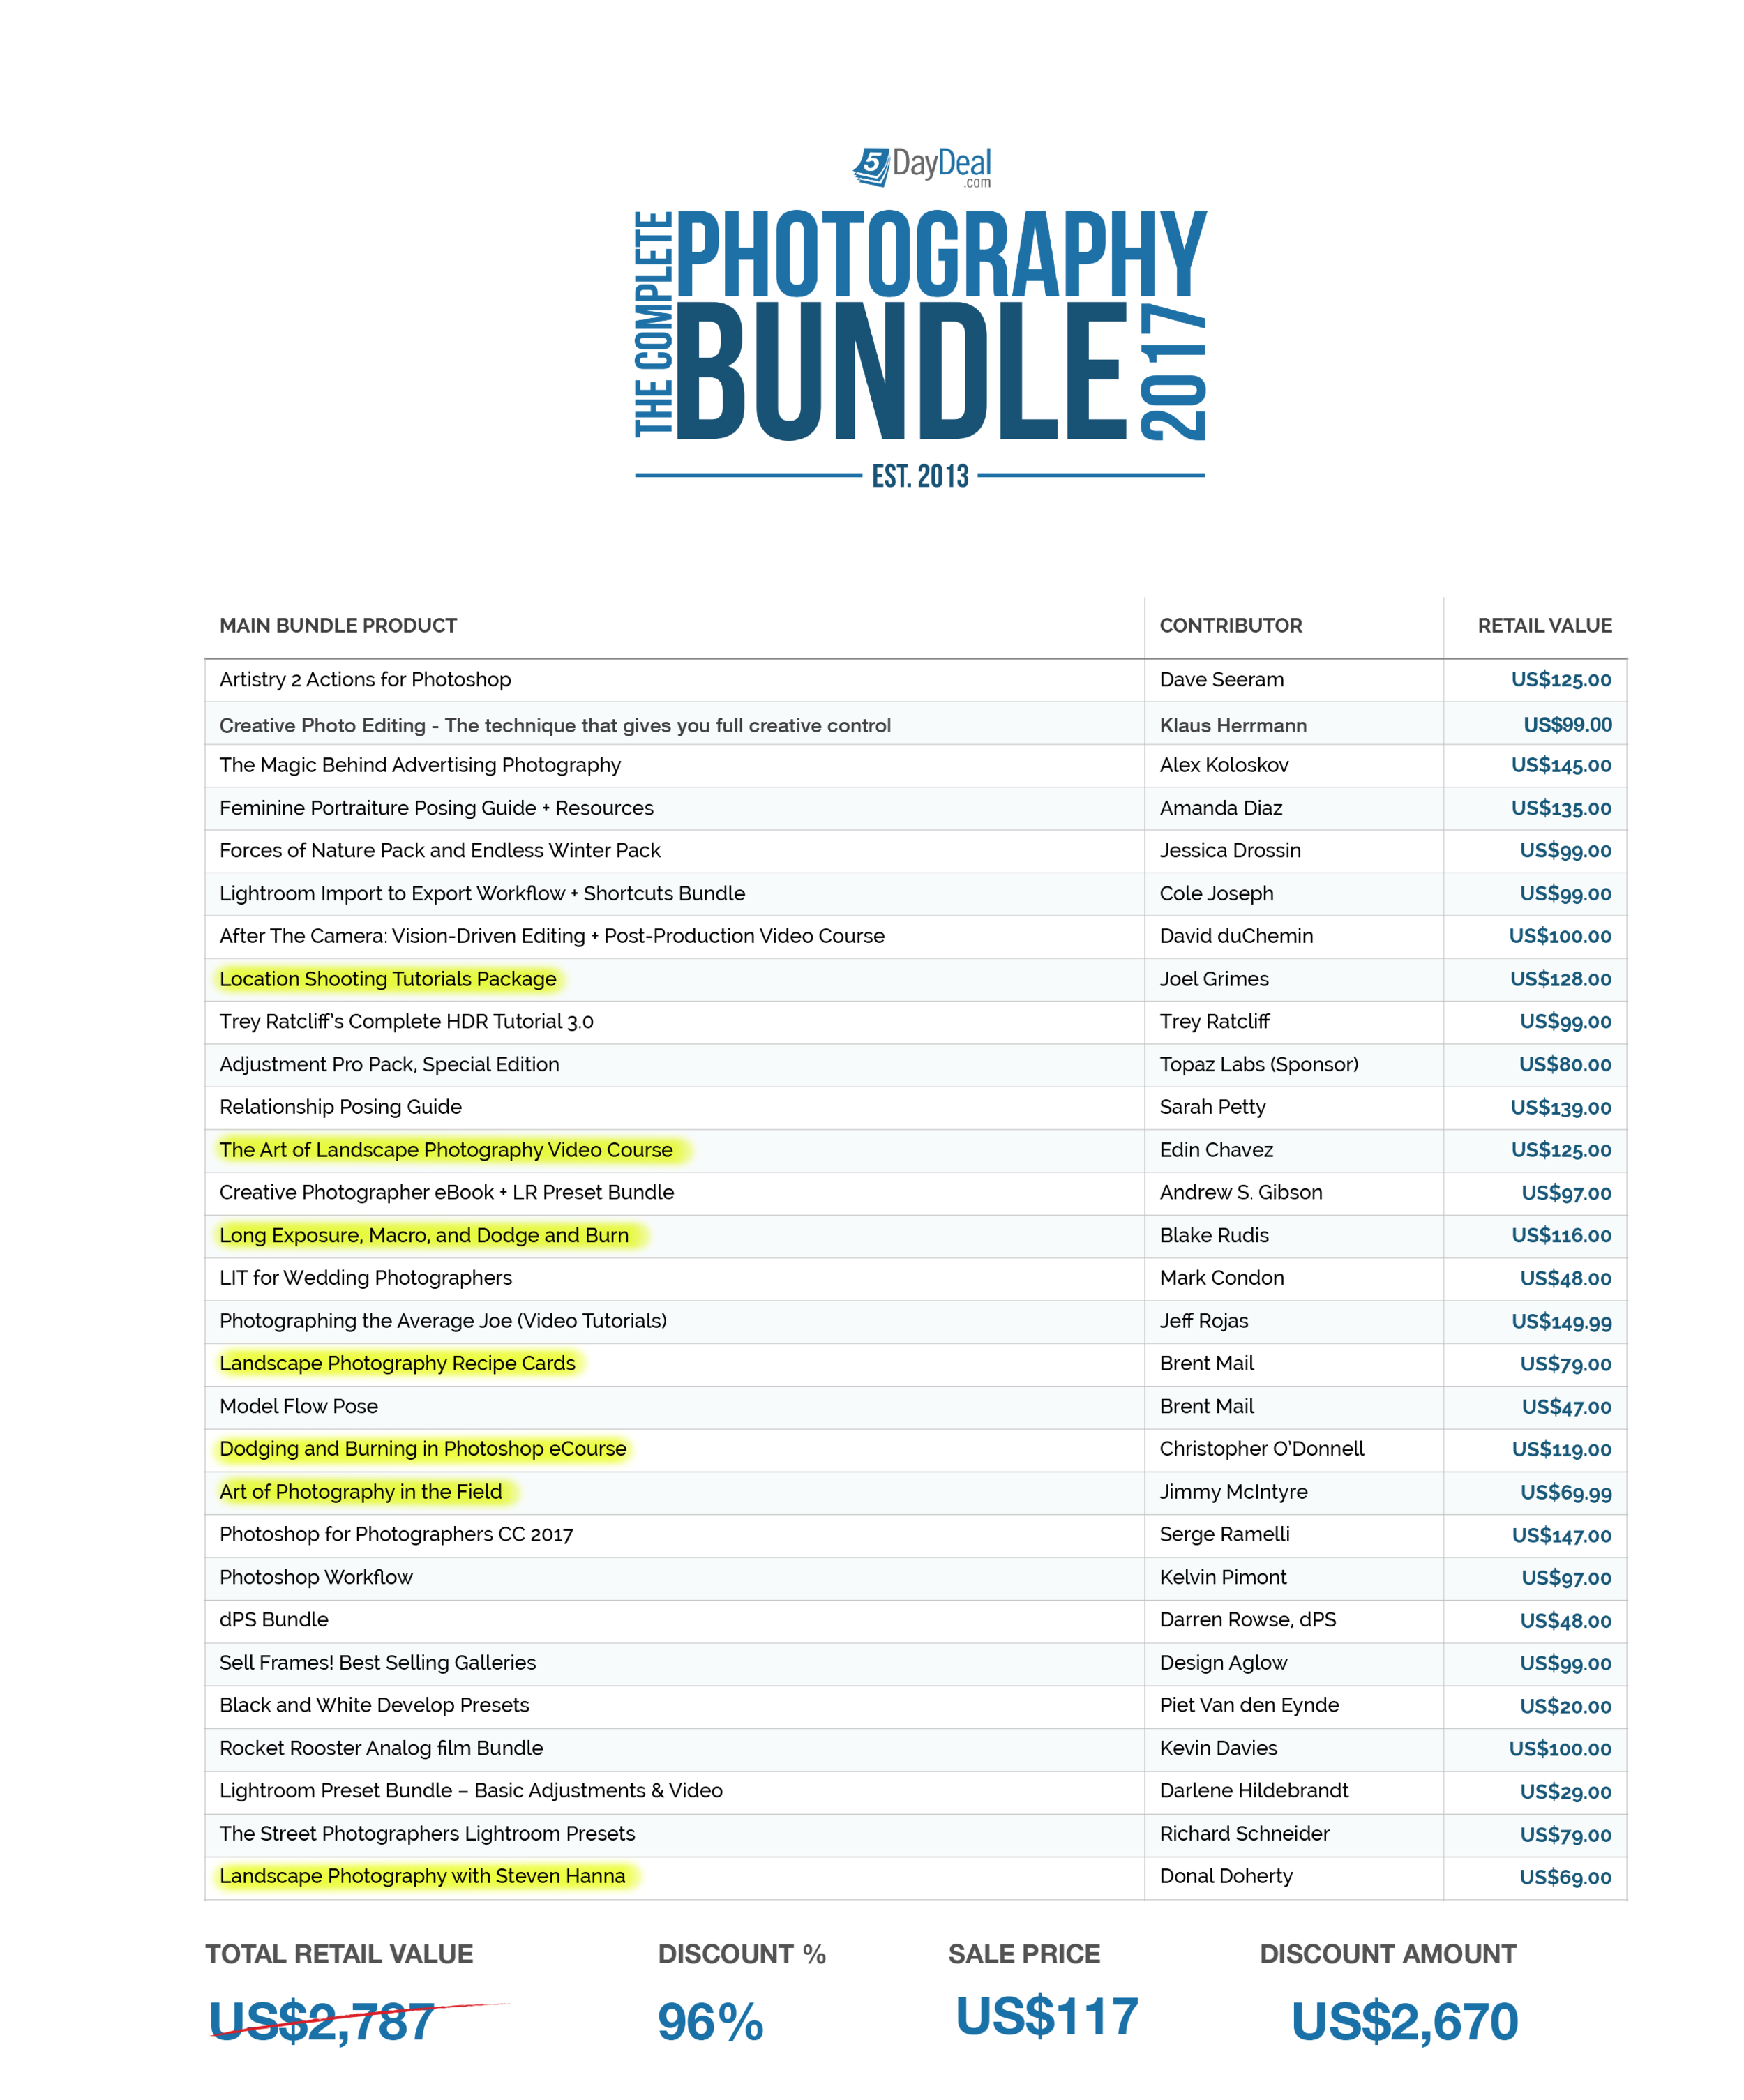
The total value of the highlighted items is about $700. From previous 5 Day Deals, I remember the excellent quality of the stuff that people like Jimmy McIntyre and Christopher O'Donnell put out, so I'm looking forward to discovering their new courses. Also, note that I've only counted items that have a direct relationship to landscape photography. There are lots of resources, like the many preset packs, that will without a doubt also be useful when you're editing your landscape images.
3. You're mainly interested in portrait photography and portrait retouching

The total value of the highlighted items is almost $800. Again, there are some hidden gems in this line-up. For example, I really enjoyed Jeff Rojas' no-nonsense approach on how to interact with, light and photograph 'normal people'. After all, we not always get to choose who winds up in front of our lens!
Still in doubt?
Here's 5 final reasons why you should really consider this bundle:

10 percent of each sale goes to charity. Since 2013, people buying the 5DayDeal have raised over $1.000.000 for charity.
- This way of learning is one of the cheapest to improve your photography skills, at your own pace, when and where you want it. Furthermore, there's always a couple of hidden gems in bundles like this. For example, I really enjoyed Andrew S. Gibson's Black & White Presets and Jeff Rojas' posing and lighting video.
- A lot of this bundle's resources are new and if they aren't new, at least they've never been in any other 5 Day Deal bundle, so there's no overlap with previous 5 Day Deal purchases.
- The bundle is gone forever on October 18th, noon PDT.
- 10 percent of the entire turnover (not the profits, but the turnover, so almost $10 on every sale) goes to charity. Since the start of the 5 Day Deal in 2013, over $1.000.000 was donated to good causes. To that effect, upon checkout, you can opt for the 'Charity Match bundle'. This is an extra, separate bundle, worth over $900 which costs an extra $24,97, half of which goes to charity. Some 50% of people who bought the bundle so far have chosen this option. If you want to maximise your savings and in the mean time maximise your charity donation, look for the 'Charity Match' section, you'll see it on the 5 Day Deal page.
- But wait, there's more :-) Another extra option is the 'Pro Bundle Addon'. That's almost $500 worth of content for an add-on of only $12,47.
You see, I'm shutting up already. Yes. I'm that easy :-)

For an extra $24,97, you not only double the amount of money that goes to charity, but you also get access to over $900 worth of extra stuff. There are two photography courses in there, including the world-famous one by Fstoppers, one of the largest photo websites. Then, if you still have another $12,47 to burn, you can get the Pro Bundle Add-on as well...

I used a Godox AD200 to backlight the smoke in this image. Shot with the Fujifilm GFX50S.
Video review of the Godox AD200 and the AD-B2 dual AD200 bracket
As you may know by now, I'm a big fan of the Godox flash eco system. First of all, because they're the first to truly support High-Speed Sync and TTL with Fujifilm cameras, including my GFX but secondly, because it's a well thought-out, nicely integrated flash system that includes options from small speedlight-style flashes like the TT350 all the way up to the AD600.
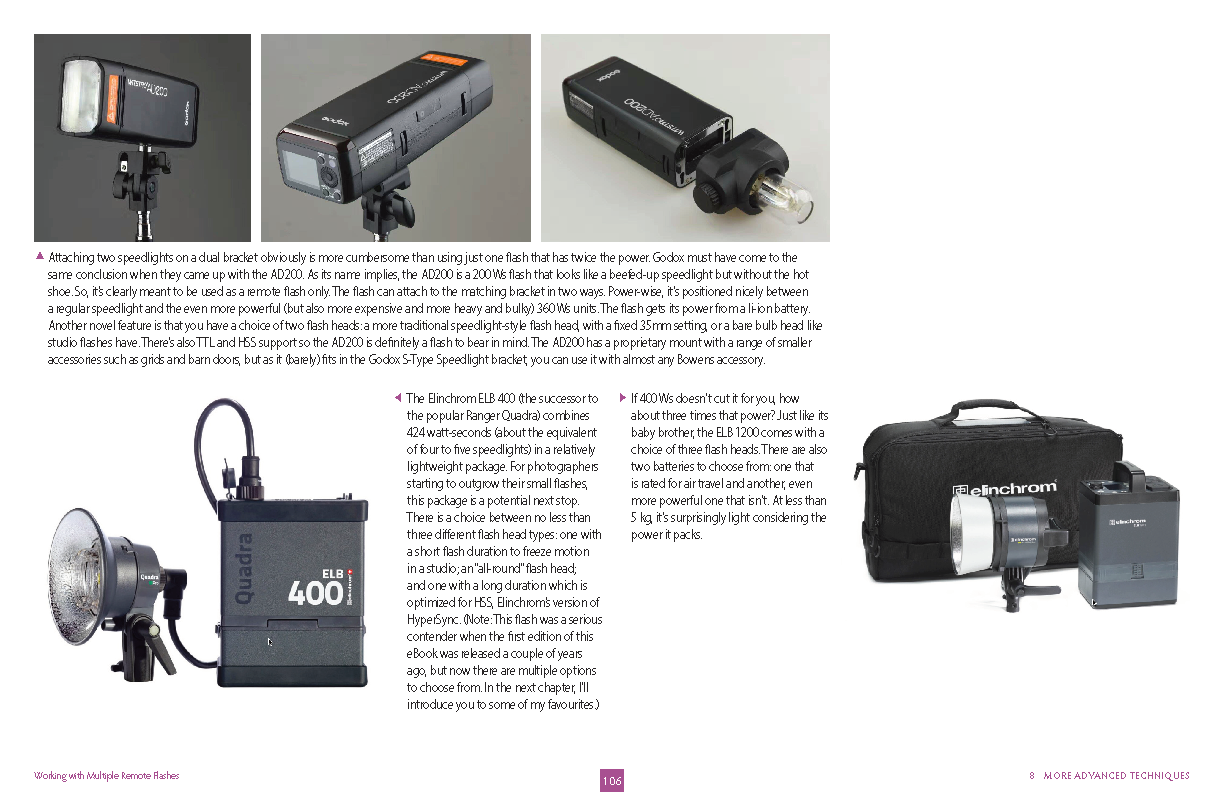
Godox' Benelux distributor Disnet was kind enough to send me a review unit of one of the newer flashes, the AD200 and of an interesting accessory, the AD-B2 which lets you turn two AD200 flashes into a 400 Ws, battery powered strobe.
You can find my first impressions in this video:

Want to learn how to work with flash? Then check out my comprehensive eBook Light It Up. It includes 3 bonus videos and a bonus set of Lightroom presets. If you happen to speak Dutch, there's also a Dutch (print and eBook) version called Flash! Flitsfotografie op locatie.
More lighting related blog posts


Stepping out of your comfort zone
From short lighting with a big softbox...
[Recommended soundtrack while reading this blog post: Stepping Out by Joe Jackson :-) ]
People are creatures of habit. So are photographers, at least this photographer is. There are areas where we feel more comfortable than others. For me, lighting wise, my comfort zone is flash. I love using flash. I know a lot of you find it complicated but I don't - at least not anymore. [Shameless plug: if you find flash intimidating, I've written a book that will help you overcome your fears. It's available here in English and here in Dutch - end of shameless plug].
The fact that I can reach into my gear bag and whip out my own portable sun is very reassuring to me. Comforting. Within that broad comfort zone of using flash, I have one technique I am more comfortable with than others. If flash is my house, then this technique is my sofa, so to speak... I could perform it on my slippers. In fact, I already have :-)
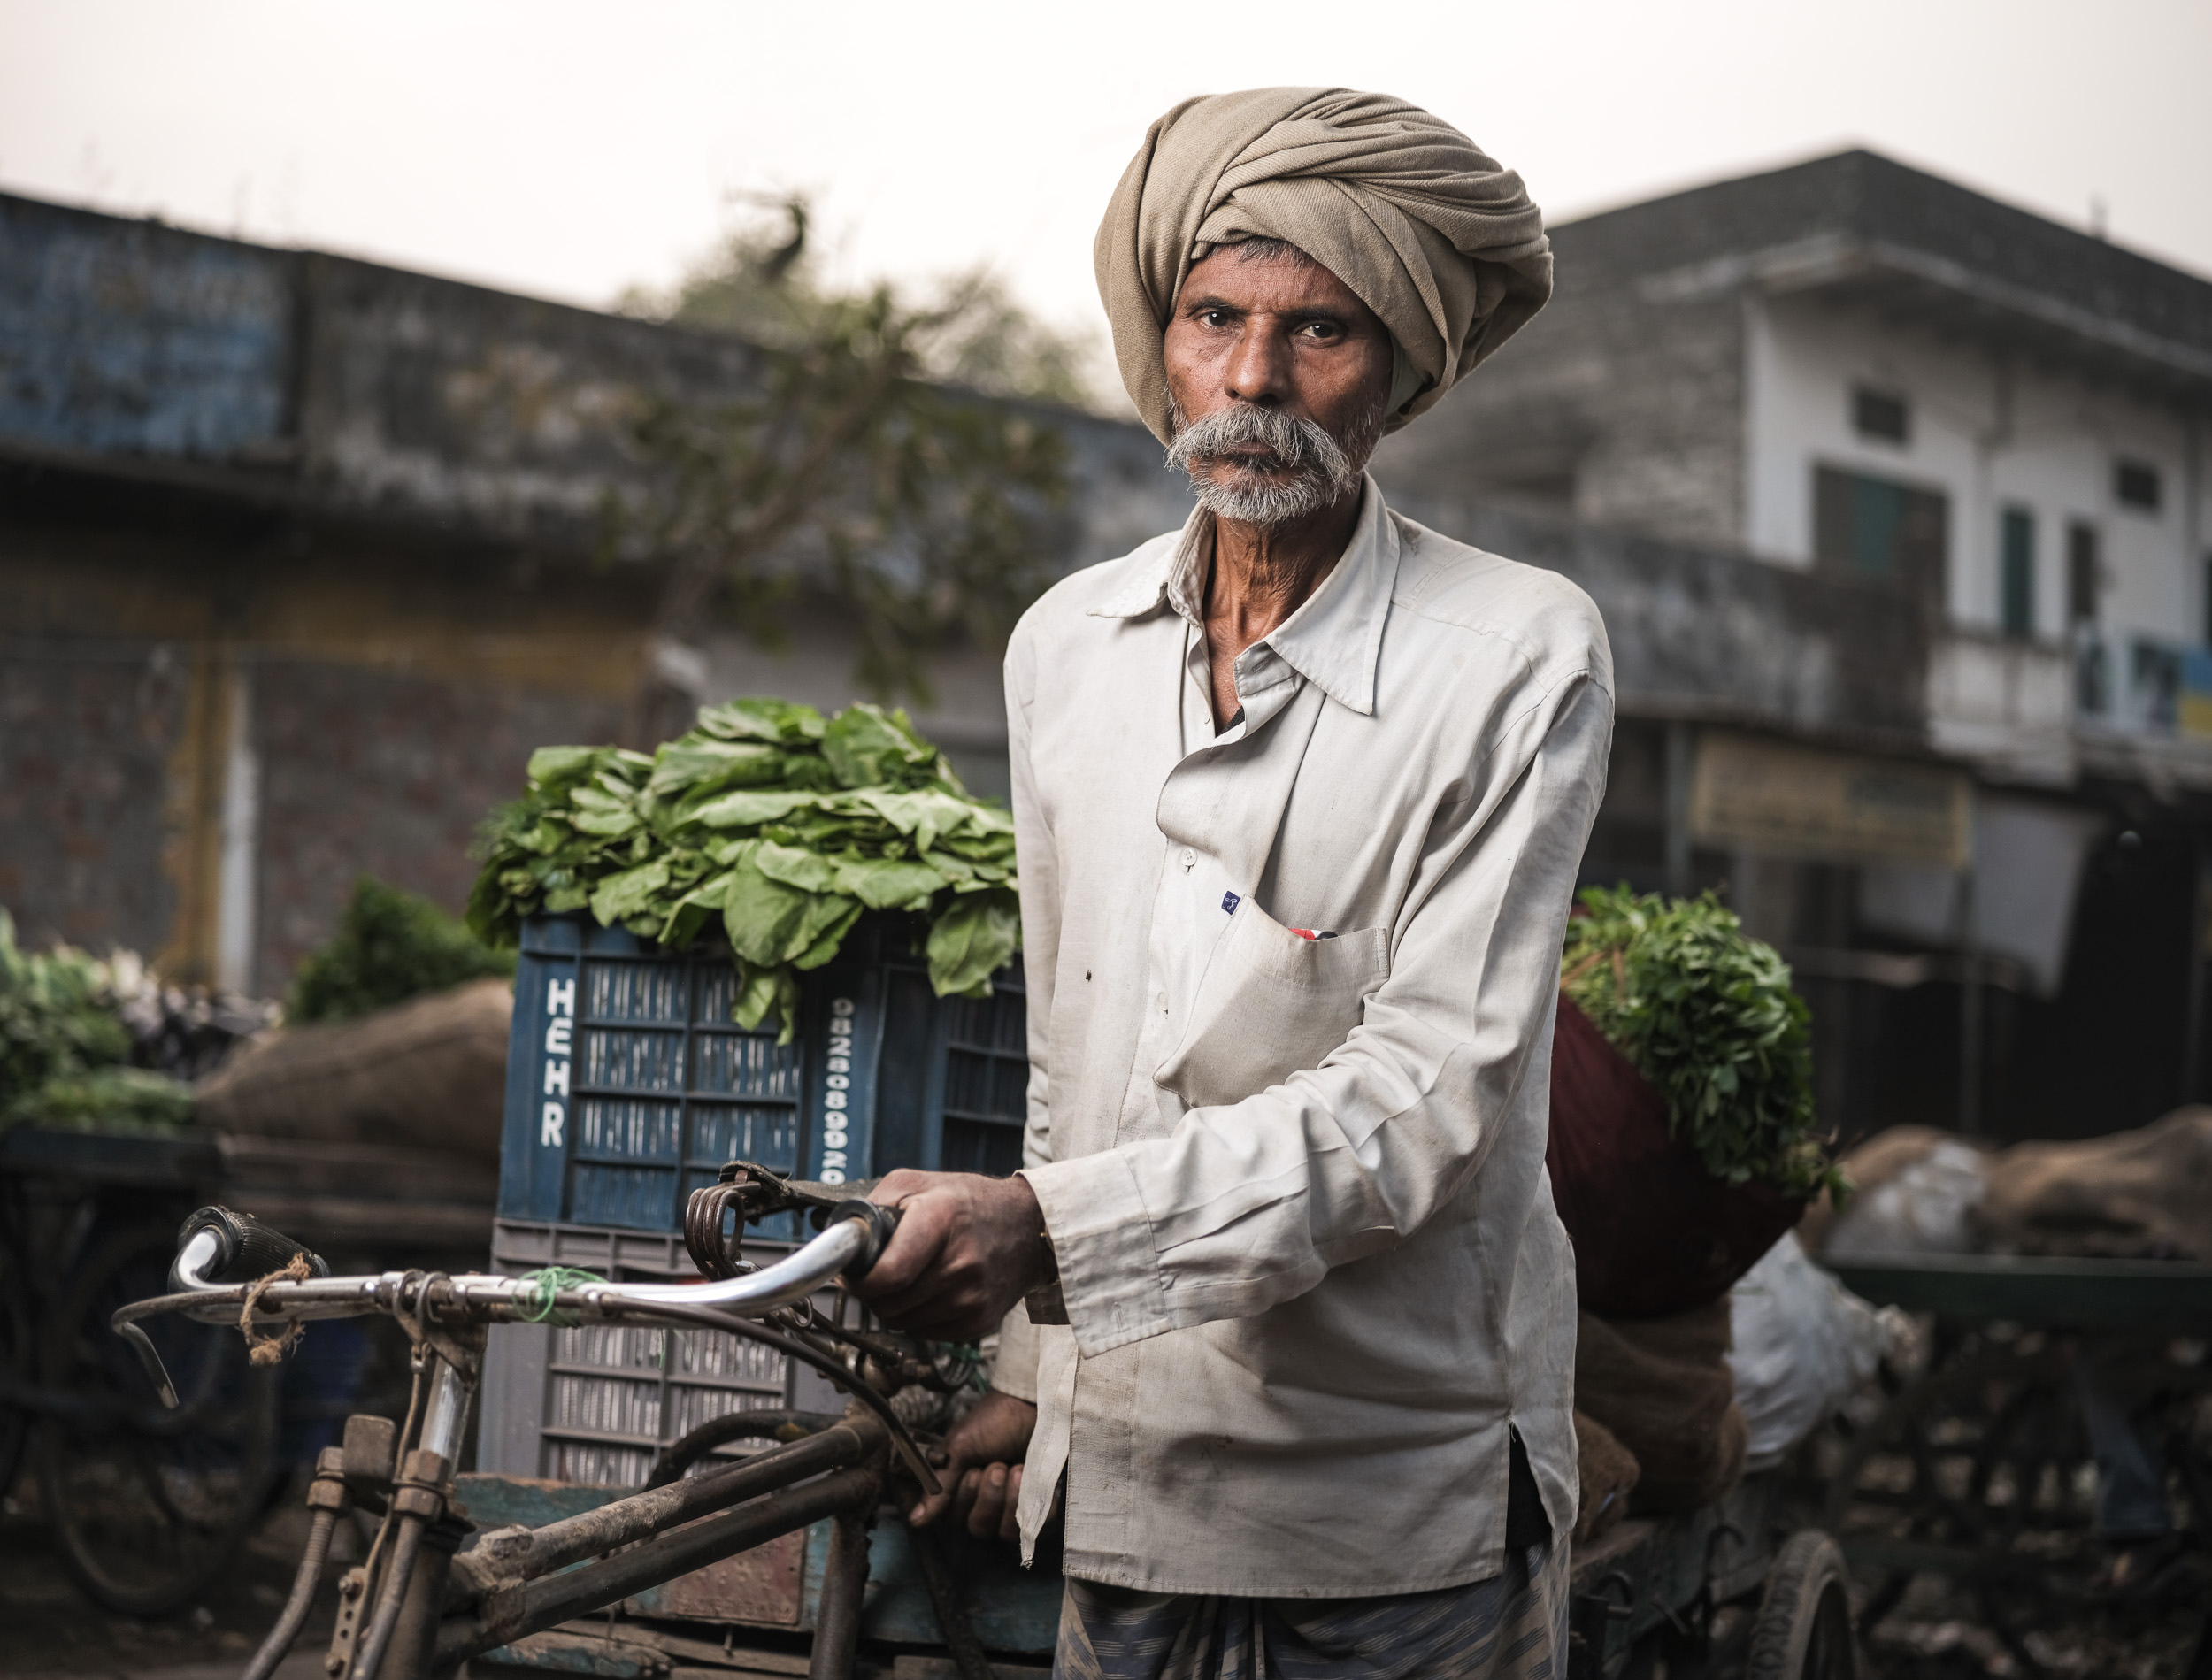
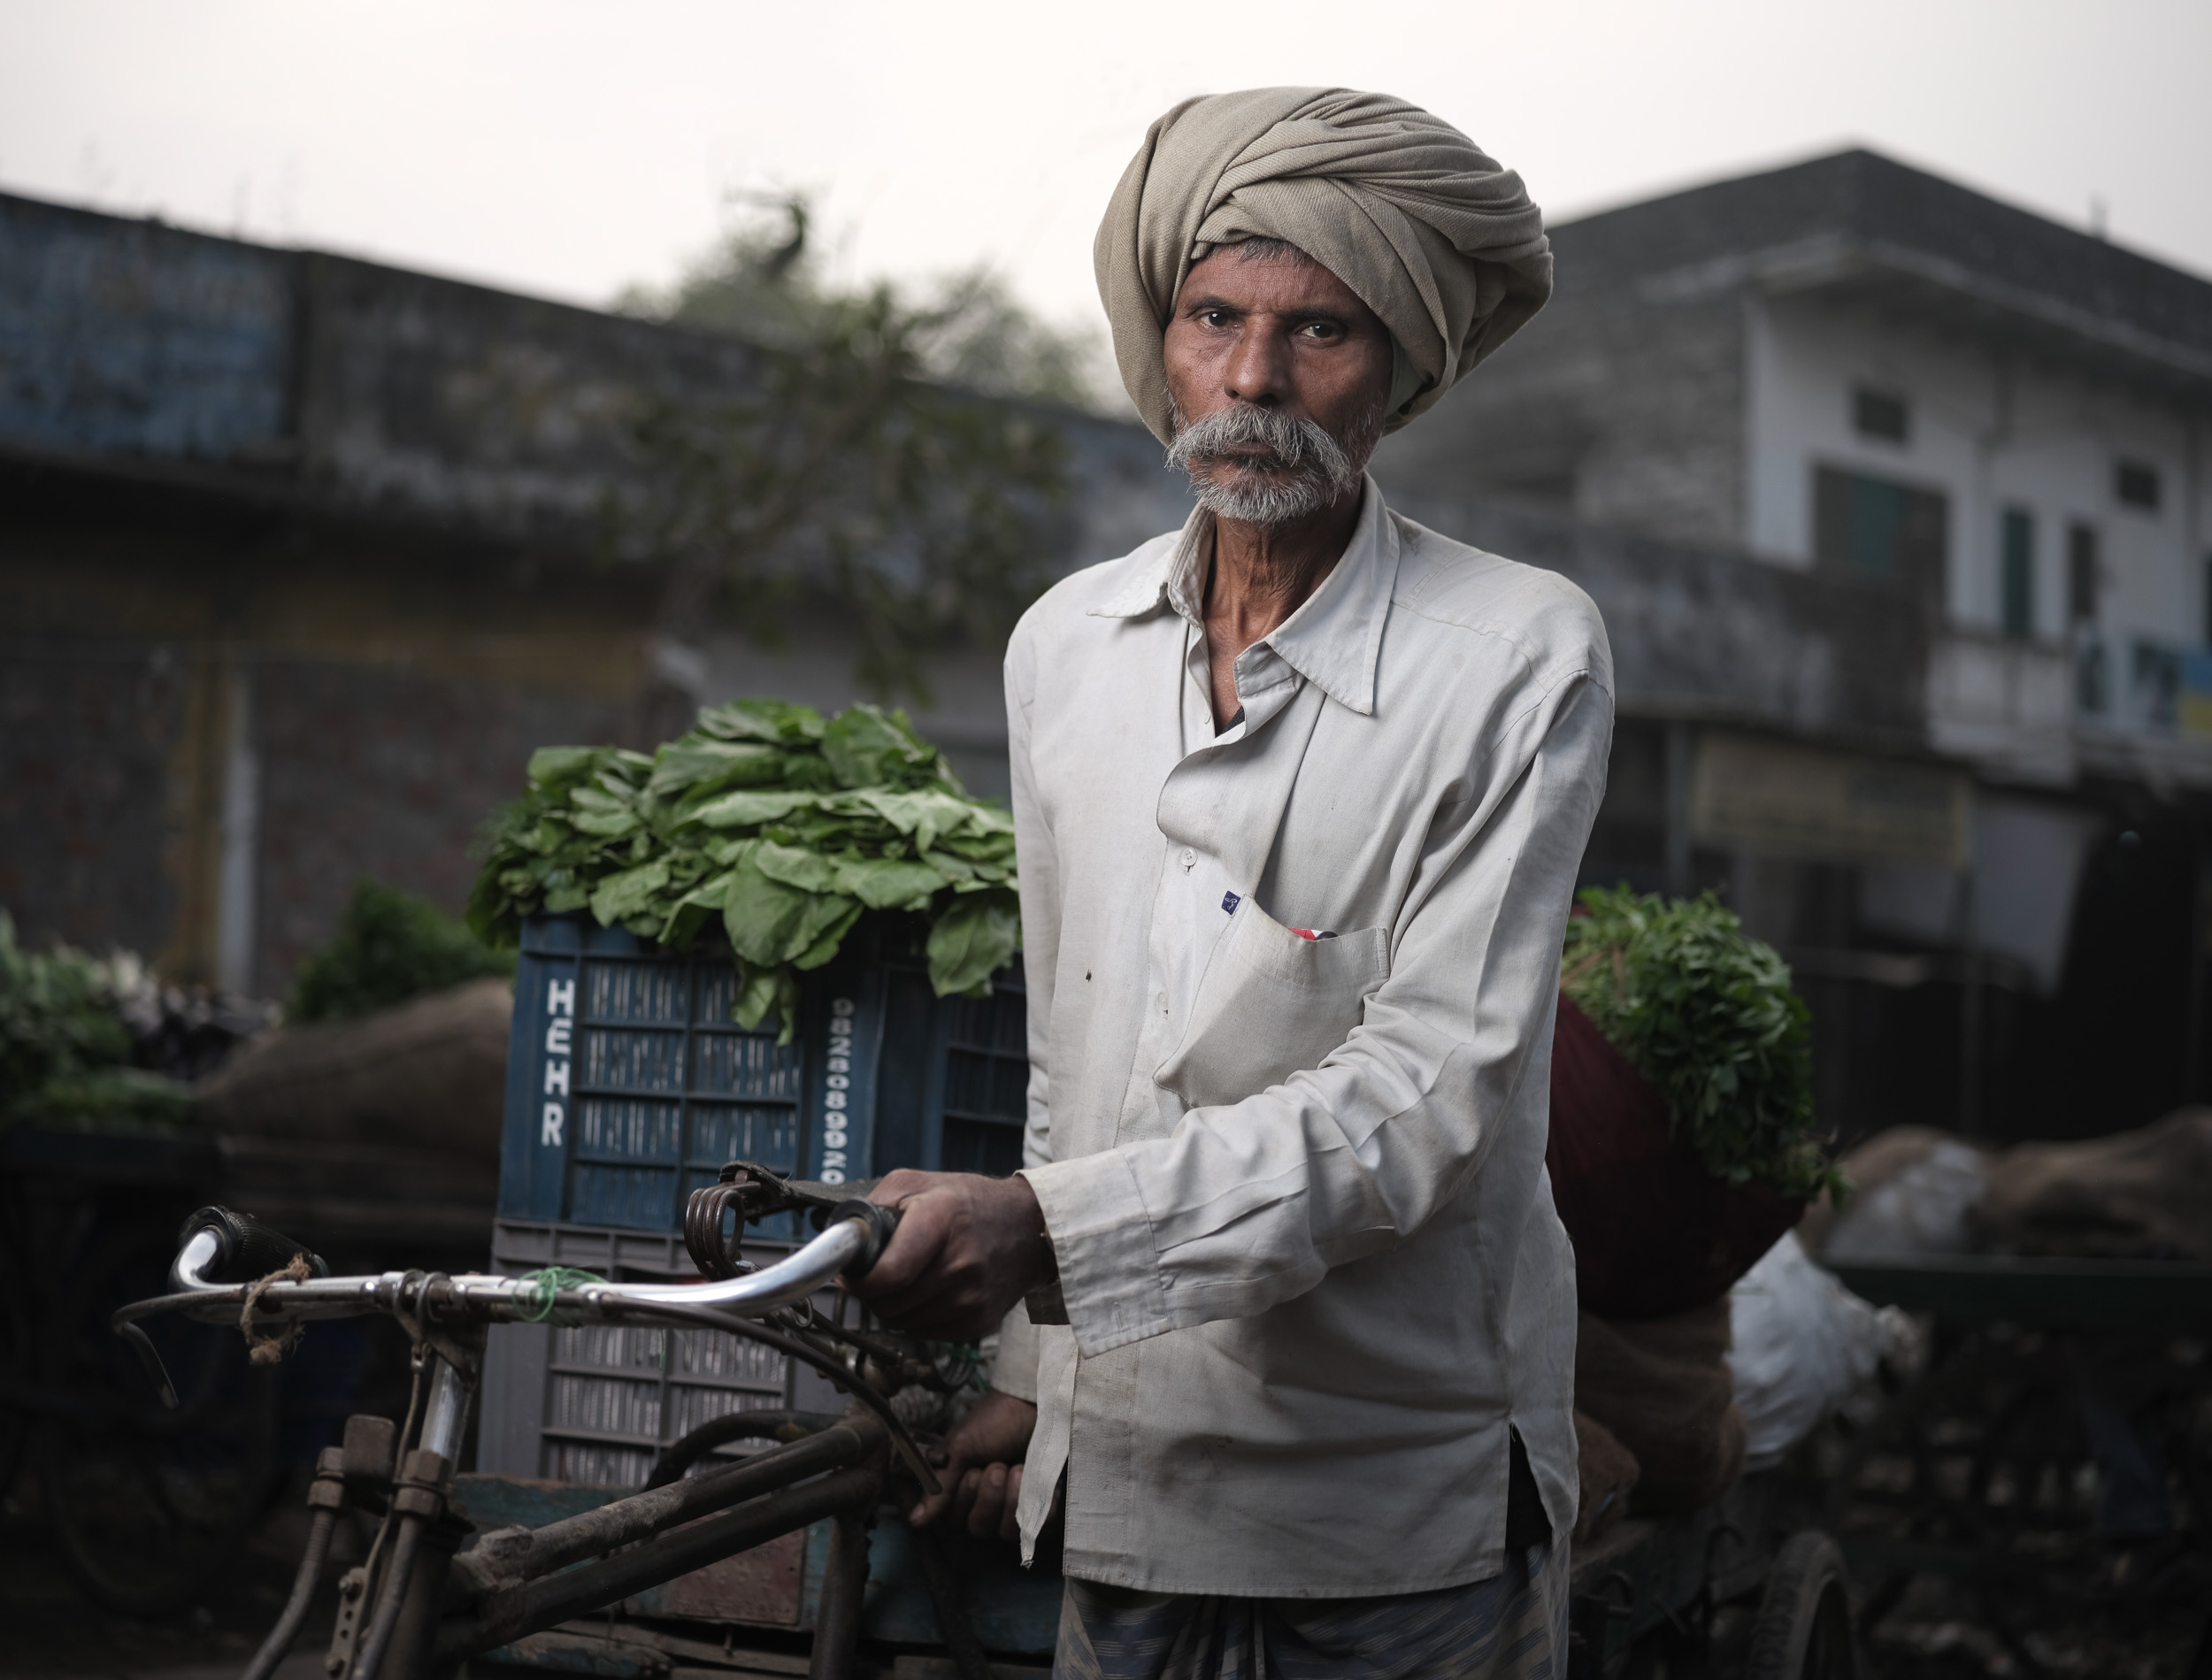
That go-to technique is the one you see in the image below: it's short-lighting with a relatively big softbox, combined with natural rim-light from the sun. My preferred softboxes are the SMDV Alpha 110 (this thing sets up in less than 15 seconds and breaks down in less than 2) and the Elinchrom Rotalux 175 cm. Generally, I'll be working with a standard to wide angle lens fairly wide open. In this image, the softbox was camera left, almost at a 90 degree angle to the camera. Because the subject has his face slightly turned to his right, the softbox predominantly lights the side of the face that's turned away from the camera, leaving a - in my opinion at least - beautiful Rembrandt triangle on the side of the face that's closest to the camera.
By putting my subject with the back to the sun, I kill two birds with one stone. First of all, I avoid squinting in the eyes and second, the sun gives me a free rim light, which helps to separate him from the background: do you see the narrow white line around the turban (camera right) and his shirt? That's the sun. I'll slightly underexpose the background and then I'll bring my subject back to the desired light level with the flash... I've done a zillion of these photographs and I'll probably do a zillion more, because I just like the look...

FUJIFILM GFX 50S | GX63mmF2.8 R WR @ 63 mm | 1-125 sec. @ f - 2,8 | ISO 500 - Flash was an SMDV BRiHT 360 in an SMDV 85 cm Speedbox
... Over short-lighting with a harsh light source...
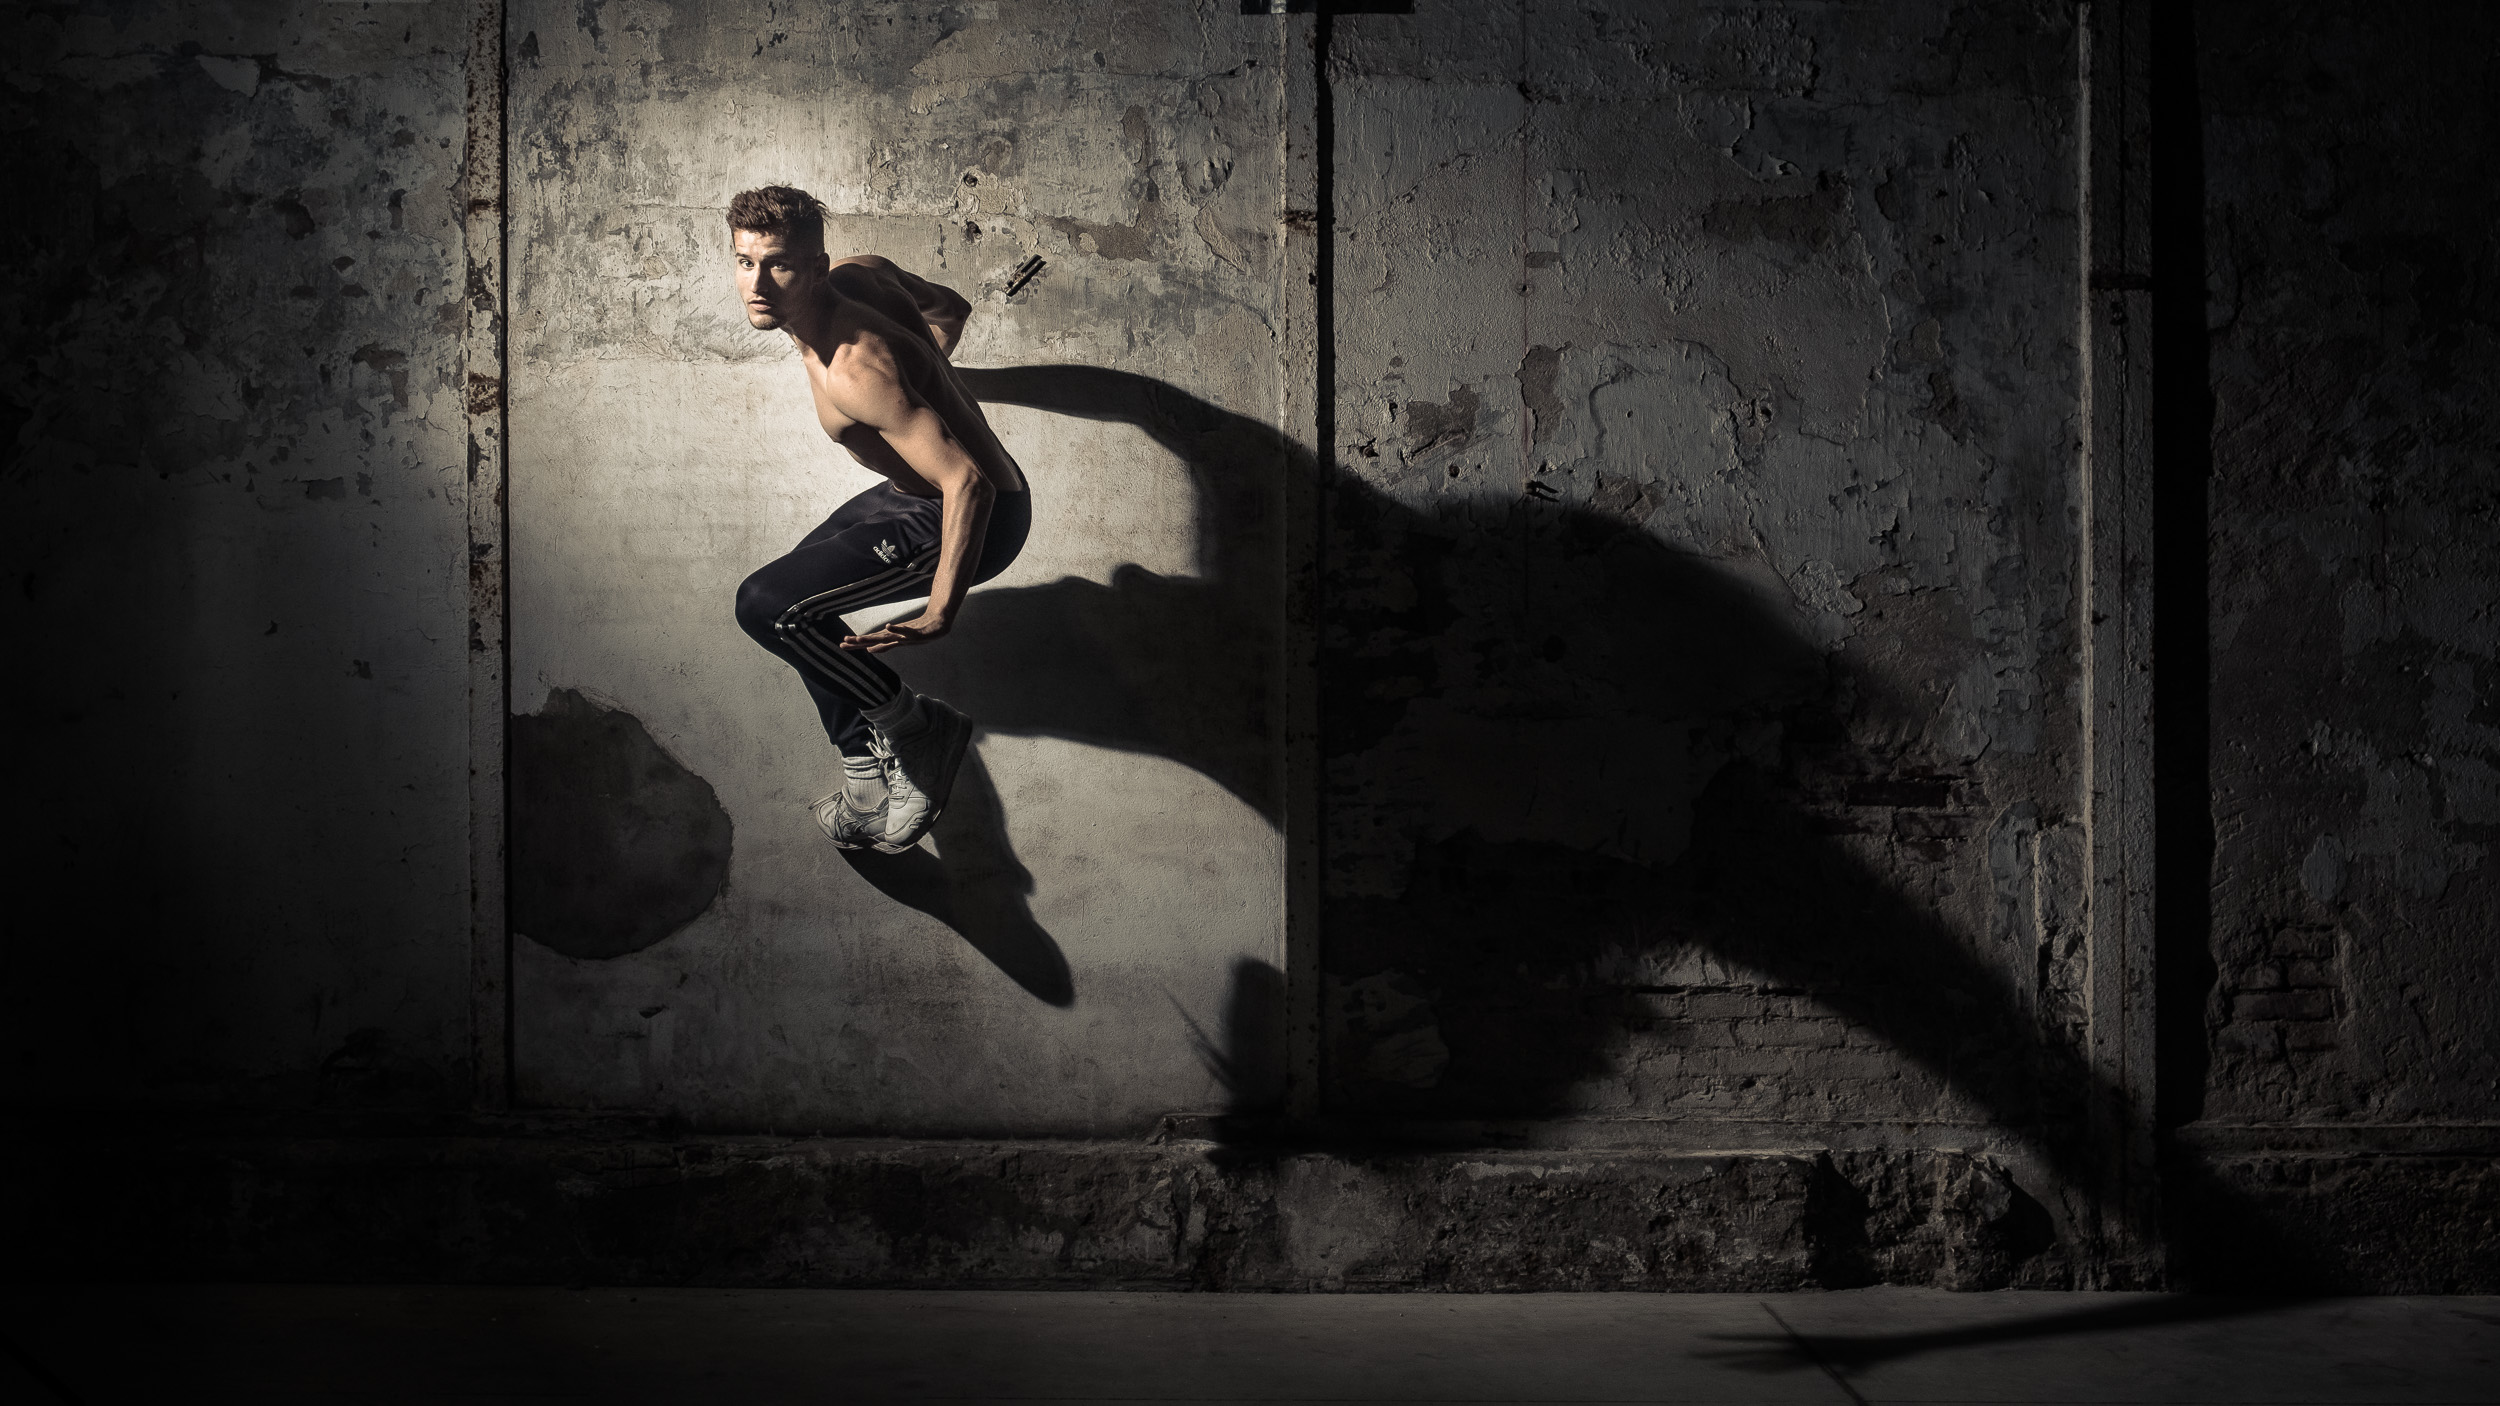
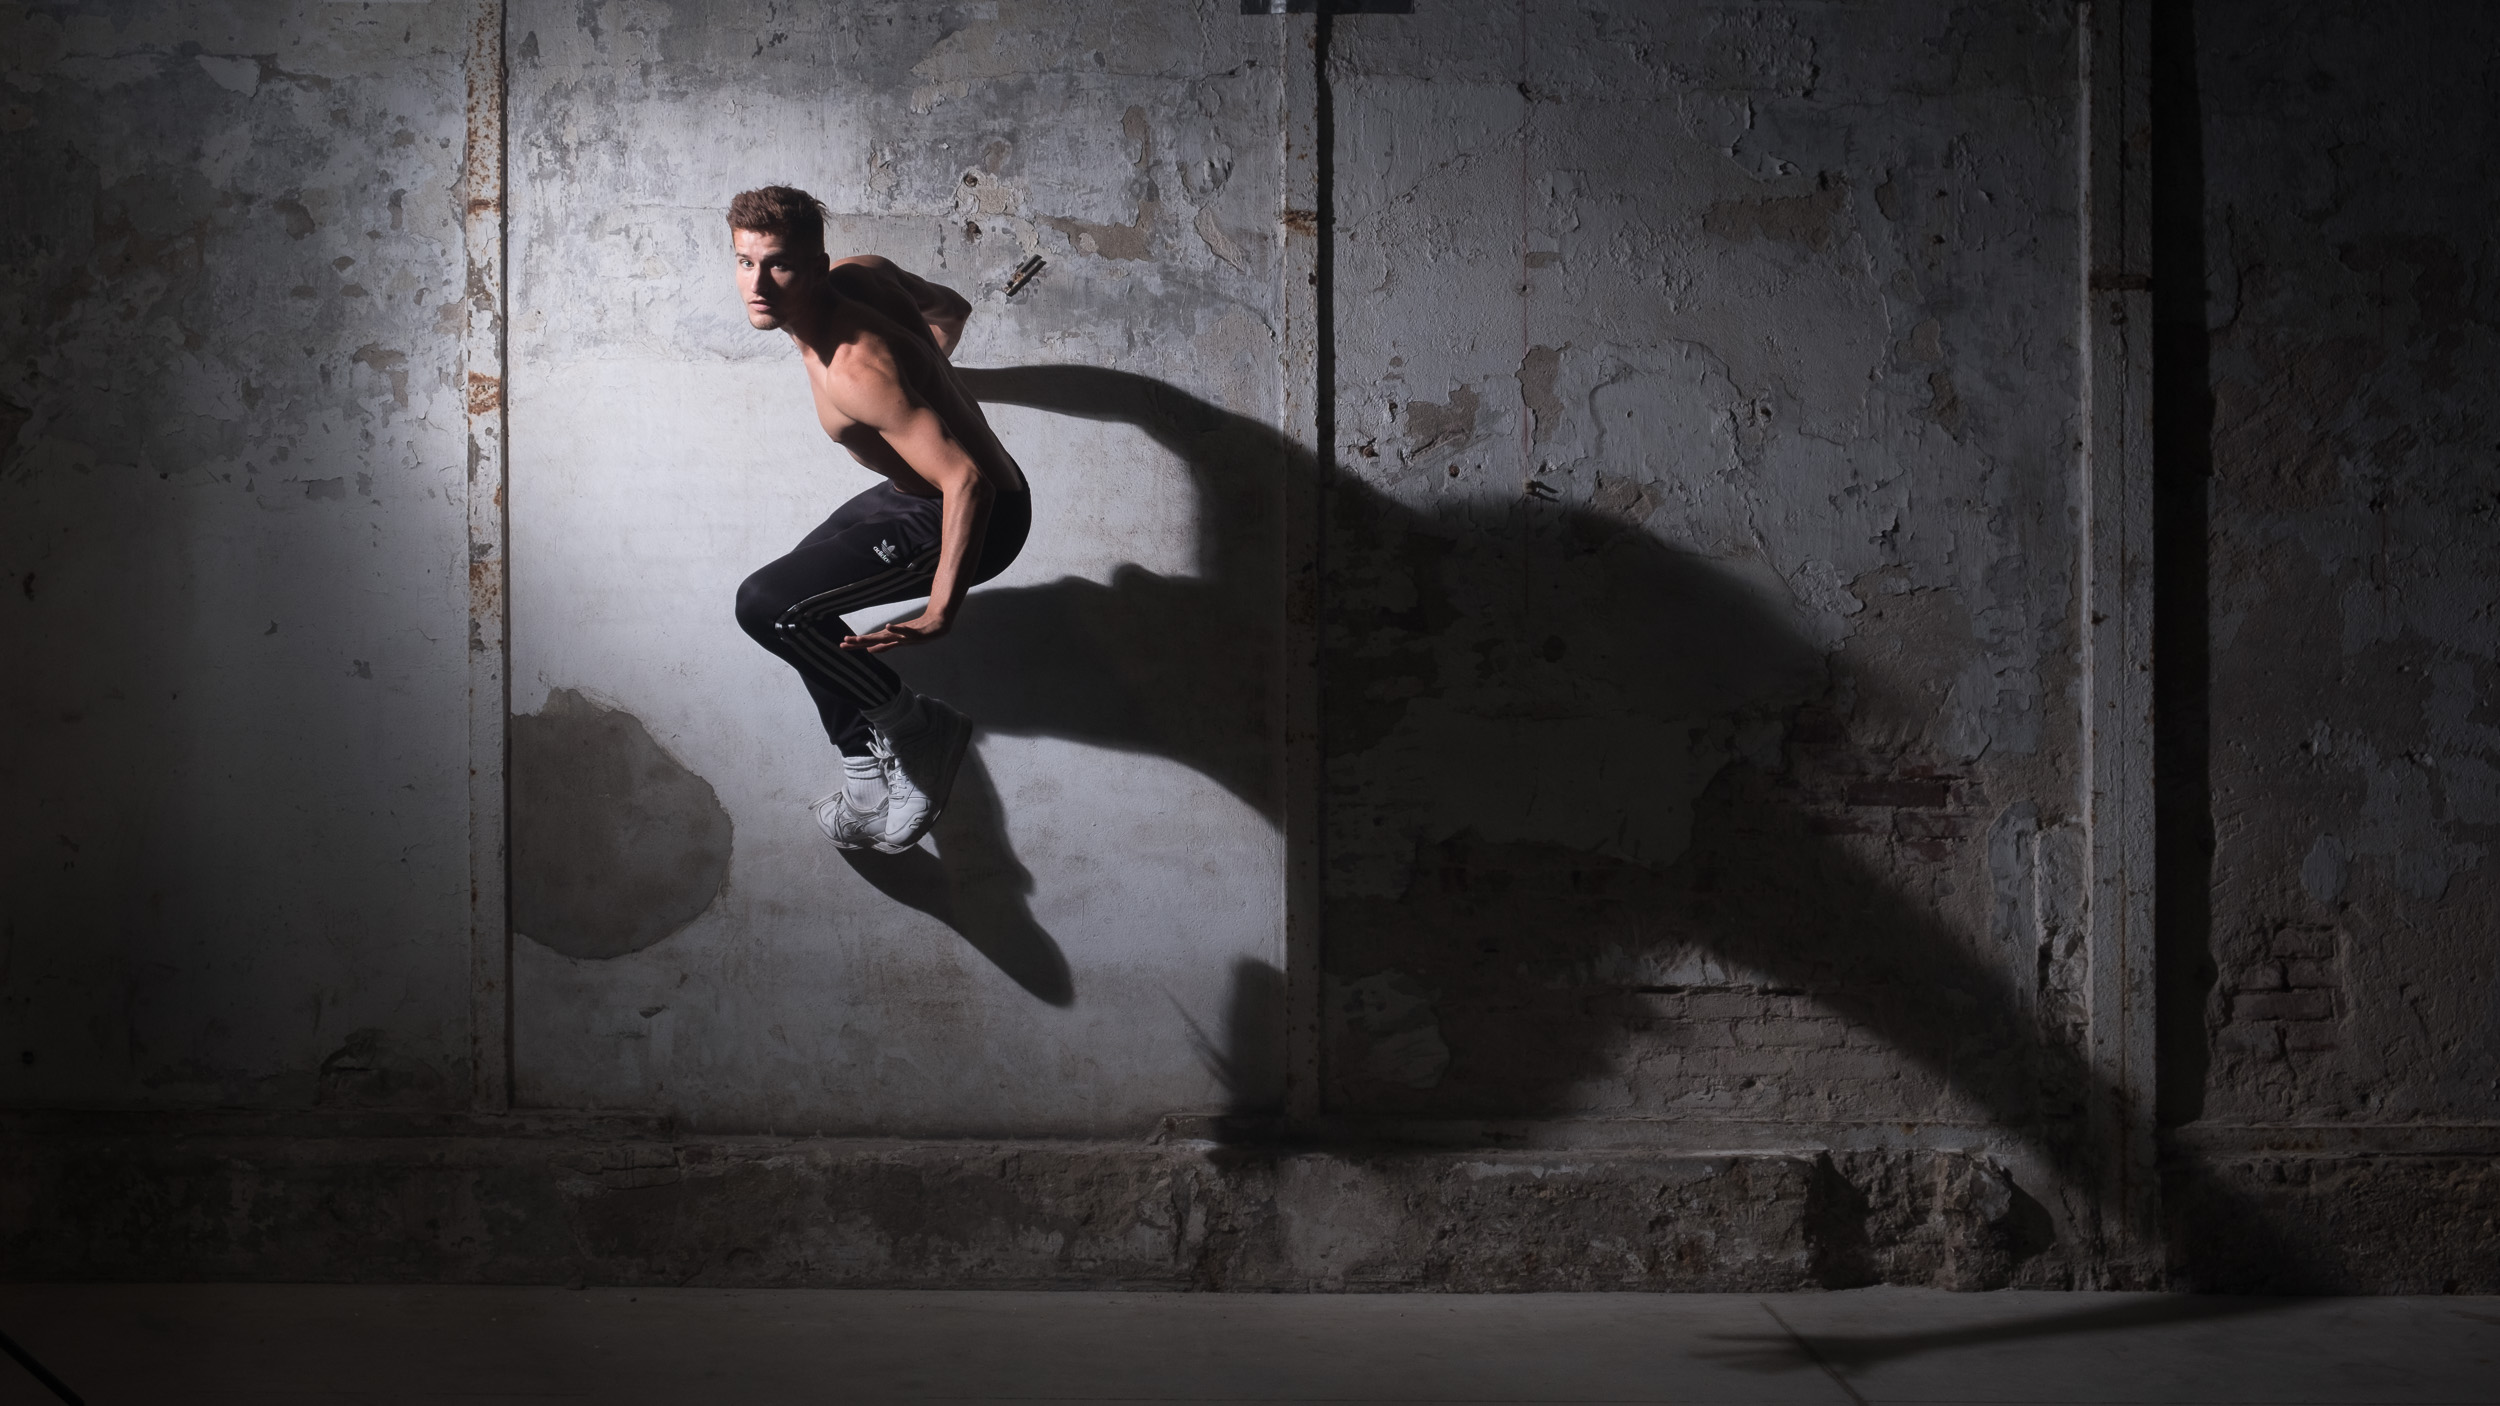
The danger of having a preferred style like this, is that you'll use it always and everywhere and that you no longer even consider alternatives that might be better. You might get a nice, safe shot, but not necessarily the one that fits the subject or the situation best. For the shot below, for example, I decided to break my usual routine. The big softbox I normally use, creates soft shadows, but here I wanted the shadow to be a part of the image, probably even the most important part. So I switched out the softbox for a standard reflector in this portrait of dancer Bradley. That's one step away from my comfort zone... But I did keep the short lighting look... We're going to get rid of that, too, in the next image...

FUJIFILM X-T2 | XF18-55mmF2.8-4 R LM OIS @ 31.5 mm | 1-160 sec. @ f - 7,1 | ISO 200 - Flash was a Godox AD200
... Over rim-lighting with a flash...
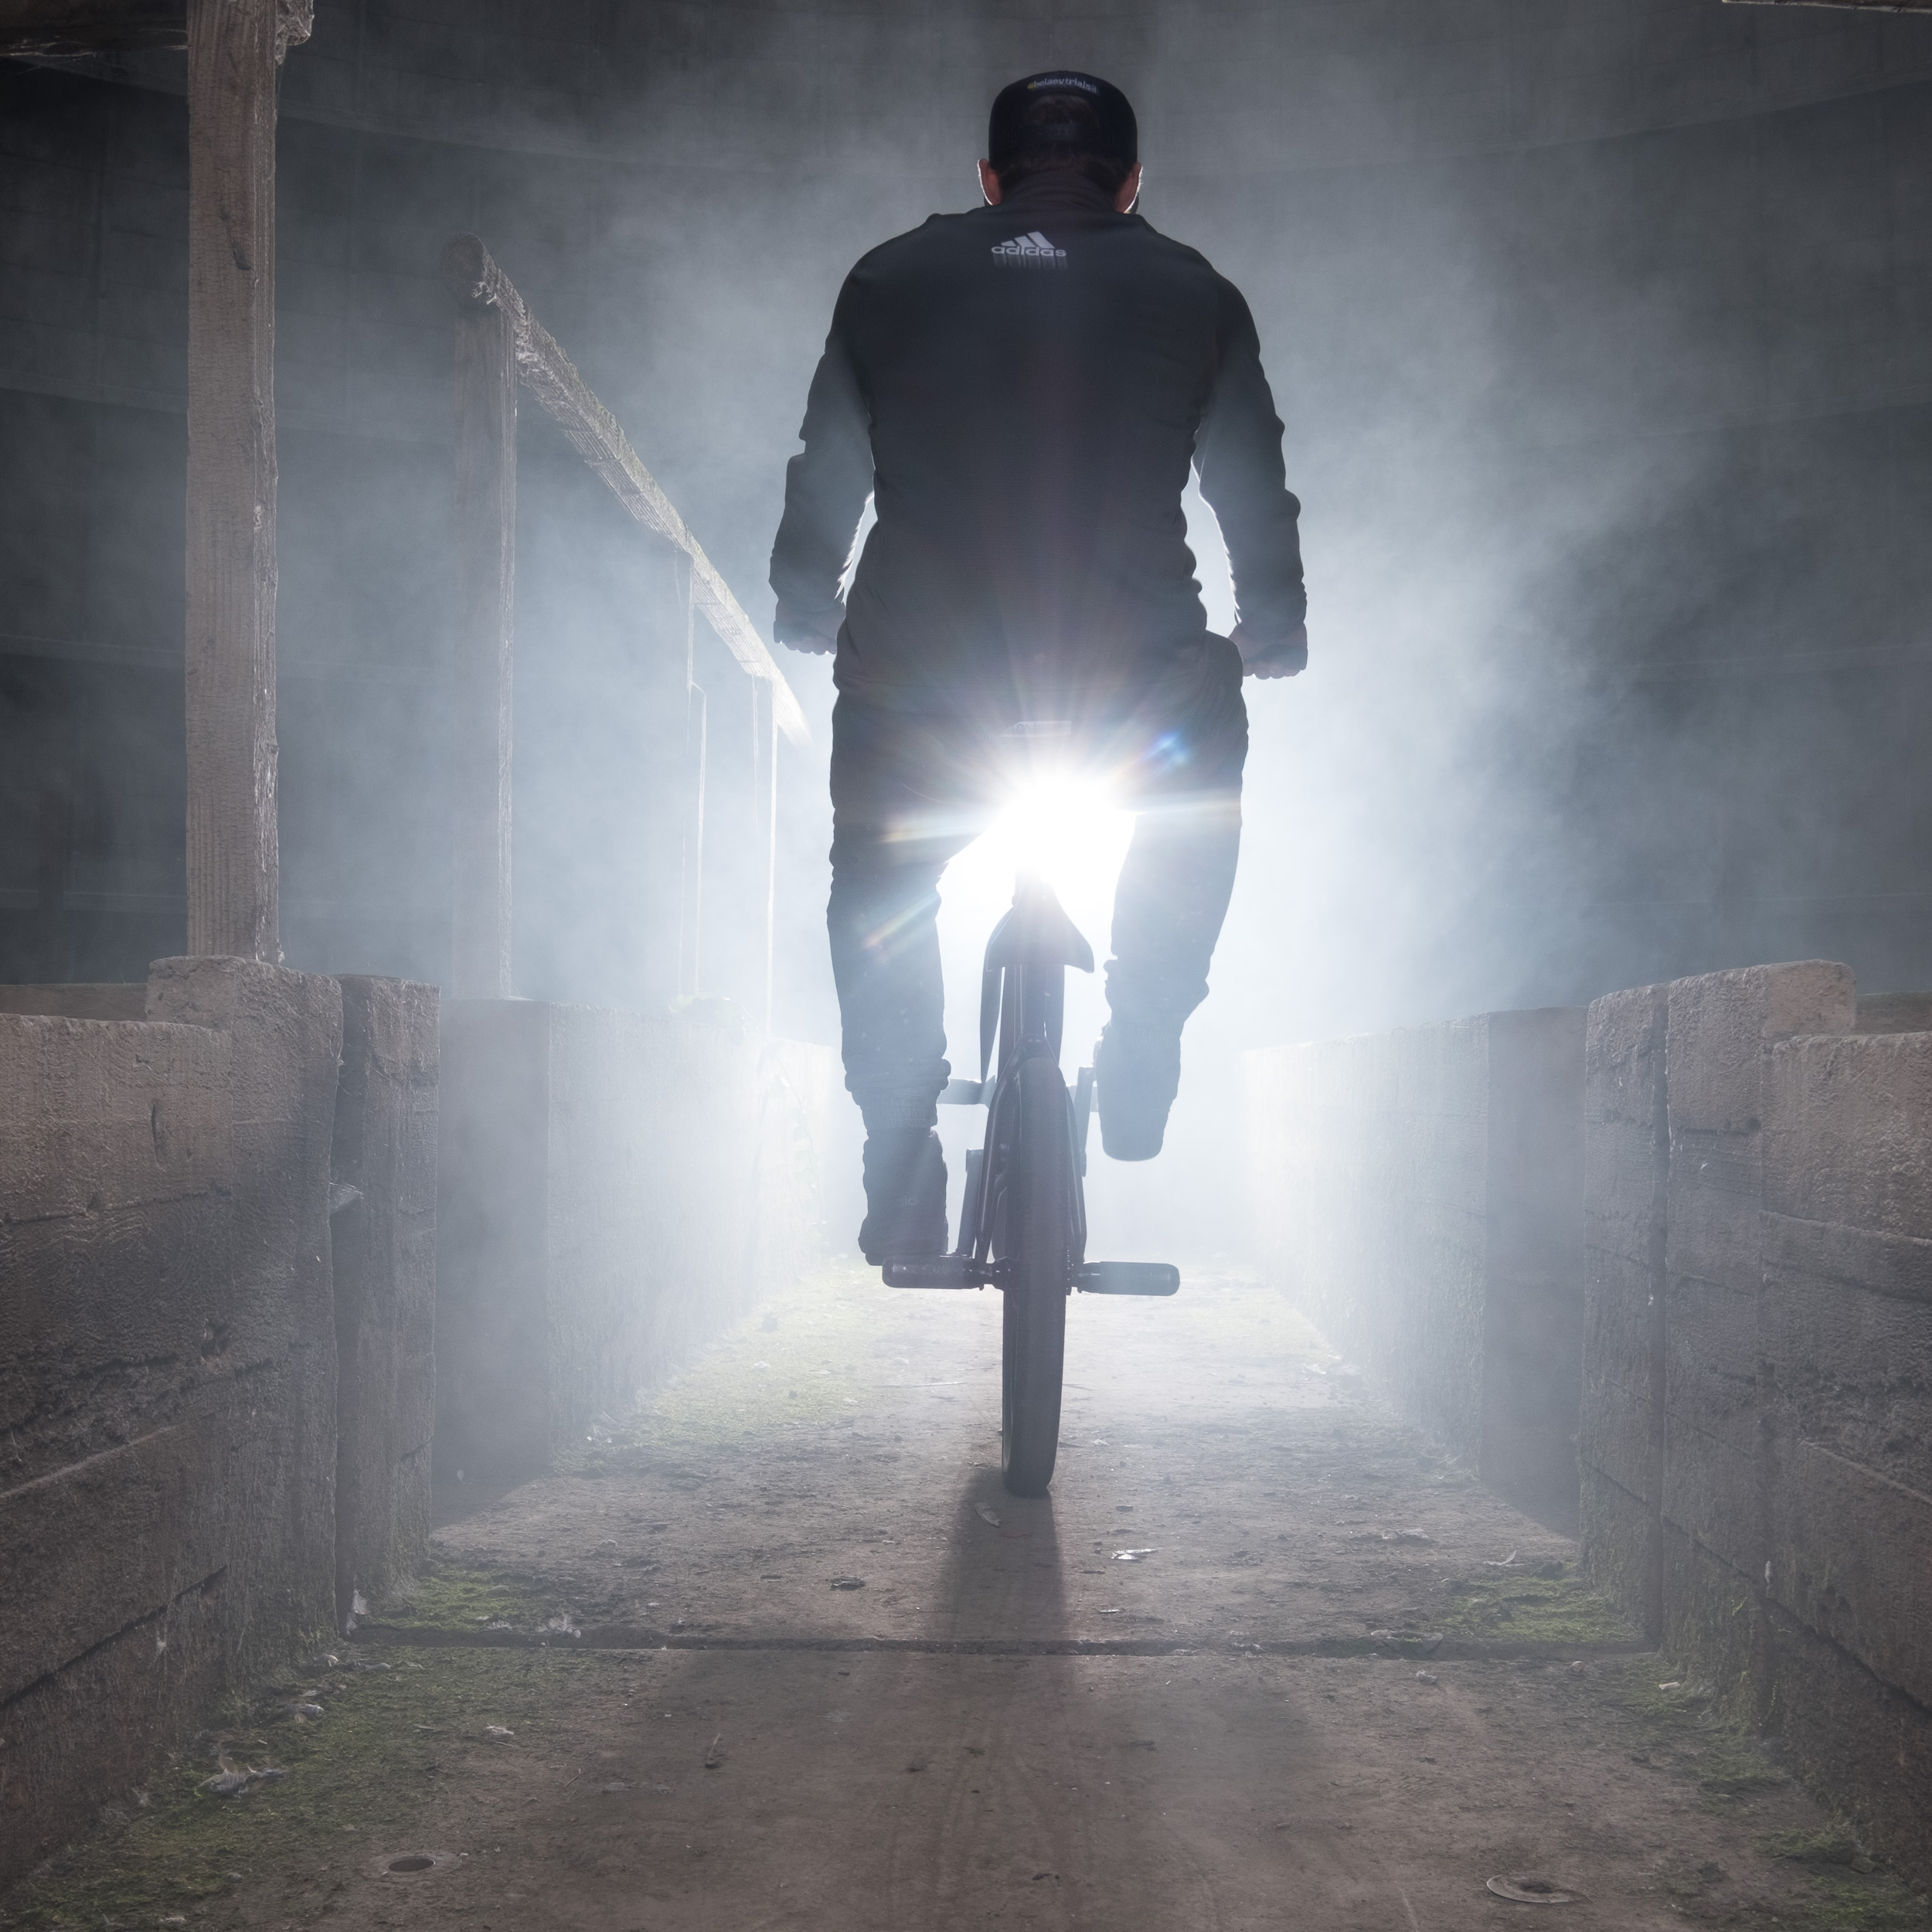
In this shoot of Barre, a BMX Flatland Rider (www.barrebmx.com) in an abandoned cooling tower, I started out in my comfort zone: two lights. For lack of sun, I used a second flash as a rim light. Both were Godox AD600 flashes. In this blog post, I explain why I am so fond of the Godox eco-system. This setup gave me a decent enough image. With that in my pocket, it was time to step out of the comfort zone.

FUJIFILM GFX 50S | GF32-64mmF4 R LM WR @ 32 mm | 1-60 sec. @ f - 8,0 | ISO 800 - Flashes used: 2 x Godox AD600
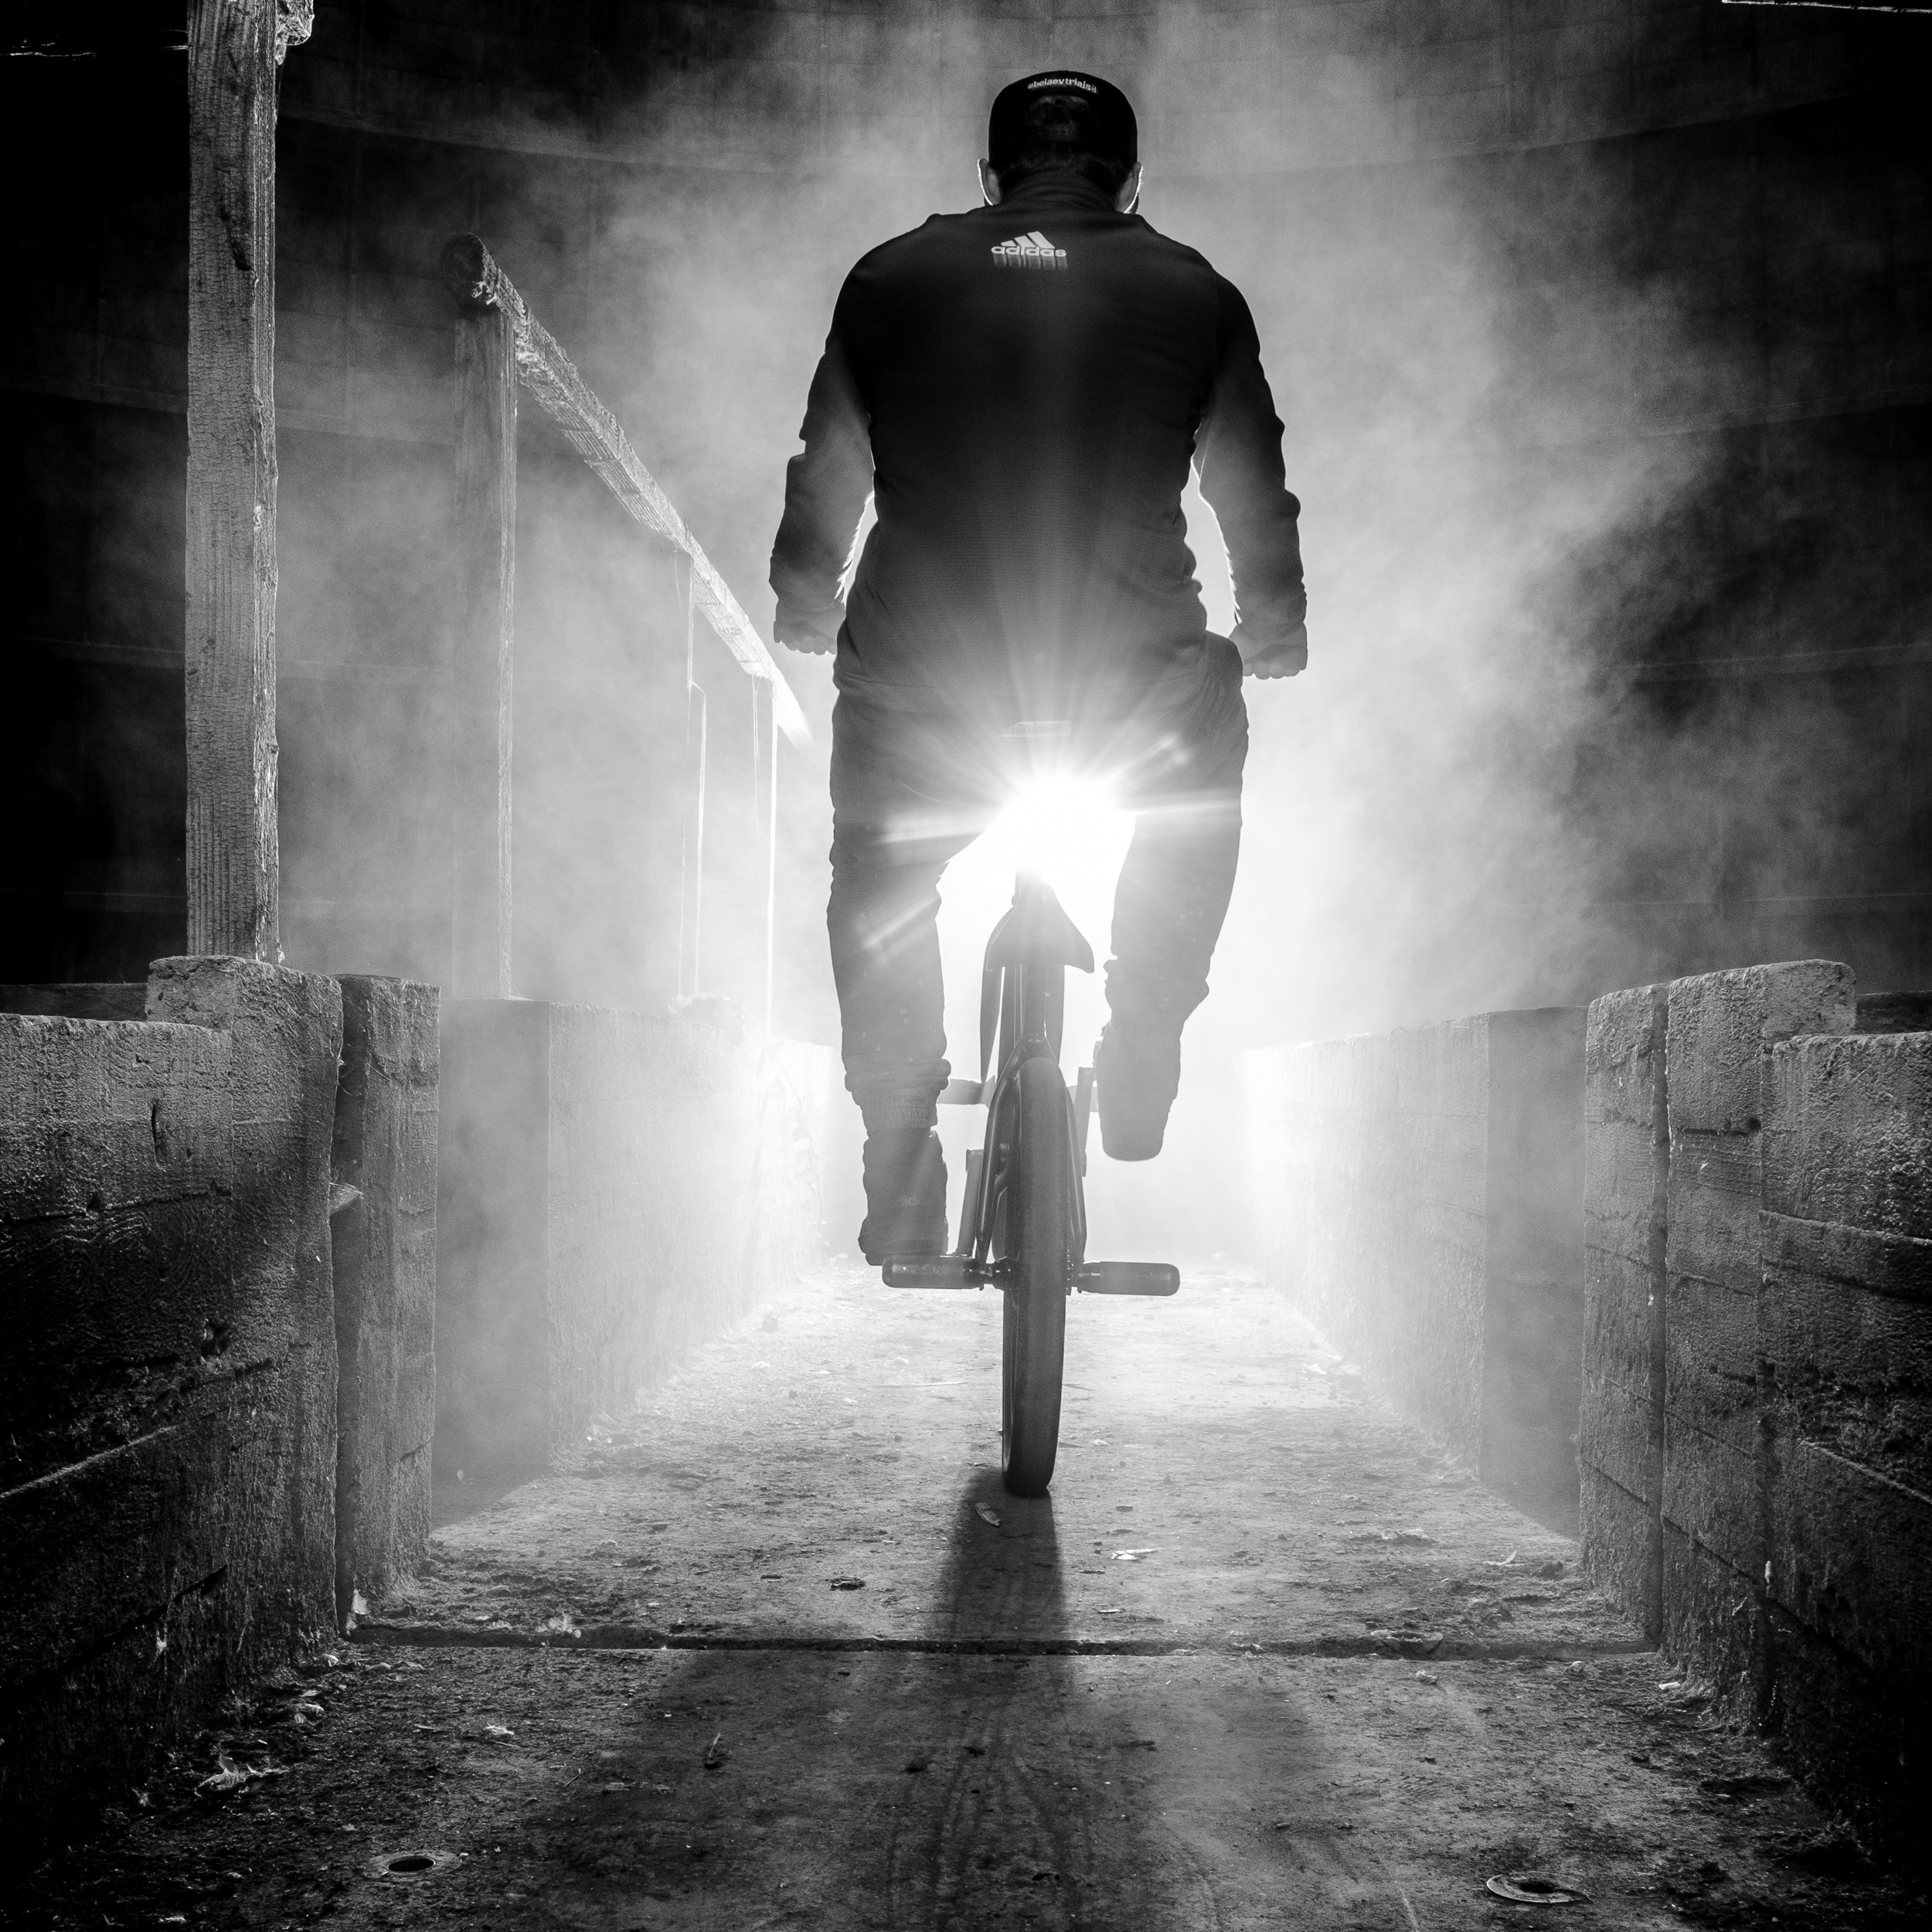
I love backlight, I love smoke and I looooove backlit smoke! To that effect, I'll often lug around my Scotty II, a portable, battery powered smoke machine. It's a totally different shot. Not better or worse, just different. But what matters is that it's a shot that I wouldn't have had if I had stayed in my comfort zone.

FUJIFILM X-T2 | XF18-55mmF2.8-4 R LM OIS @ 31.5 mm | 1-160 sec. bij f - 7,1 | ISO 200
To using natural light only...
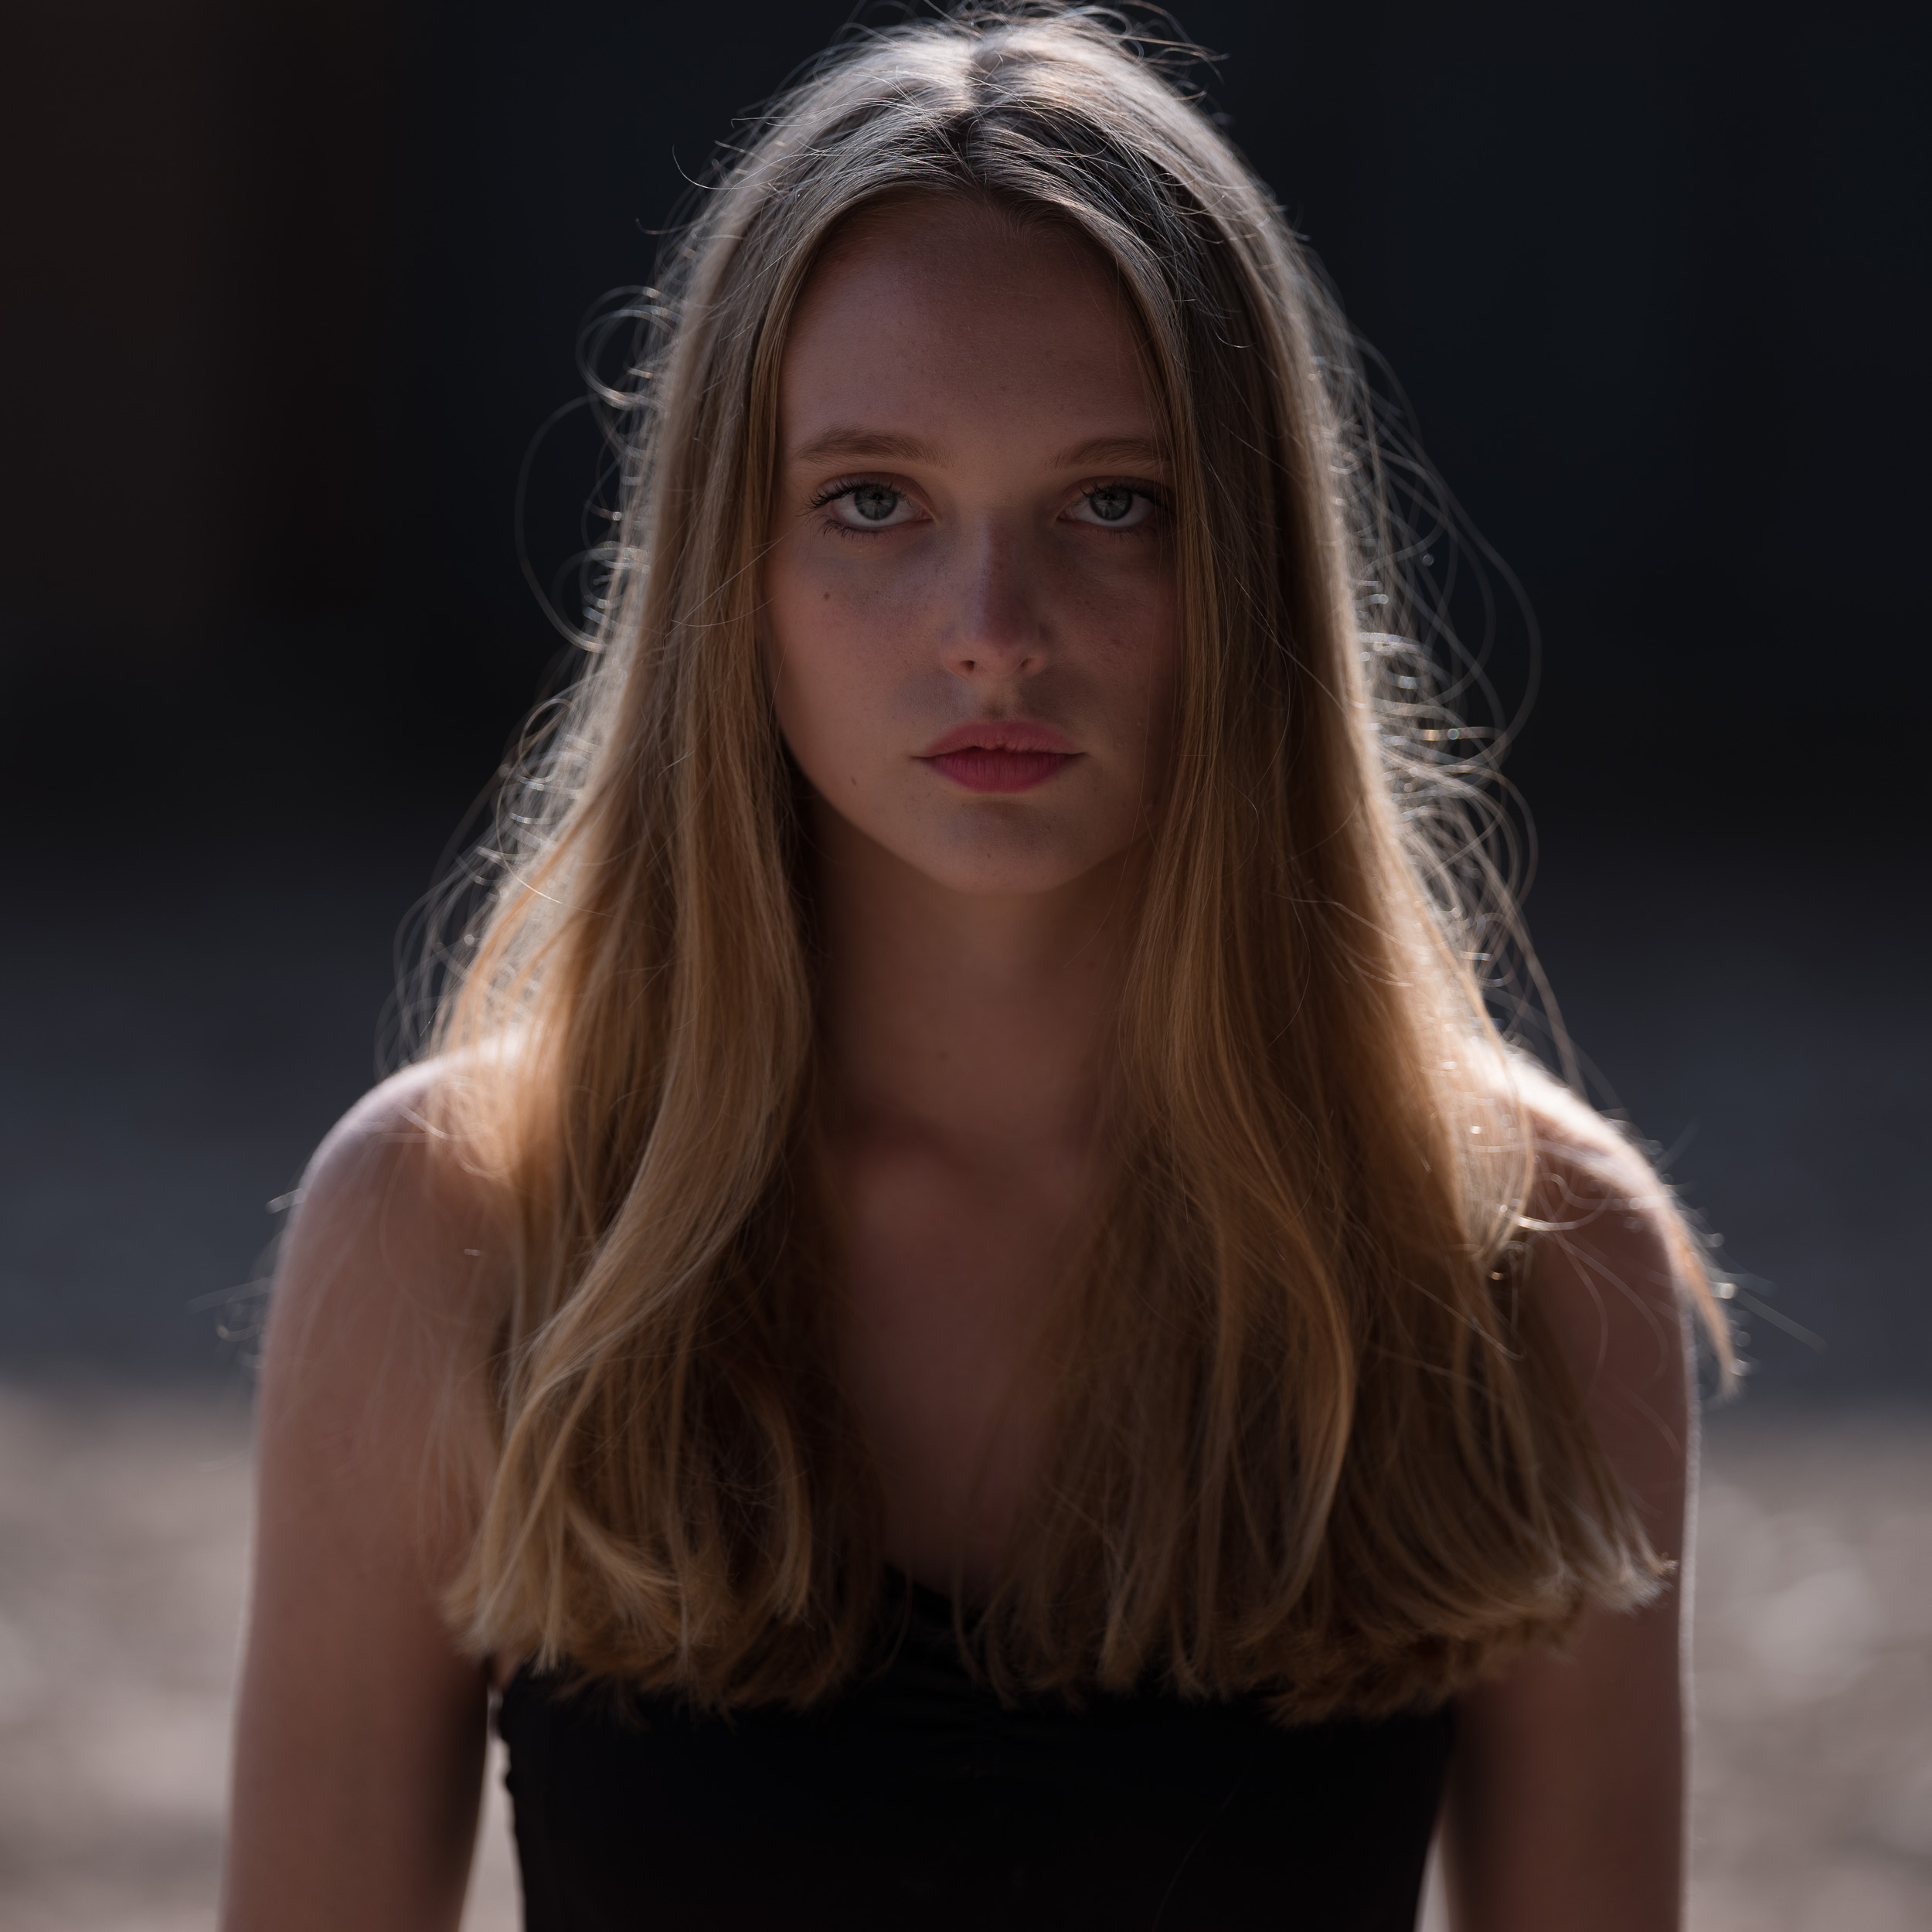
One way to get out of your comfort zone in a ... comfortable way, is to team up with a model and another photographer for a TFCD shoot. There's no stress to deliver, so you're free to do what you want and you can learn from the other photographer's handling of light. For this shoot, my buddy and fellow Fujifilm Ambassador Ioannis Tsouloulis (as far as names go, that's not a comfort zone!) and I got to work with Mila, a very talented young model who also happens to be a keen ballet danser. I did my usual wide-angle-big-softbox shot that you can see below.

FUJIFILM GFX 50S | GF23mmF4 R LM WR @ 23 mm | 1-500 sec. bij f - 8,0 | ISO 100-2
And then Ioannis challenged me to work with natural light only, and a reflector. I hate using reflectors (that would be another blog post entirely) and I'm not a big fan of using typical portrait lenses either, but I got one of the best shots from the day by stepping out of my comfort zone.
It also helps to have a stunning model, obviously. Mila probably would still look great with an on-camera flash and a toy camera, I think...

Postprocessing
In case you're wondering, the images above don't come rolling out of the camera like this. At least not out of my camera. There's always some degree of styling and retouching going on. That's not a shame or a bad thing, on the contrary, it can be an equally important part of your style as the actual photography. I do try to get my images more or less right in terms of overall exposure and composition, but then comes the fun part: the postproduction. Unlike many photographers I know, I really love this phase. Especially since I've started shooting with the Fujifilm GFX. Man, those pixels can take a digital beating! Below are some before and after comparisons. My edits are mainly done in Lightroom, using one of my Lightroom preset packs.
I just warmed up this image slightly and gave it a slightly more crispy look with a preset from 'Piet's Power Preset Pack, Vol. I'
I thought the dramatic light would go well with a more dramatic postprocessing that gave a gritty, urban feel to the image. This look was achieved by using one of my favorite presets (I've named it after my son, go figure!) Noah, which you can find in my Colorific Colour Grading bundle.
As Barre was already wearing black and there wasn't much colour in the background either, black and white was a logical choice to process this image. All it took was one click on one of my 'Piet Van den Eynde's Black and White Develop Presets for Lightroom'

I wanted the image to radiate with warmth, so I chose a warming preset from my Power Preset Pack and increased the Exposure some more.


FUJIFILM GFX 50S | GF32-64mmF4 R LM WR @ 32.6 mm | 1/1000 sec. @ f/4.5 | ISO 1000 | Godox AD600 with SMDV Softbox as main light + Godox AD200 + Strip light as rim light + Godox AD200 as background light | Triggered by Godox X1T-F trigger for Fujifilm
Why I use Godox flashes with my Fujifilm cameras
in Lighting
January 23, 2018 update: The below still holds true, in fact, it's only gotten better. In the original video, I am using the TT350F mini flash as a trigger, because at the time it was the only way to use High Speed Sync with Fujifilm cameras. However, over the past 6 months, Godox have not only issued a Fujifilm version of their X1 trigger (the X1T-F), but also of their latest XPro trigger (the XPro-F). I'll report on the latter as soon as I've had a chance to play with it...
As I am a Fujifilm shooter who loves to use flash, I get asked a lot which flash system I recommend for Fujifilm users. In my opinion, the Godox 2.4 GHz flash eco-system is currently one of the most interesting choices, especially if you want your flash gear to be able to grow with your flash power needs. Because that's how it generally goes: you start out with one speedlight-style flash on your camera. Then you start to use it off-camera... Then you discover that sometimes, a speedlight isn't powerful enough and so you start looking for a more powerful flash. But wouldn't it be cool if you could still use that speedlight together with that bigger flash?

FUJIFILM GFX 50S | GF23mmF4 R LM WR @ 23 mm | 1/1000 sec @ f/4 | ISO 100 | Godox AD600 in an SMDV Alpha 110 Speedbox. This picture would actually have looked better with a slower shutter speed (to slightly blur the movement of the train), but the point of the tutorial was to show the High-Speed Sync capabilities of the Godox system in combination with Fujifilm cameras, so I deliberately set my camera to a high shutter speed...
That's what the Godox 2.4 GHz ecosystem can do for you. Not only is it currently one of the very few to support HSS and TTL for Fujifilm cameras*, but Godox also has an entire range of Fujifilm compatible flashes, ranging from the small TT350F over the recently announced TT685F, the Ving V860IIF (which I hope to review later) and the 200 Ws AD200, all the way to the 600Ws AD600. Using an optional head, you can even combine two AD600 units into one whopping 1200 Ws flash system. That's a lot of sun-stopping power! The nice thing about this eco-system is that you can mix and match the flashes according to your needs, put them in different groups and use them in Manual or TTL mode and even in High Speed Sync with an X-T2, X-T1, X-Pro 2 and GFX*. In this video, I am using the TT350F as a commander. If you want a more powerful commander flash, you can opt for the Ving V860IIF or the TT685F. If you just want a trigger, the recently introduced X1T-F will do the job nicely.
Best, of all, the Godox gear is quite affordable, which lets you save some money to invest in Fujifilm cameras or lenses... Speaking of which, in this video, you can see me using the TT350F, AD200 and AD600 in combination with the Fujifilm GFX50S, the GF 23 and the GF 110. Warning: gear overdose ahead! Special thanks to Frannie, Frank & Ioannis. Thanks also to Fujifilm Belgium and Disnet.nl, the Dutch importer of Godox.
* With other Fujifilm cameras, some features are not supported. Not on all Fujifilm cameras: check the Godox website for specifics.

Want to improve your flash skills?

My just released eBook, Light it Up! Techniques for Dramatic lighting will teach you everything you need to know. Everything explained in plain English with lots of behind the scene shots or lighting diagrams. For those who already have some flash experience under their belt, there are also more advanced chapters on gear and light setups. The book also contains plenty of buyer's advice (did you know that some brand flashes cost up to three times as much as third party alternatives, while not offering more power or features - sometimes even less).
Finally, it comes with two cool bonuses: a set of three fifteen minute videos and a sample set of Lightroom presets.
Light It Up! Deluxe (including bonuses) retails for only € 29.95 / USD 34.95. Code light10 gets you 10% off!
P.S. If you speak Dutch, the book is also available in Dutch (both as a print book and an eBook).


Featured in the Official Fujifilm X Magazine!
I am honored to be featured in the 20th issue of the official Fujifilm X Magazine in an article about travel photography. I not only talk about classical travel photography, but also urbex photography, which I consider to be traveling back in time! You can download this and the previous editions of the magazine here for free.
The cover image was shot mixing flash and available light during my 5 day GFX Challenge shoot in India, the video of which you can see below. If you're interested to know more about flash photography, check out my latest book Light It Up! Techniques for Dramatic Off-Camera Lighting (in English) or Flash! Flitsfotografie op locatie (in Dutch).

Using Flash to Improve your Photographs
in Lighting
People often ask me why I take a flash to destinations like India or Indonesia. After all, isn’t there enough sun over there? The problem is they mistake quantity with quality. Sure enough, there’s plenty of sun in Varanasi or in Borobudur. In fact, there’s often too much of it, especially on those cloudless days these countries seem to have some sort of patent on. From early in the morning to right before sunset, there is often so much sun that, unless you’re photographing in the shade, the contrast is too much to handle. Bringing a flash will let you soften that contrast, by opening up the harsh shadows the sun creates. The more powerful the flash, the more options you have: a small speedlight will let you fill in the shadows, whereas a big strobe will even let you overpower that sun, allowing you to turn midday into evening. By using modifiers such as softboxes and umbrellas, you can create soft light where ever you want, even if the available light is unpleasing.

FUJIFILM X-E1 | XF14mmF2.8 R @ 14 mm | 1/200 sec @ f/8 | ISO 200
A small flash with an umbrella, put camera left was used to fill in the shadows caused by the late afternoon sun.
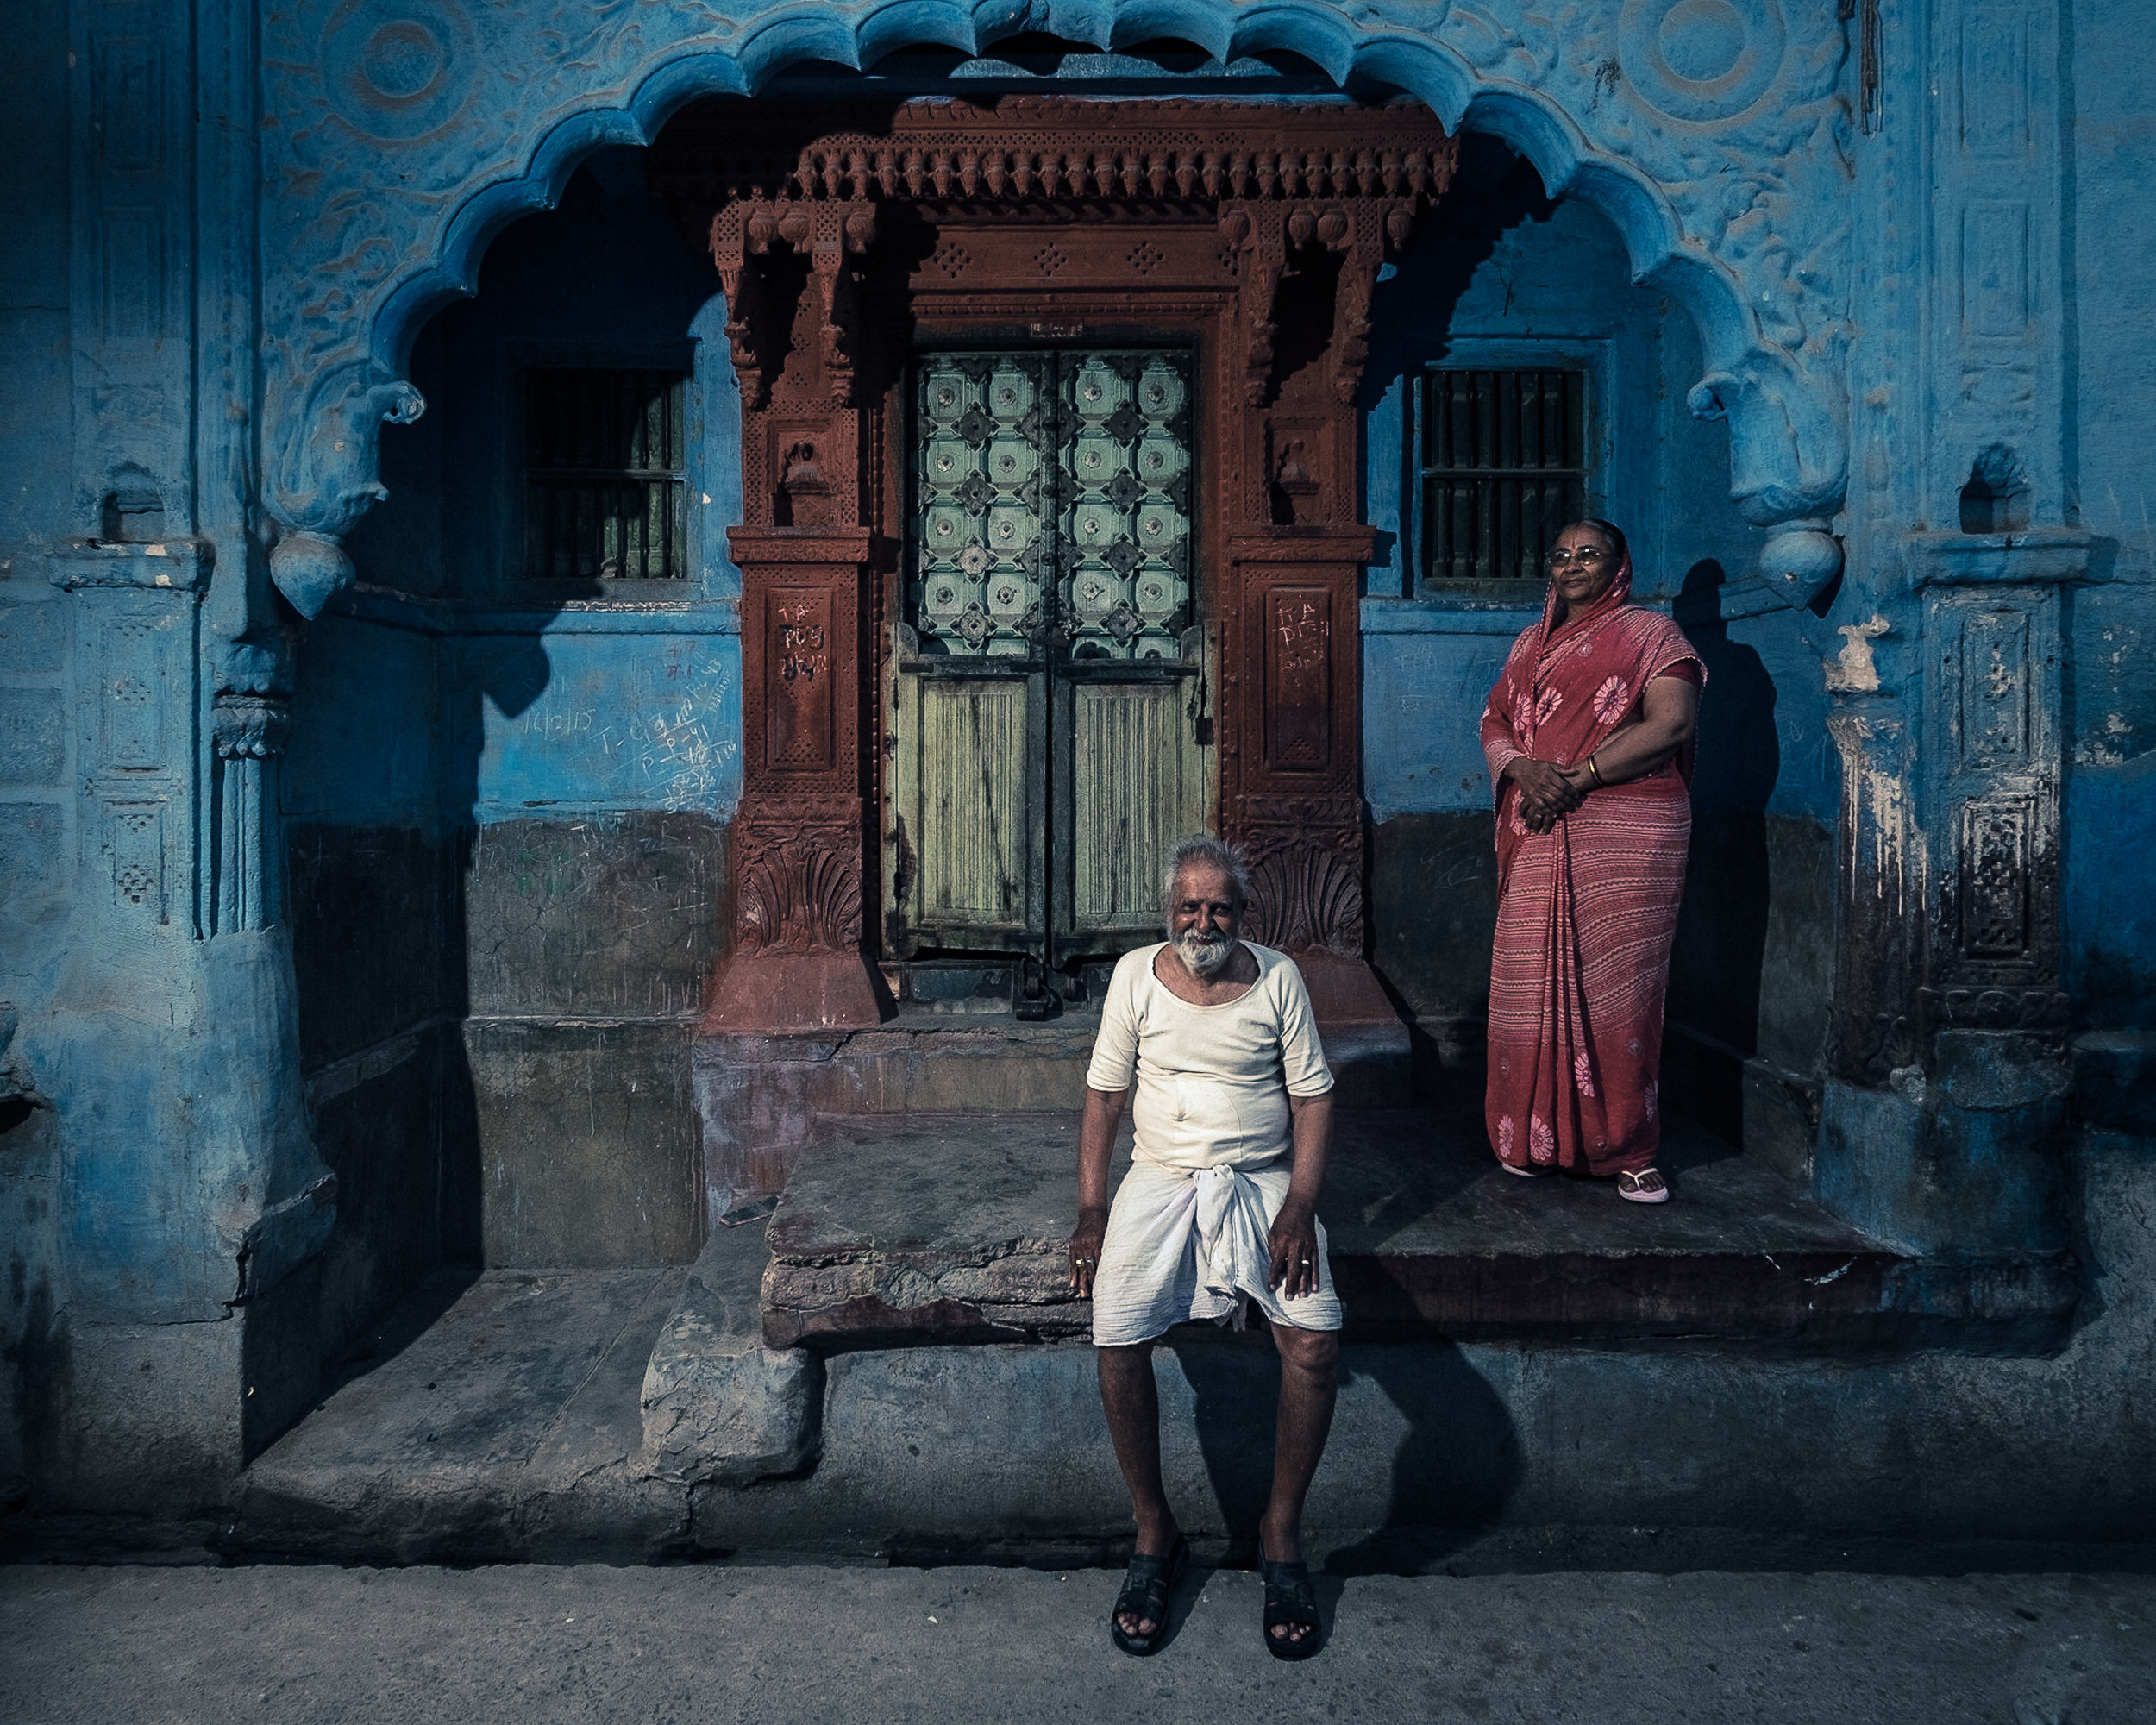
FUJIFILM X-T1 | XF10-24mmF4 R OIS @ 10 mm | 1/180 sec @ f/5 | ISO 200
This picture of a Rajasthani couple in Jodhpur looks like it was made in the evening, but it was actually photographed around noon. I underexposed the available light heavily by choosing a narrow aperture, a relatively fast shutter speed and a low ISO. I then directed the flash so it looked like late setting sunlight.

The Jodphur example brings us to a second advantage of bringing a flash: you have control over the direction of your light. The position of the sun (and many other available light sources …) is out of our control. You cannot move a street lamp to a position that would better suit the composition of the photo you have in mind. But you can put a flash upside down on a light stand or hang it from a house with a clamp, cover its head with an orange gel and simulate a light bulb anywhere, as the image below shows.
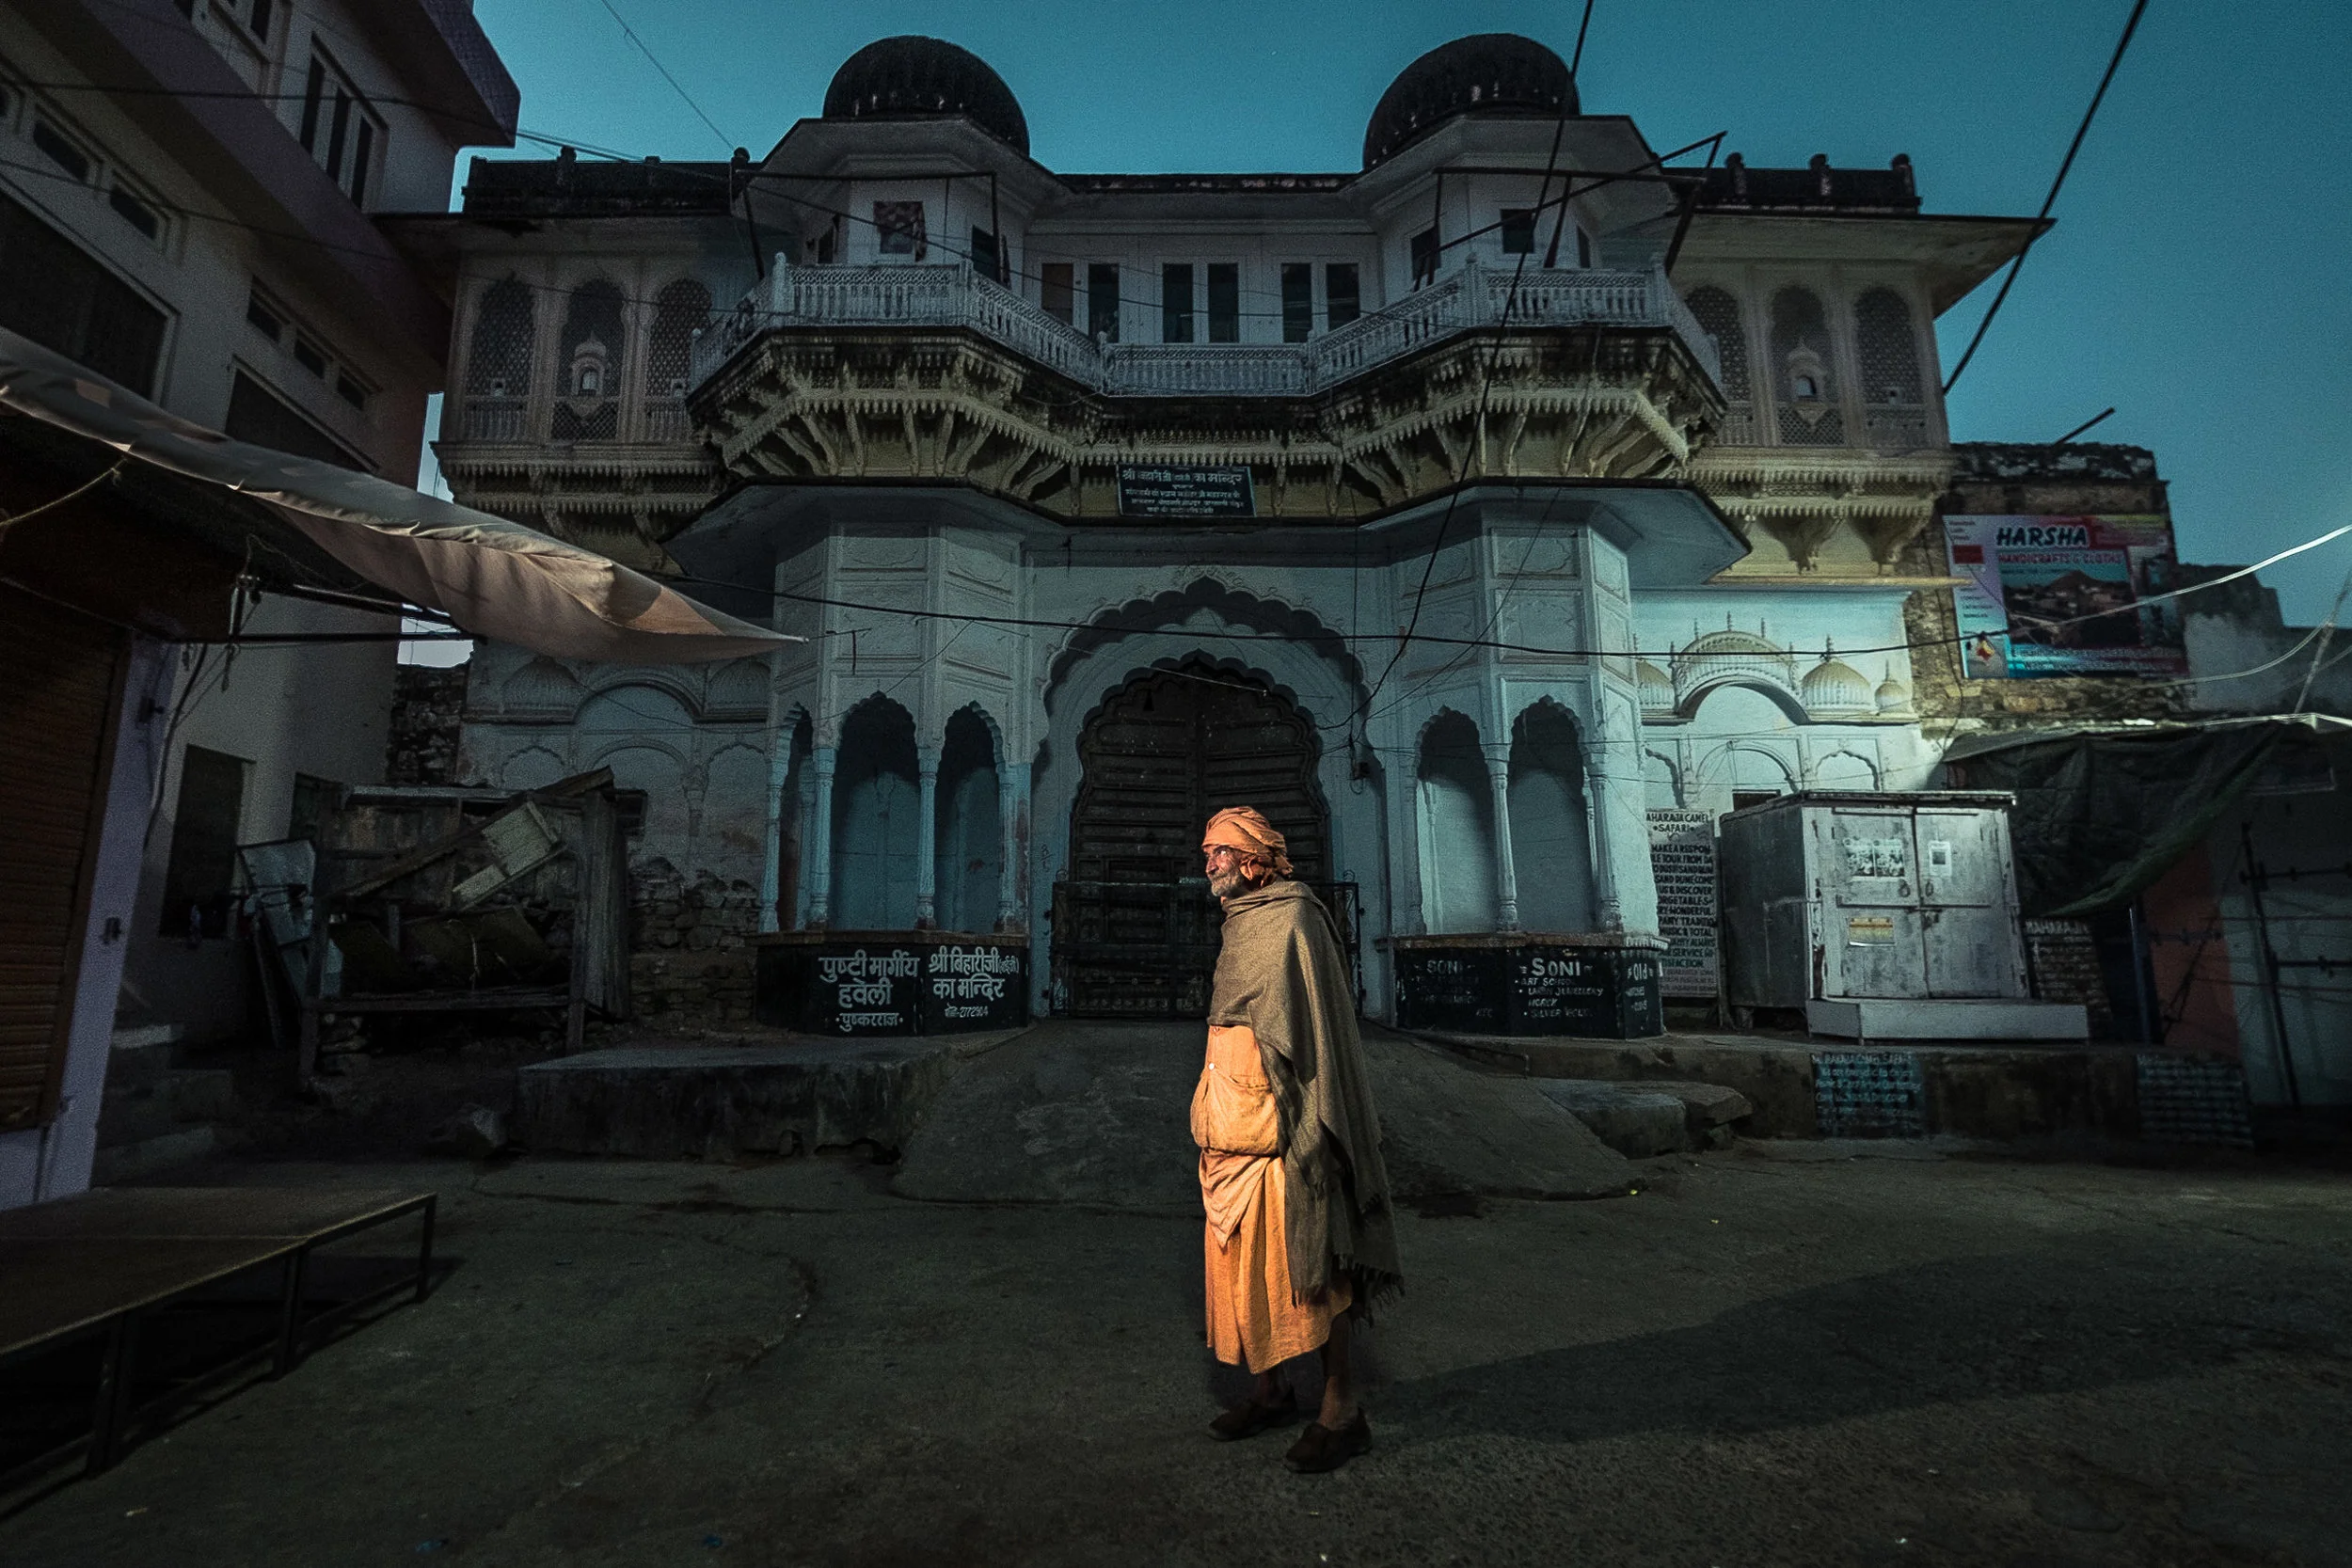
FUJIFILM X-T1 | XF10-24mmF4 R OIS @ 10 mm | 1/3 sec @ f/4 | ISO 800
There was no street light where I wanted to photograph the pilgrims going to do their morning bathing rituals in Pushkar lake. So I created my own street light with an orange gelled speedlight I hung off a canopy just outside of the frame.
At the start of this article, I talked about quality of light. When we talk about quality of light, we should not so much think of it in terms of ‘good’ or ‘bad’ but rather in terms of ‘hard’ or ‘soft’. Hard light isn’t necessarily bad light. It all depends on what you want your photograph to say. When I set out to photograph the war cemetery in Langemark, Belgium, I wanted the picture of the tombstone to reflect the atrocities of war. However, on that particular day, it was very cloudy. There was almost no contrast at all. Ideal light to shoot just about anything, but not for what I had in mind. Contrary to the example I started this blog post with, the available light was too soft, too pleasing, too… flattering. So I put up a flash on a tripod, zoomed the flash head all the way to the maximum and added a grid to get a tight beam of light. The result is a much more dramatic light, one that helps to convey the atmosphere of the place much better than an available light picture.

The available light was very soft... In fact, it was too soft for what I wanted the photo to say.

A strategically placed flash with a grid makes concentrated light beam...

... that matches the subject a lot better.
Want to improve your flash skills?

My just released eBook, Light it Up! Techniques for Dramatic lighting teaches you everything you need to know. Everything explained in plain English with lots of behind the scene shots or lighting diagrams. For those who already have some flash experience under their belt, there are also more advanced chapters on gear and light setups. The book also contains plenty of buyer's advice (did you know that some brand flashes cost up to three times as much as third party alternatives, while not offering more power or features - sometimes even less).
Finally, it comes with two cool bonuses: a set of three fifteen minute videos and a sample set of Lightroom presets.
Light It Up! (including bonuses) retails for $30 + applicable taxes but until May 29, you can save 25 percent. No discount code needed. Get it here.
P.S. If you speak Dutch, this book is also available in Dutch (both as a print book and an eBook). I also have a Dutch video course on off camera flash over at my Dutch online photo training website www.photofactsacademy.nl.


My New eBook Released: LIGHT IT UP!
I am very happy to announce that Craft & Vision have just released my latest eBook: Light It Up! Techniques for Dramatic Off-Camera Lighting.
In this 160-page PDF eBook, I cover everything I have learnt myself over the past 10+ years in working with flash photography. The eBook includes essential theories about light but with a focus on the practical consequences for you as a photographer. It showcases techniques and gives advice on using speedlights and portable studio flashes on location. All the info is presented in case studies, lighting diagrams, and advice on the best gear to buy for different scenarios. Inside you’ll find:
- Both beginner and advanced lighting setups
- Lighting diagrams and behind-the-scenes setup shots
- Real-life lessons from me on what works, what doesn’t, and how to improve
- A comprehensive discussion on the latest lighting gear and how to save big on gear by buying third-party flashes
- In-depth coverage of advanced techniques such as high-speed sync and hypersync
- Information on both big and small flashes and the importance of a “flash ecosystem”
- How to work with on-camera flash with excellent results
- Post-production instruction
Light It Up! will help you overcome any fear you might have for flash photography (I know I had, years ago!) and help you turn your flash from a contrarian adversary to a trusted ally. Personally, I would rather leave a lens at home than my flash! I hope you will, too, after reading this eBook!
Pricing
Light It Up! is priced at $30 (+ VAT in Europe) and that's including two really cool bonuses (see below). Until May 29th, there's a special 25 percent off launch discount, making the price only $22,50. No coupon codes are needed. If you know that some of the third-party gear I use myself (and recommend in the eBook) costs between half and a third of the price of the brand flashes of the camera manufacturers themselves, you'll save the purchase price of the eBook many times over!
Bonus 1: Three Lighting Videos

In addition to the 160 page PDF eBook, you'll also get access to three 15 minutes bonus videos. That's 45 minutes total of bonus video content. The first video shows you how I shot this particular image on a recent trip to Varanasi and how I processed it in Lightroom and Photoshop. In the second video, I share my 'Layering Lights' technique with you: a cool technique to create really beautifully lit photos with just one light. In the final video, I walk you through some of the images in the eBook, giving you behind-the-scenes information.
Bonus 2: Five LIghtroom Presets
Because everybody loves bonuses, I have created a second bonus for you: five free Lightroom presets that show you how one click can take a picture from good to great.
Below is the first of the three bonus videos that come with the eBook. Watch it now for free!
And here you can see a couple of sample pages... (don't mind the compresson, the actual PDF pages are crystal clear).


Still in doubt? Here's what other photographers had to say about Light It Up!
“In the first couple of chapters alone, this eBook covers the same information that other photography courses spread across months or even years. Although the book contains some pretty techie stuff, Piet knows how to explain it in a simple way and illustrates it with practical examples. More advanced photographers will also benefit from this book by useful tips and examples from Piet’s daily practice, explanations on typical flash problems and solutions, setup shots, or lighting diagrams.”
“Do you want to start using your flash creatively, both on- and off-camera but are getting lost in all the information that’s out there? No need to worry: this book will guide you through the world of flash techniques and gear. It’s a highly educational book that offers an interesting insight in technique and creativity.”
“As an available light aficionado, reading this book had me go out and flirt with flash light.”
“Don’t hesitate. Terrific book!”
“Impressively complete. Should be on every photographer’s bookshelf.”
“A truly marvelous book, both in terms of contents and layout, explaining complex concepts in an understandable way. Highly recommended!”

Announcing the 2017 Kolkata and Varanasi Location Portraiture and Lighting Masterclass
Matt Brandon and I are pleased to announce the third edition of the Location Portraiture and Lighting Masterclass. This workshop will be held from November 26th to December 3rd, 2017, in two of India's most photogenic cities: Kolkata and Varanasi. We will shoot both classical portraits as environmental ones, and use available light as well as artificial (flash) light. Below are some examples of the types of photos you can expect to go home with at the end of the workshop.
Interested? You can find more info and a link to the registration form here.
No flash? No problem! Lightroom and the Fujifilm GFX.
At the Photo Days photographic trade show in Brussels this weekend, I had the honour of doing some GFX studio demos with two lovely and very talented models: Rosalinde Kikstra and Sooraj Subramaniam. I had a number of Godox flashes and modifiers set up and I'll post some images later of those results but the image that probably underlines the GFX's fantastic capabilities the most was one I made by accident: on one of the shots in a Black and White portrait series, I had misaligned the trigger so the flashes did not fire. All I got was a heavily underexposed ambient exposure shot.

FUJIFILM GFX 50S | GF120mmF4 R LM OIS WR Macro @ 120 mm | 1/125 sec @ f/5.6 | ISO 400
So, in front of a live audience, I said, jokingly... let's try and see what we can make out of this... I increased the Exposure slider by almost 5 stops (the maximum in Lightroom), dragged a couple of other sliders around and half a minute later got this result...

FUJIFILM GFX 50S | GF120mmF4 R LM OIS WR Macro @ 120 mm | 1/125 sec @ f/5.6 | ISO 400
Here's the two of them side by side in the Lightroom interface.
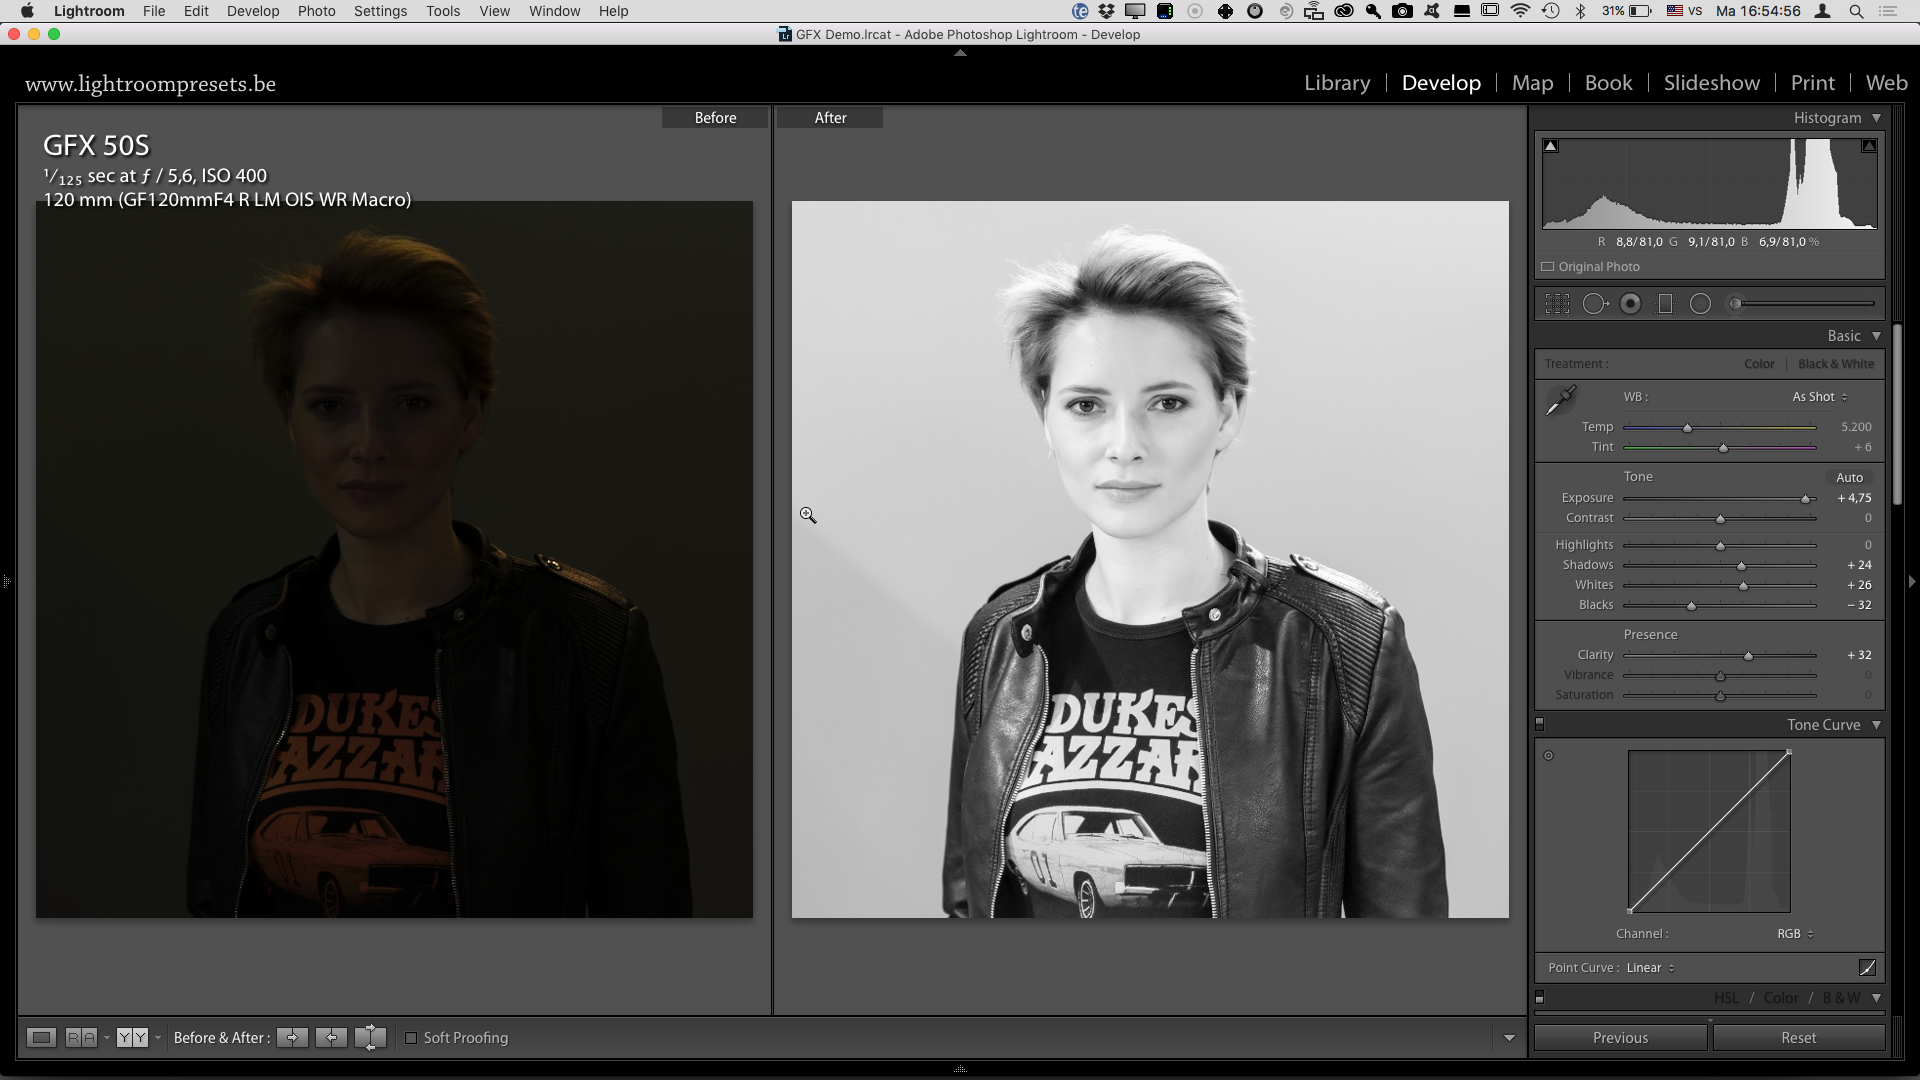
And below is a 1:1 crop. I added 25 Luminance Noise Reduction in Lightroom and of course there is still some noise but considering the fact that my ISO wasn't even at the base of 100 but at 400, I think the result is nothing short of fantastic...
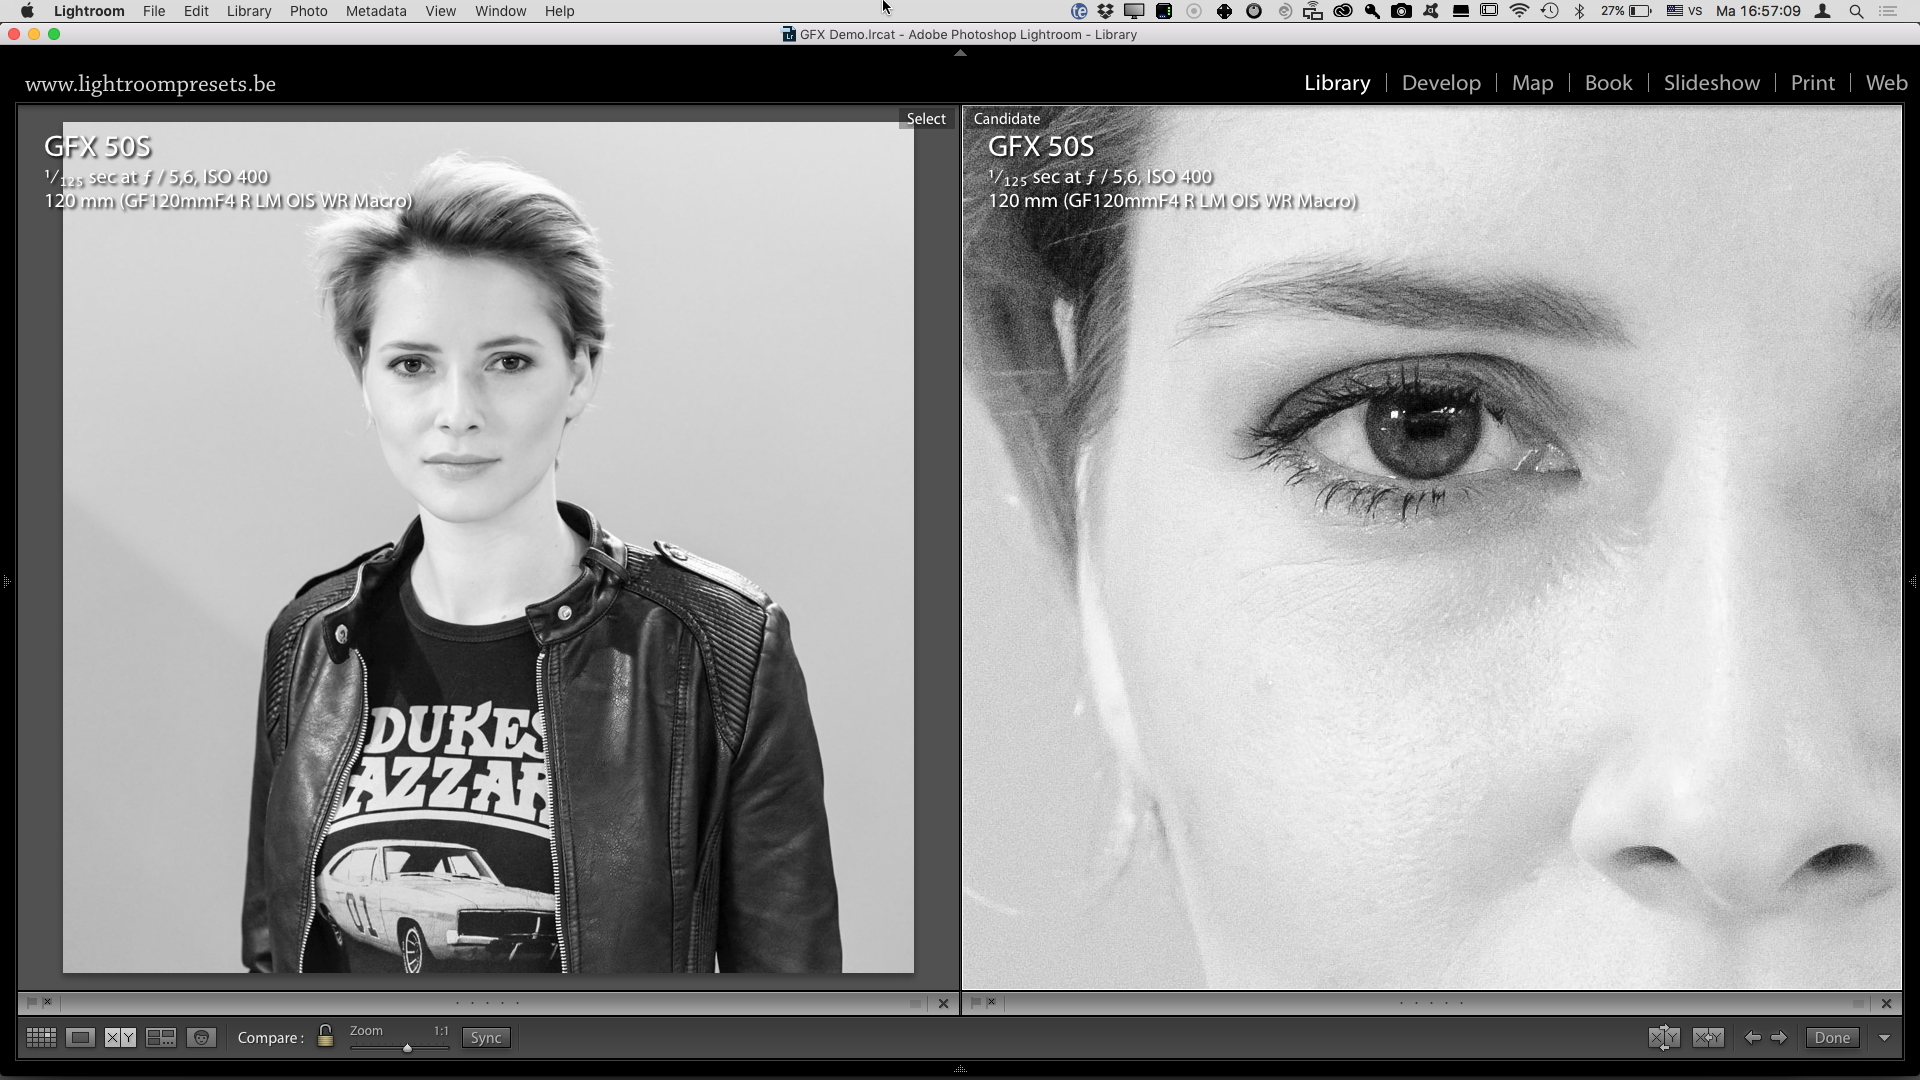
For me, the takeaway from this accidental experiment is that if Lightroom and the GFX can do this on a completely underexposed file, imagine what you can do with a halfway decent exposure. Just about anything, I guess...
Oh... and just for the sake of being complete... here's the actual image with the flashes firing :-)

FUJIFILM GFX 50S | GF120mmF4 R LM OIS WR Macro @ 120 mm | 1/125 sec @ f/5.6 | ISO 400
Some other Fujifilm GFX related blog posts you might enjoy:


The Fujfilm GFX Files, Part 2 - More videos
A video interview with about the GFX and the accessories I used in India
As you could read in part 1, I have been using the brand new Fujifilm GFX in India and Belgium for a couple of weeks. I also made a 3 minute video about it for Fujifilm. Well actually, I did not make that video: fellow X-Photographers Matt Brandon (www.thedigitaltrekker.com) and Serge Van Cauwenbergh (www.fotografieblog.be) filmed it - entirely with X-T2 cameras by the way - and Matt also edited it. In case you haven't seen it yet, here's that video:
On the way back from Varanasi to Delhi, Matt interviewed me about the GFX, but also about some of the other accessories we have been using, like the SMDV BRiHT 360 and the SMDV Speedbox 85 that you can see me use extensively in the video. We also talk about using monopods and tripods and how to back up images like this while traveling. You can check out the video interview on Matt's site. There's some cool 100 percent close-ups of shots!

Check out my video interview here.
More GFX Challenge videos
If you haven't overdosed on GFX news by now, here are the latest GFX Challenge videos that Fujifilm have released:
Ollvier Wehrli - Switzerland
Watching Oliver's beautifully filmed video gave me vertigo. I guess I'm not cut out to be a landscape photographer!
Joshua Loh - Singapore
Joshua Loh appreciates the small form factor and fast focusing capabilities of the GFX. I also take away from the video that I really need a Mercedes SLS to complement the GFX... That car features in no less than three GFX Challenge videos :-)
Supalerk Narubetkraisee (Thailand)
Supalerk also lauds the universal nature of the GFX and has a couple of really nice star trail photos in his video.
Shiro Hagihara (Japan)
Shiro - like me - appreciates the EVF which lets him decide on exposure and color without having to take his eye off the viewfinder. He loves the Velvia simulation for his landscape work. He says the GFX lets him capture details that even his eyes could not see.
Saiichi Nakmura
Saiichi's work involves still life photography with water. The video offers an interesting view into his studio set-up. He praises the quality of the CMOS sensor and the standard 4:3 aspect ratio which he finds better suited for commercial use.
Jonas Rask and Palle Schultz (Denmark)
The detail and sharpness of Jonas' lifestyle shoot images with a biker almost bite you from across the screen. A must-see if you're into motorcycles or good-looking guys :-)
Sangsun Ogh (Korea)
Sangsun takes us to a shoot of a model wearing traditional Korean attire. Needless to say, the resolution of the GFX helps to bring out every little bit of texture.
Knut Koivisto (Sweden)
Knut appreciates the fact that the camera works as well in the studio as it does outside of it, in the streets. He uses the X-T2 and the GFX intermittently. For him, DSLRs have been sidestepped now.