The 5DayDeal irrevocably ends in…

My personal top five
There's so much stuff in the new edition of the 5DayDeal, that annual new bundle for all photographic training and other photographic tools such as presets, overlays, actions and more, that it's easy to be overwhelmed. In a prior blog post, I already covered the full offer. In this blog post I want to dig a bit deeper into my personal top five!
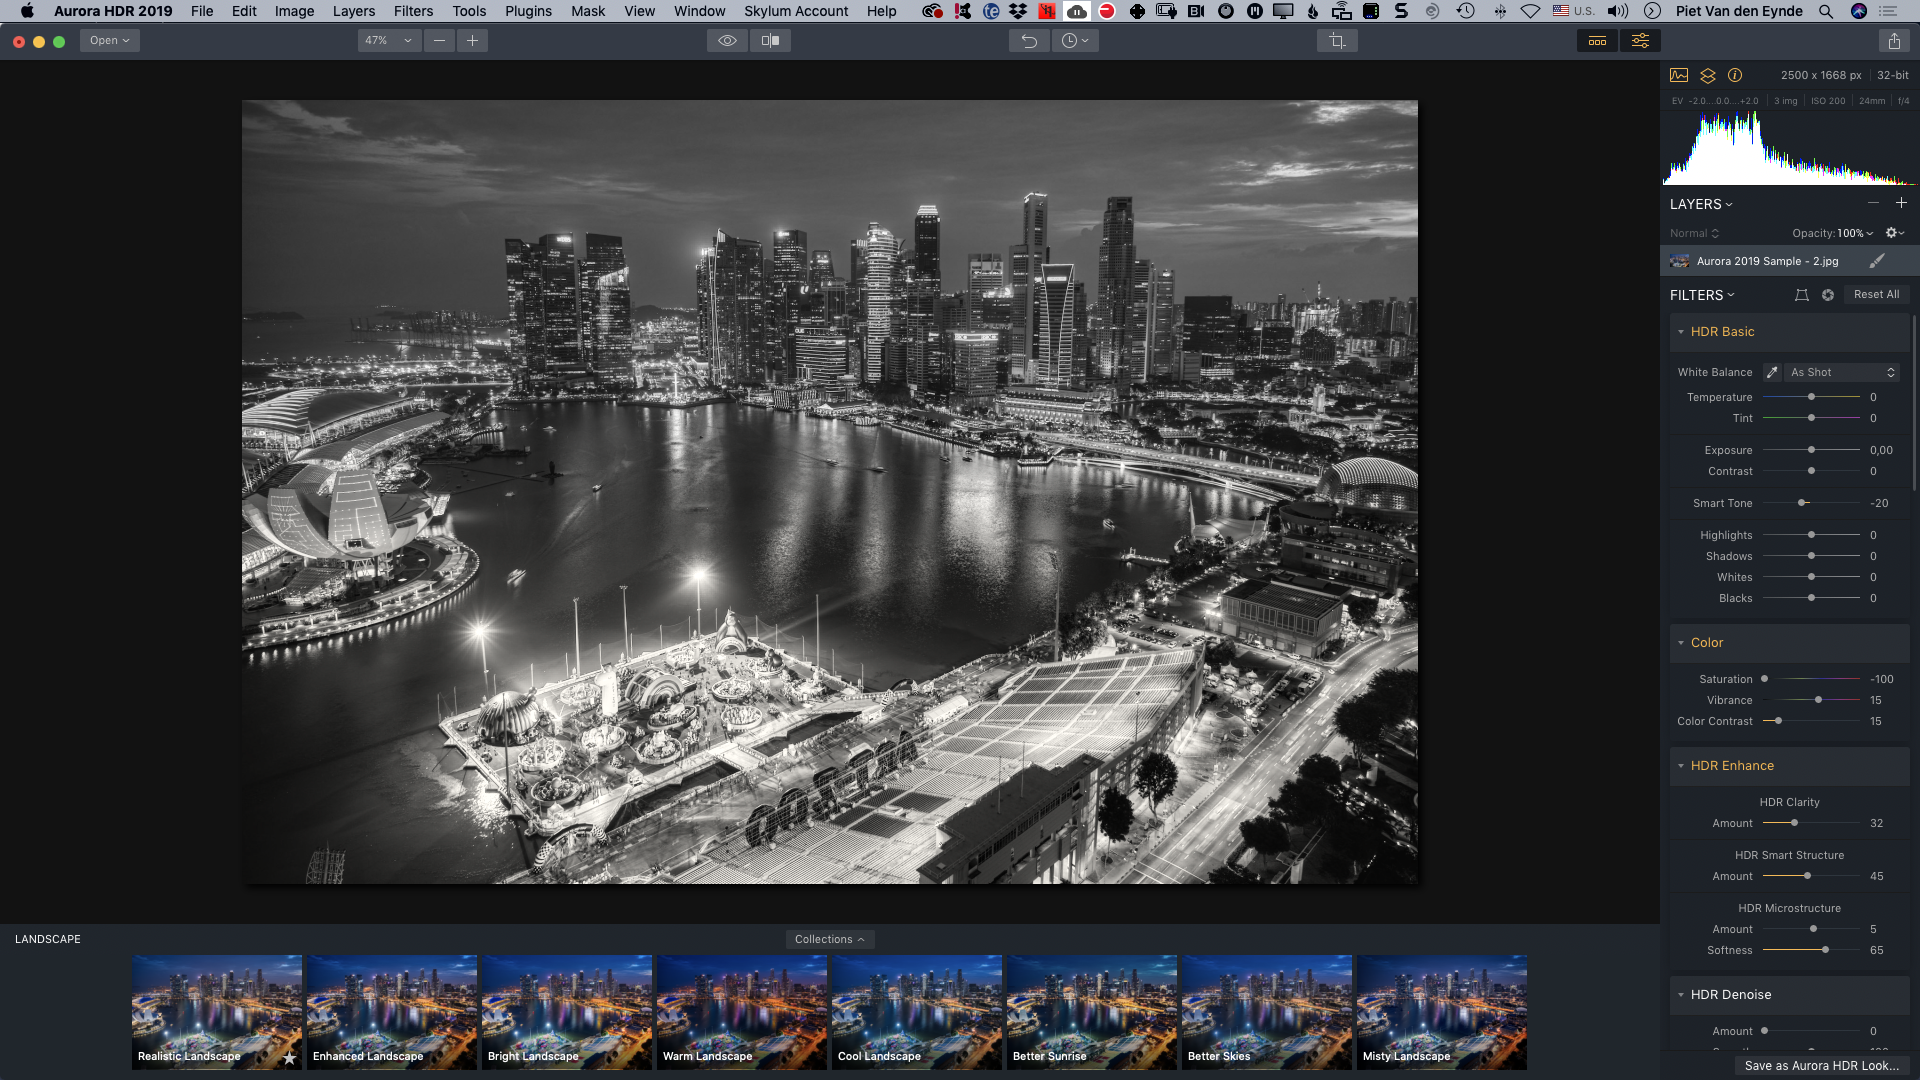
Aurora HDR 2019
Aurora HDR 2019 is by the same makers as Luminar and is one of the best – if not the best – HDR software application on the market today. If you think that HDR is only useful to make those exaggerated, cartoonish grungy edits, you're mistaken. Of course you can do that too, but HDR software is also used by landscape and architectural photographers. Something few people know, is that you can also use it to make some very moody black-and-whites, either in combination with Lightroom or Photoshop or not. Aurora HDR 2019 is normally $99. Now, you can get it together with all the other tools in the 5DayDeal for less than that. Aurora HDR 2019 is part of the basic Photography Bundle of $89.
2. Serge Ramelli’s Fine Art Photography Masterclass
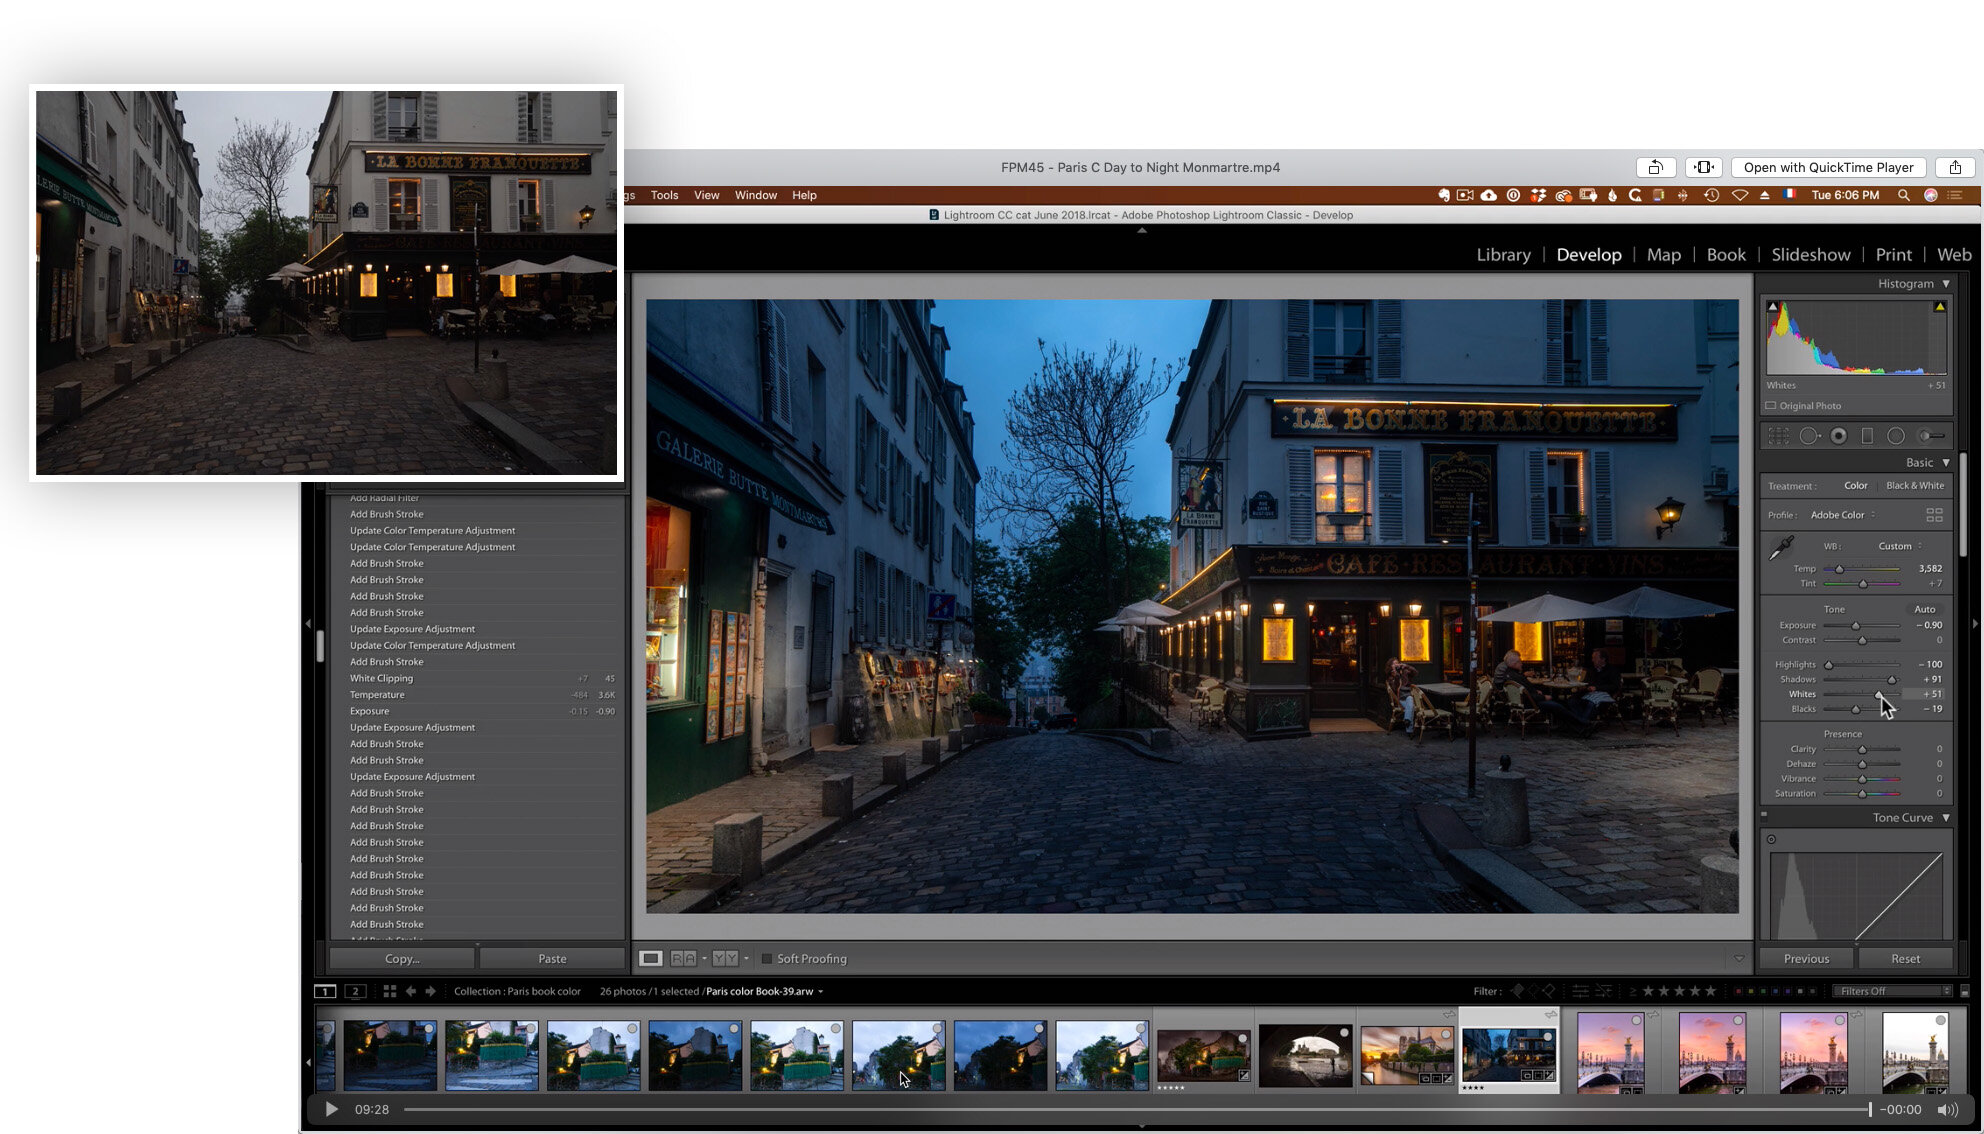
Serge Ramelli is somewhat of a phenomenon. This Frenchie-with-the-charming-English-accent has managed to build a proper Lightroom training imperium over the last couple of years. 500,000 YouTube followers? I can only dream of it! In general, I often think his edits are a little over-the-top – which coming from me means something as I don't shy away from a bold Lightroom slider move or two – but as the French say ‘Qui peut le plus, peut le moins’. The Lightroom tutorials in his Fine Art Photography Master class are pretty advanced and they showcase some surprising, out-of-the-box applications of specific Lightroom tools. Amongst others, there is a really nice day-to-night tutorial in which he transforms a picture that he took during the day into a night scene. Serge’s entire Masterclass normally retails for $147. Now you can get it for $89 together with all the rest of the tutorials in the 5DayDeal.
3. Getting Started with Photoshop and Adobe Camera Raw
Blake Rudis of f/64 Academy is a big name in the Photoshop training industry. He's also made a couple of Photoshop panels that are very popular with landscape photographers. In this course, he takes a really deep dive into Adobe Camera Raw. After all, not everybody works with Lightroom :-) How deep? Well… I've learned more than one thing and I'm only halfway the course. That should tell you something…
4. The Artist by Joel Grimes

Joel’s signature light setup: twoi strip lights and a beauty dish in a butterfly light position.
I think I've got about every tutorial that Joel Grimes has ever published. The fact that I started to pay more attention in my photography to working with rim light and striplights, I have Joel to thank for. This year's 5DayDeal bundle features his ‘The Artist’ course. This isn't a real hands-on tutorial but rather a motivating, almost philosophical course about how to improve in your photography, also if you're doing this for a living. Throughout the course, you'll see plenty of examples of Joel's work. Amidst all the more practical courses in the 5DayDeal, this course is a welcome and motivating change. In this course, Joel also talks about overcoming your limitations as a photographer and he knows what he's talking about, as he is colourblind! This course normally retails for $179. Now it's in the bundle, with 70 hours of other tutorials for only $89.
5. Complete Posing workshop by SLR Lounge
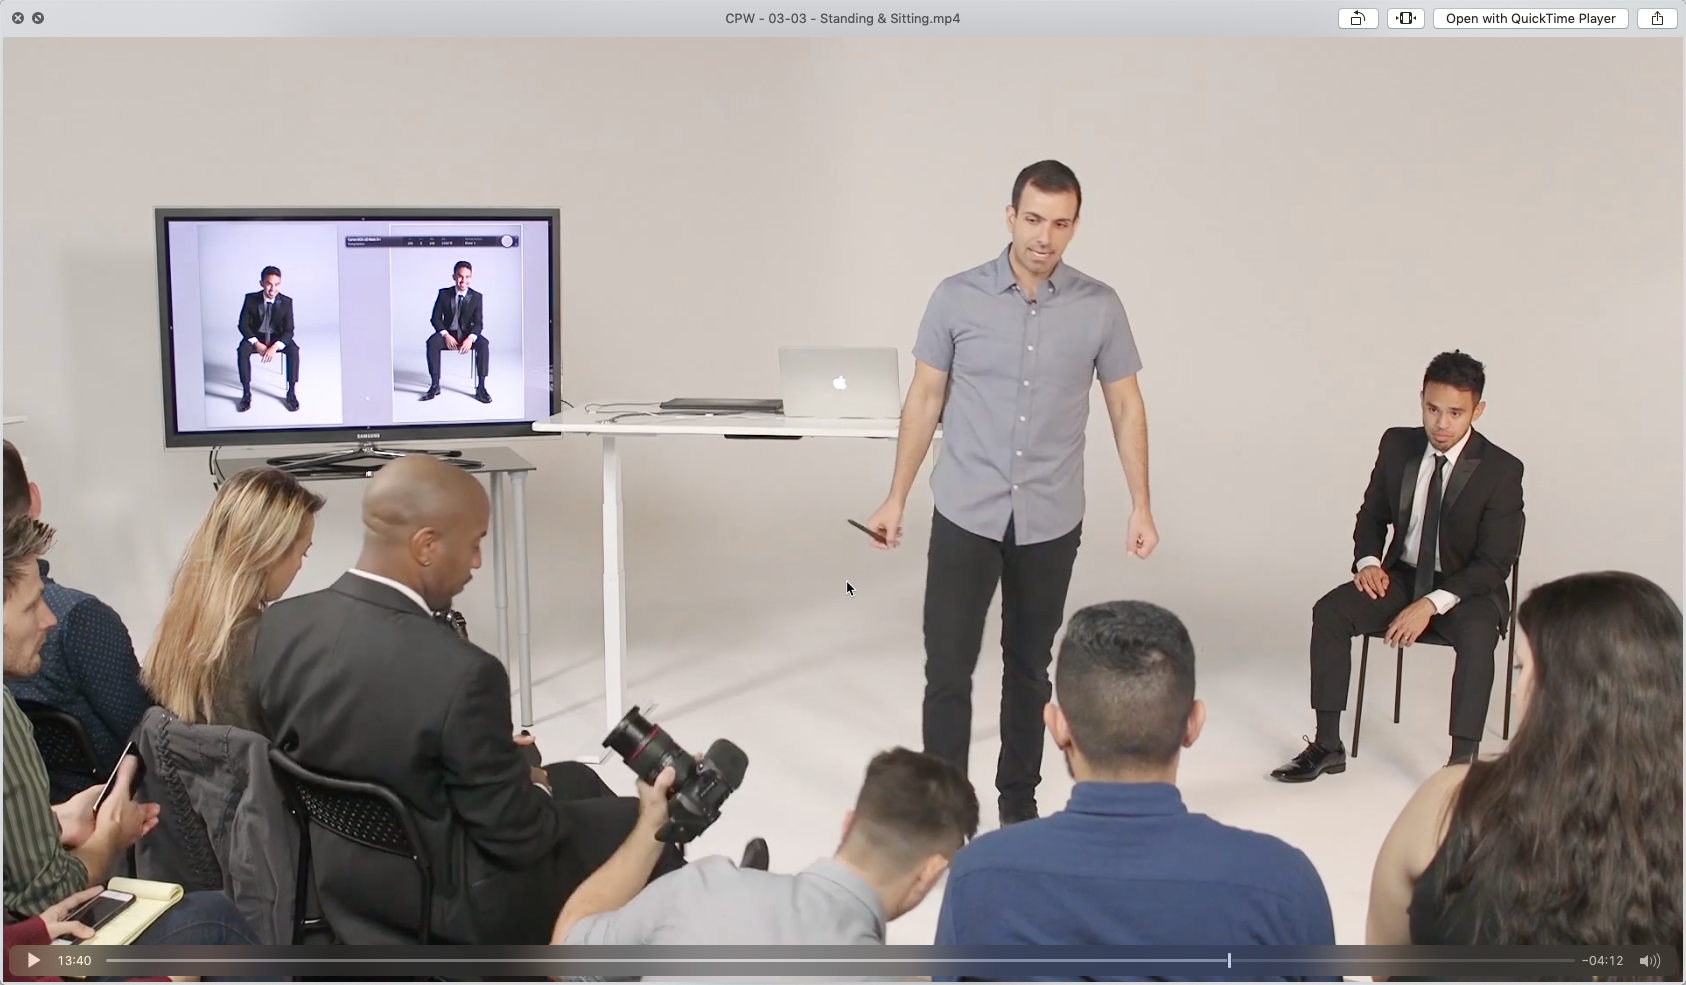
You know the feeling? During a workshop or on the tradeshow, generally you'll be photographing professional models that can strike a different pose with every click of your camera. But then back home, when you try to apply your recently acquired skills on your neighbour's son or daughter or even worse, on your own kids, things don't work quite as well. Posing is one of the most underestimated skills in photography. Really good models take years to get to that point. But… As a photographer you can lend your models a helping hand. In the Complete Posing Workshop by SLR Lounge there is no shortage of ideas and techniques to give even the most clumsy sitter a camera-friendly pose. This course was an eye-opener, also for me! It talks about posing men, women and – the most difficult skill of all – posing couples! The nice thing about it is that it is in part filmed live and that the public, consisting of amateur photographers, takes turns at taking the pictures while the teacher gives directions. This way, you can also learn from the mistakes that are being made.

My favourites from the Charity Bundle and the Pro-Bundle
The 5DayDeal base bundle is $89, but upon checkout, you can optionally purchase two smaller add-on bundles: the Charity Bundle and the Pro-Bundle, which will respectively set you back 24 and $39 extra. It obviously depends on your budget, but there are a couple of hidden gems amongst those two extra bundles as well. I've picked one from each bundle:


“I purchased the 5DayDeal 2 years ago. Zero regret. This one sounds even better. These packages hold extreme value and they also contribute to a very worthy cause. Such high profile contributors ensure that the quality of product and software is top notch. I can highly recommend these pacakages to anyone looking to lift their game.”
The Beginner’s guide to Photoshop (part of the Charity Bundle)
In addition to my own Photoshop for Lightroom Users course, there is another Photoshop course in the 5DayDeal. However it's not in the $89 base bundle but in the Charity Bundle. If one of your goals is to learn Photoshop, I really advise you to add the Charity Bundle to your order. This is a course by Phlearn, an authority in the field of Photoshop courses. After having watched both this course and my own, Photoshop won't have many secrets left for you!

Beverage Photography and Retouching with Rob Grimm (part of the Pro Bundle)

In this beautifully shot tutorial, you get a number of examples of the preparation, lighting setup, shooting and postprocessing of beverages, one of the trickiest forms of product and studio photography. This tutorial normally retails for $99, now it is part of the optional Pro-Bundle of $39 that you can add to the basic Photography bundle of $89.
Watched two videos from my ‘Photoshop for Lightroom users’ course for free, this weekend!

Because I'm humble, shy or both :-) – I haven't listed my own Photoshop for Lightroom users course in the top five. But in the meantime, you should know that this brand-new, seven hour course is also part of the 5DayDeal bundle. My course comprises 25 case studies (‘chapters’) with exercise files about when and how as a Lightroom user, you should go to Photoshop and back. As promised, until the end of the 5DayDeal, each day I’ll stream an entire chapter of my course for free! And because tomorrow is Sunday and I don't want to send out any emails, I'm already putting Sunday's video online today! Twice the viewing pleasure :-)
The first video is about how you can use Photoshop to clone… in perspective! You can do so with the remarkable yet highly unknown Vanishing Point Filter. The second video is about Content Aware Fill, another one of those things that I regularly go from Lightroom to Photoshop for.
Did you pick up something? Then imagine what you could learn from the full seven hour course and from all the other courses in the 2019 edition of the 5DayDeal!
Extra bonus! Buy the 5DayDeal through my link and you will receive one of the bonuses below completely free:
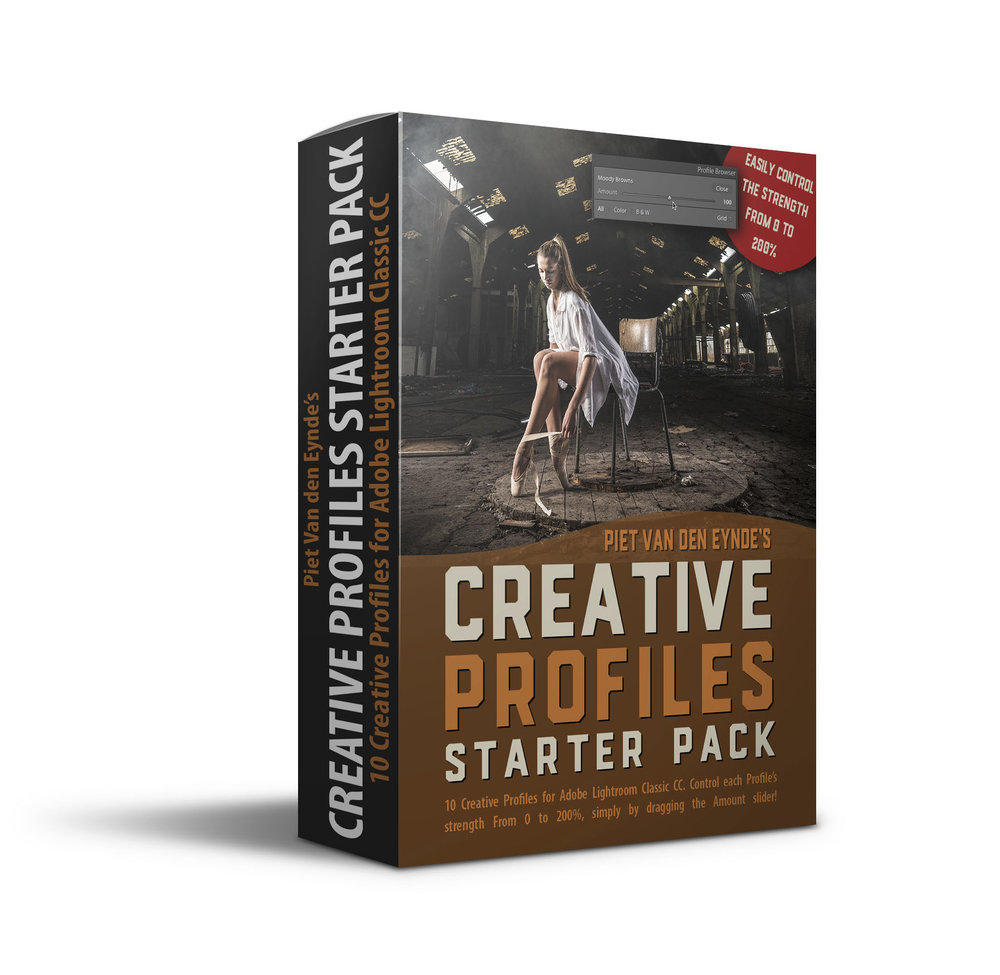
As a thank you for buying the 5DayDeal (and therefore my new course) through my affiliate link, I've got an extra gift for you: you can pick one item from the following list! How about one of my two texture packs, one of my two Creative Profiles packs for Lightroom Classic, a preset pack for Lightroom or a complete introductory course to Lightroom Classic? Once you've purchased the 5DayDeal bundle through this link, this other link will give you all the information you need to claim the bonus of your choice. Important: don't go looking for that bonus during the checkout procedure on the actual 5DayDeal site: this bonus is an extra offered by me personally and therefore delivery of it is handled by me, via this form!


*: + VAT for European citizens. If you have a VAT number, you can enter that during checkout and you can order VAT-free.
Affiliate disclaimer: the links in this blog post are affiliate links. When you use these links, MoreThanWords receives a commission. This commission is paid for entirely by the organizer of the bundle, 5DayDeal. Therefore this commission doesn't cost you anything extra. On the contrary, when you use my affiliate link you will receive an extra bonus that you wouldn't have had when purchasing directly.

I was one of a select few that could test these tools already live and you can read about my thoughts in this blog post. In fact, I was so enthusiastic, that Skylum asked me if they could use this quote of me on their website :-)
Discover the three killer new features of the upcoming Luminar 4
If you're a regular reader of this blog, you know that I think that Luminar by Skylum Software is one of the most interesting new developments in terms of photographic software. There are several reasons for this:
Luminar is affordable;
It exists in a Windows and a Mac version
It can be run by itself as a Lightroom alternative (Luminar 3) but also as a plug-in (Luminar Flex);
It is relatively simple to use:
It makes intensive use of AI (Artificial Intelligence) to automatically and quickly speed up complex image retouching jobs.
Skylum is currently working on Luminar 4, that is expected somewhere this fall. Every once in a while, they give a sneak peak of the new features that will be in that version 4 and this week, they teased a fantastic new tool for portrait photographers. I was lucky enough to be asked to make a video about this tool for Skylum that will be on Skylum’s YouTube channel later this year but as a reader of this blog, you can already watch it here. But first, let me tell you some more about the new philosophy for Luminar 4.
Luminar 4 ss the future for both Luminar 3 and Luminar Flex
An important new development is that Luminar 4 will be the upgrade for both Luminar 3 as well as for Luminar Flex. Luminar 3 and Flex will kind of melt into Luminar 4. During the installation procedure of Luminar 4, you will be able to choose whether you want to use the application as a stand-alone piece of software, as a plug-in, or as both. Personally, I think it is a good thing because now, Skylum can focus on this one product instead of having to update to different yet very similar pieces of software. This also means that if you want to use Luminar as a standalone and as a plug-in in the future, you’ll only need one license.
AI Sky Replacement: the first new dazzling feature of Luminar 4
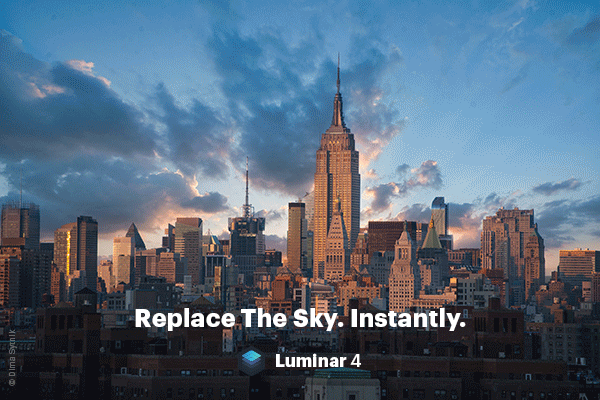
Luminar 4 will contain a lot of smaller and bigger new features. One feature that will definitely interest landscape photographers, is the AI Sky Replacement filter. This lets you swap out a boring sky in a landscape or a cityscape for a more interesting one without having to make tedious selections. It all happens automatically. Luminar 4 even makes sure that the perspective matches and that where necessary, the foreground is color graded to match the new sky, for example when you put us warm sunset sky into an image that was shot earlier in the day. As you can see from these animated gifs, the tool works surprisingly well and of course there are sliders for more advanced tweaks should you need them.

AI Structure: the second new feature of Luminar 4
Everybody loves Clarity, Structure and Texture. Lightroom just recently added a new Texture slider and Luminar also has a number of sliders to emphasize details in your images. Yet, up until recently, you always have to use a mask to make sure that all that extra structure and detail didn't add 10 or 20 years to your model. With AI Structure, this happens automatically this tool recognizes things like faces and skies and can give different areas in an image each their own (or none at all) dose of extra structure.

AI Skin Enhancer en AI Portrait Enhancer: the third main new feature of Luminar 4
The previous two tools were mainly interesting for landscape photographers, but this tool will be right up your alley if you are a portrait photographer. AI Skin Enhancer can't automatically recognize faces and can soften the skin in those faces while retaining texture. I was pretty sceptical myself but I think the result is nothing short of amazing. I know photographers that would happily pay the price of Luminar 4 only for this feature. Even more so, the only direct alternative that I know is a plug-in called Imagenomic Portraiture and although that plug-in is really good, it costs more than double then all the tools in Luminar 4 combined and it's not as flexible or automated.
In the video below, I show you these two new portrait tools in more detail.
What if you want to buy Luminar 4 or you want to upgrade to Luminar 4?
If this blog posts as aroused your interest for Luminar 4, there are a couple of options, depending on the scenario…
You want to start using Luminar already now as a standalone application
You can now buy a special, discounted ‘Early Bird’ bundle of Luminar 3 + Luminar 4: you can already start using Luminar 3 now and as soon as Luminar 4 is released, you can start using that. Luminar 4 will automatically upgrade your Luminar 3 catalogue. On this bundle, discount code MORETHANWORDS will knock another $10 off of the prize and you can also receive a number of bonus Luminar presets. The regular price for this bundle is $99. With the code you only pay $89.Click here to go directly to the sales page for this bundle on the Skylum website. The bundle you’re looking for is the most right-hand one of the two.
You want to start using Luminar already now as a plug-in
You can now buy a special, discounted ‘Early Bird’ bundle of Luminar Flex + Luminar 4: you can already start using Luminar Flex now and as soon as Luminar 4 is released, you can start using that. On this bundle, discount code MORETHANWORDS will knock another $10 off of the prize and you can also receive a number of bonus Luminar presets. The regular price for this bundle is $99. With the code you only pay $89.Click here to go directly to the sales page for this bundle on the Skylum website. The bundle you’re looking for is the most right-hand one of the three.
You're okay with waiting until Luminar 4 is officially released, but you want to get it at the best possible price
In that case, you can pre-order Luminar 4 right now via this link for $69. Choose the leftmost option of the two. The price will increase soon (although I don't know when exactly) but by pre-ordering, you are sure to lock in the current price and you get a number of bonus presets for Luminar on top of the deal. In any case, you have a 30 day money back guarantee that only starts when the software is actually out.You're already a Luminar 3 customer and you want to upgrade to Luminar 4.
In that case, you can pre-order your upgrade for $59 via this link and you’ll receive a bonus presets pack valued at $49. Until Luminar 4 actually comes out, you can simply continue to use your existing version of Luminar 3.You're already a Luminar 3 customer and you want to upgrade to Luminar 4.
In that case, you can pre-order your upgrade for $59 via this link and you’ll receive a bonus presets pack valued at $49. Until Luminar 4 actually comes out, you can simply continue to use your existing version of Luminar Flex.
How do you enter your discount code in 1) and 2)
To claim your discount code MORETHANWORDS, in the checkout window, you click on Enter a Promotional Code (1). If you have a VAT number, you can even enter that and VAT will be excluded from the price. For that, click on (2) Enter VAT ID.

DISCLAIMER: The above links are affiliate links: when you use these, MoreThanWords receives a commission. This commission is entirely paid for by the software manufacturer. So you do not pay extra. On the contrary, in some cases, you can use a special discount code that lets you pay even less than if you would buy directly from the software manufacturer. Commissions like these allow me to continue adding free contents tutorials and reviews on this blog.
Organising small flashes with F-Stop's Medium Shallow ICU

What you’re about to watch is highly unusual for me. I’m going to give organisational and packing advice! Move over, Marie Kondo :-) It’s kind of funny, really, because I normally am really bad at organising things but I think what I do in the video makes sense. Judge for yourself :-)
Save over 35 percent on my Light It Up ebook

Packing flashes is one thing. Knowing what to do with them when you open the bag an entirely different one. But I’ve got your back: in my best-selling ebook Light It Up! I explain everything I’ve learnt in the past ten years of working with flashes big and small. I start with simple examples and gradually take it up a couple of notches. This Deluxe Edition even comes with three bonus videos totaling 45 minutes of playing time.


5 Tips to get started with off-camera flash
Nederlandse versie? Klik hier.
I know, this sounds like the start of an AA meeting, but I have a confession to make: flash used to scare the (insert your own power term here) out of me. That's mostly because I learned it back in the analog days, where more than a week would pass between making a shot and seeing the mess I had made on the contact sheet. As a result, I was an available light shooter for a long time. Not so much by conviction as by lack of an alternative. Luckily, things have changed a lot over the past ten years or so. Currently, technology has evolved to the point where using off-camera flash is as easy as baking an egg. Or, if you’re the kind of kitchen hero I am, probably even easier than that! With the technology issues (mostly) out of the way, this means that you can now focus on getting the shot you want. The following tips will help you be successful with your first ventures into off-camera flash.
1. Start indoors and with people you know
When you’re starting out, start indoors. No wind to knock over your precious, new-bought gear. No sun popping in and out of the sky to mess up your ambient exposure (more on that later), no people to run into the frame or worse... run off with your stuff while you're figuring out the buttons and dials… Once you feel confident with your gear and you have gotten some good results inside, then take your gear (and your model) for a walk outside! I found it helpful to start with people I knew. There's always a family member in need of a picture!

It does not replace actual hands-on practice, but the cool Elixxier set.a.light 3D STUDIO software also lets you plan shoots ahead and understand how light and modifiers behave. In my upcoming ebook Light It Up!, I'll have a couple of examples of how I used this software to my advantage.
2. Always determine your ambient exposure first
When you use flash, you’re basically mixing two light sources, flash and ambient light, and you can determine how much (if any) of both light sources you let into your final picture.

The total brightness of this image (left) is the sum of the available light that was let into the camera (middle) and the flash light that was let into the camera (right).
Because the background is generally not (or less) influenced by your flash light (unless your model is close to it, see the next tip), you should always set your background exposure first. Especially when you’re working with a model outside, it’s a good idea to slightly underexpose that background compared to how you would expose it if you were photographing it without a subject. That makes sense: the background isn’t the subject, therefore it shouldn’t be too bright or otherwise it will detract from your actual subject. For example, when I have a sky in my background, I will generally set my exposure so that I still have detail in the sky.

This is an example of a shot where I set my ambient exposure for the background. It is slightly underexposed so that I maintain detail in the sky…

This is the same image after having added a flash through an umbrella (and some creative postprocessing using one of my free Lightroom presets.
As a result, your model will generally be underexposed, but that’s not a problem… After all, that’s what you have the flash for, right? After having successfully determined your background exposure, fire up your flash and your trigger and adjust the flash power until your subject is correctly exposed. As a side-note, this is why I love to work with mirrorless cameras like the Fujifilm X-series. If you are working with a DSLR, you always see a bright image in the viewfinder, you never see your actual exposure. For that, you have to take a shot and then chimp at it on your LCD screen. On my Fuji camera's, when I'm working in manual exposure, I can set up the Electronic VIewfinder in two ways: either to show me a nice and bright exposure (which is helpful for framing) or the actual exposure (which is helpful to determine how bright or dark I want my background to be). I have even assigned a Function button to easily switch between the two views. So I no longer need to waste a shot (and waste time) to determine my background exposure. Furthermore, when I make the actual exposure with the flash, I have set up my viewfinder to display the image I just made for 1.5 seconds (or shorter if I press the shutter again). This lets me determine if I need to adjust the power or the direction of my flash, again without chimping!
3. Want more control over your background exposure? Move your subject farther away from it.
If your model is close to a wall, the flash light that lights her will also light that wall, so it will be hard to control the exposure of both independently. If you want that wall to be darker, there's a couple of things you can do: first, you can add a grid to your light: this will limit the amount of stray light or spill light. But what if you're on a budget? In that case, just move your model (and your flash) further away from that wall. As light loses a lot of power quickly, the bigger the distance between the model and the wall, the less flash light will light that wall.

Same camera and light settings, but in this image the model was much closer to the background...

... than in this image.
This photo was shot in a white studio. Yet the ambient light was completely eliminated by a judicious choice of aperture, ISO and shutter speed. I kept the power on the softbox the same. In the picture on the left, the model was standing fairly at 9 feet from the background, so there’s still some flash light illuminating that background. In the picture on the right, the distance between the model and the white background was twice the original distance. The distance between flash and model (and hence the flash power) was kept the same as in the first shot. As a result, a lot less light reaches the background and it turns darker.
This is the reason why it's always good to have a lot of space, even if you're not planning on doing full body shots. The more space you have, the more you can play with the distance between your subject and the background and the more you can light them separately, even with just one light.
4. Use the sun as a free rim light
In a studio, I love working with at least two light sources: one as a main light and one as a rim light, coming from the back. This rim light will create a nice highlight on the back of your subject, separating it from the background and adding a nice 3D feel to the image.
On location, I don’t always have 2 lights with me and even if I do, I don’t always have the time to set up a second light. Nor do I have to. I’ll often use the biggest light source of them all, the sun, to my advantage and put the subject with his back to the sun. This kills two birds with one stone. Not only does my subject not have to squint, but I also get a free rim light. Then it’s just a matter of using the flash to bring my subject up to the desired brightness.

ujifilm GFX 50S | GF120mmF4 R LM OIS WR Macro @ 120 mm | 1/125 sec. @ f/5.6 | ISO 100
In the image above, I placed two strip lights behind Rosalinde to separate the leather jacket from the grey background. By the way, one of the things that you'll also find in my upcoming Light It Up! ebook, is loads of gear advice. For example, I really love the Nicefoto strip lights as they're affordable and super quick to set up on location.

FUJIFILM X-T1 | XF56mmF1.2 R @ 56 mm | 1/180 sec @ f/2.8 | ISO 200
In this case, I placed the motorcycle man against the sun. The result is a nice highlight around his outline, which nicely separates him from the background, along with the open aperture I chose for this shot.

The setup shot for the motorcycle image: a relatively cheap ($500) but very powerful 600 Ws portable studio flash (the Jinbei HD600) and a $25 flash umbrella.
5. Experiment with the placement triangle of light - subject - camera
When you start out with off-camera flash, you’ll probably put your light at a 45 degree angle to your subject, with your subject facing the camera. It’s a great starting position but don’t leave it at that. Experiment with the angle of your subject’s face towards the camera and with the angle of the light source towards the camera and the subject…

A couple of sample pages from my just released eBook Light it Up! The relative positioning of your light, camera and subject towards each other can greatly influence the atmosphere of your image.
One of my favourite lighting schemes is pretty straightforward. It is called ‘Short Lighting’ and it lights the side of the face that is turned away from the camera. This results in a more threedimensional portrait and works great with character faces, of which there are many along the shore of the Ganges in Varanasi, where this image was taken.

FUJIFILM X-Pro2 | XF16-55mmF2.8 R LM WR @ 45.5 mm | 1-250 sec @ f / 2.8 | ISO 200

Short lighting with a free bonus rim light from the bright Indian sun. Two great lights for the price of one!
Don’t let the softbox fool you into thinking you need a big budget to pull of a shot like this. I could have achieved 90 percent of this look with a $25 umbrella. The reason I prefer a softbox is that it gives me more control over my light, especially in confined spaces, where I can add a grid to it.
Want to improve your flash skills?

On April 1st 2018, the second, revised and updated edition of Light it Up! Techniques for Dramatic Off-Camera Flash, will be released with a couple of cool but time-limited bonuses. If you want to get a reminder when it launches, sign up for my newsletter. You'll even receive a set of ten free Lightroom presets, on the house!
P.S. If you speak Dutch, there's no need to wait as this book is also available in a Dutch print and ebook version! Check it out here.