Cameras

The 2016 edition of the 5 Day Deal: What's in it for you?

From now until Wednesday, October 19th, noon PST, it's 5 Day Deal time again! The 5 Day Deal is a unique bundle of photographic training content. If you were to buy every item separately, you'd be looking at a total bill of over $2.500. Now, you're only paying $97, a savings of more than 95 percent! The bundle contains over 60 hours of video training, 15 eBooks and almost 500 Lightroom presets and Photoshop actions. In total over 25 gigabyte of training goodness.

From Lightroom presets over video courses on how to shoot wine or photograph models to a complete landscape postprocessing photography course: there's something for everyone in this bundle.

From Lightroom presets over video courses on how to shoot wine or photograph models to a complete landscape postprocessing photography course: there's something for everyone in this bundle.

Of course, the real question is: 'What is this bundle worth to you?' Unless you're really into all genres of photography, probably not the full $2.500. But I can guarantee you that even if you're only remotely interested in photography, the 5 Day Deal bundle is certainly worth more than the measly $97 it's selling for. In fact, this bundle will do more for your photography than the umpteenth camera bag or a shiny new UV filter. 

To help you determine if it's worth your dollar (well, 97 of them), I've broken the bundle down into three typical areas of interest: general postprocessing, landscape photography and portrait photography. You'll see that even if you're only really into one of those three areas, the bundle is a steal. Heck, if you're into two or more, you should already be ordering!

1. You're into Lightroom and Photoshop

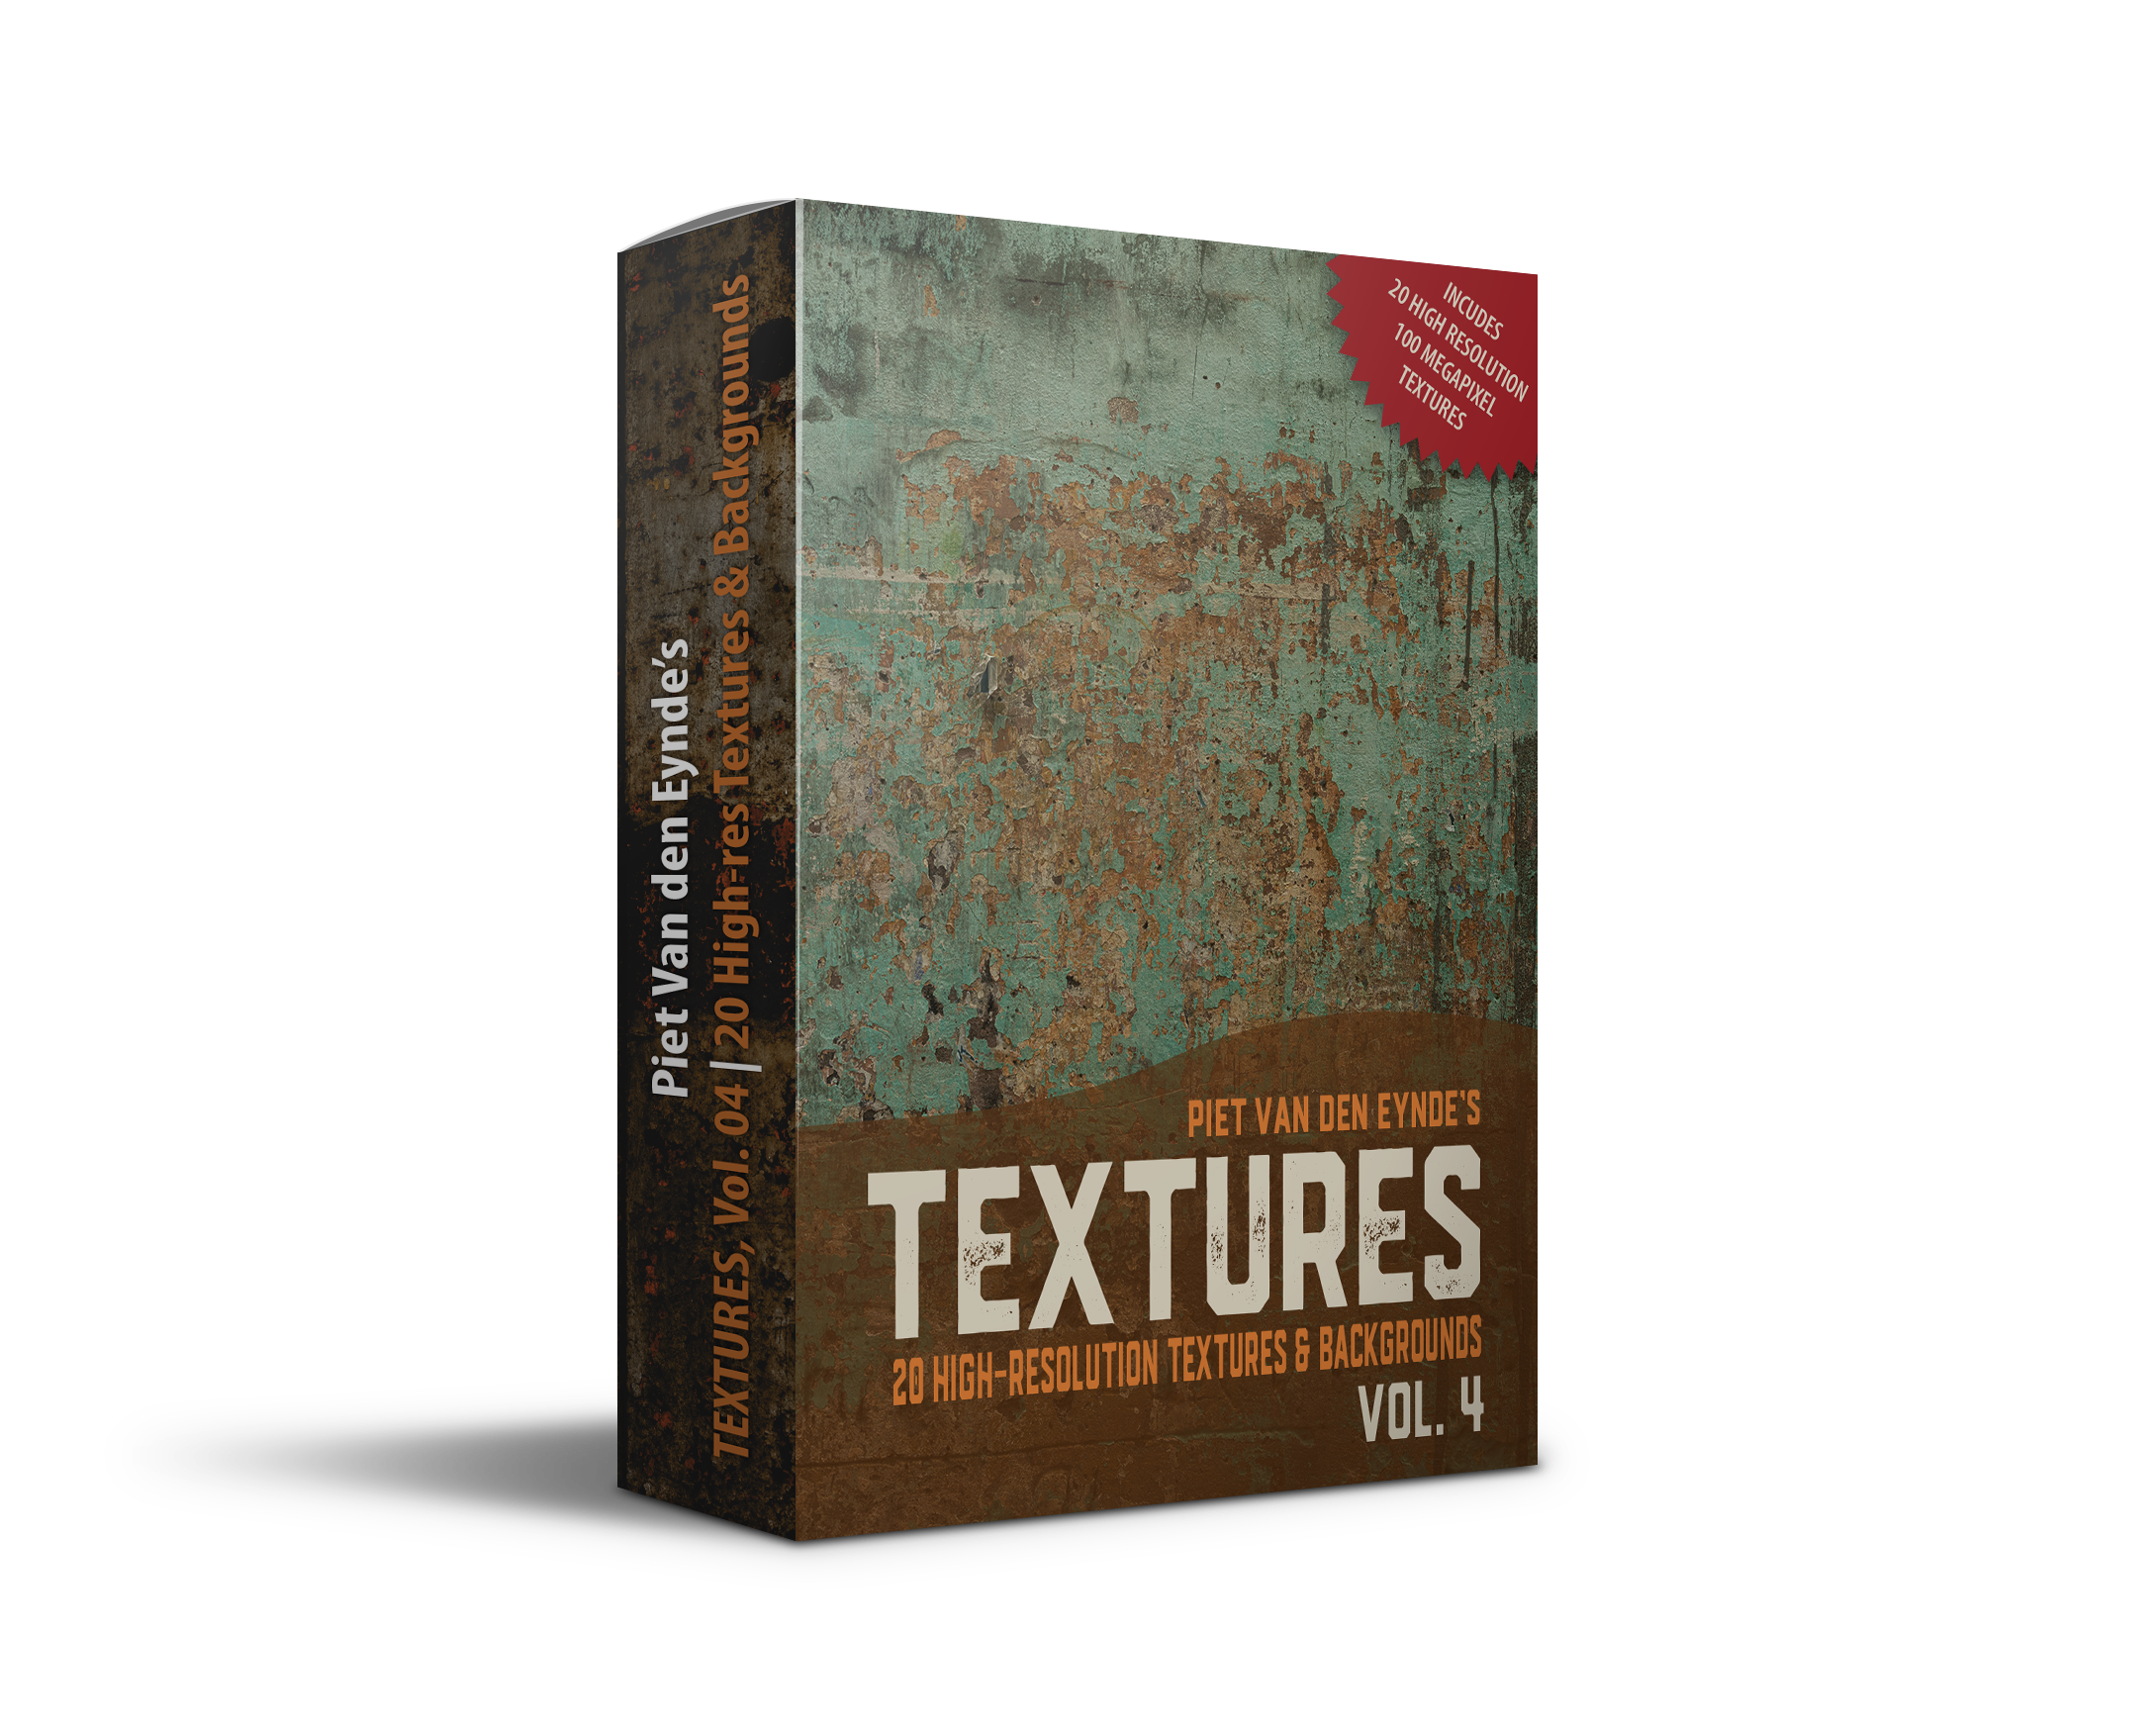
Postprocessing seems to be the main theme of this year's bundle, so if image editing is your thing, you're in for a treat. The bundle is ideal to hone your editing skills over these cold winter months and get you ready for a great start in 2017. There's hundreds of Lightroom presets and Photoshop actions, textures and loads of training videos. There's also a lot of HDR training, and I mean photographically interesting HDR, not the headache-inducing variety! The total value of the highlighted items alone is over $1.600. The 5 Day Deal price is less than ten percent of that. If you're a Lightroom or Photoshop user, this bundle really is a no-brainer.

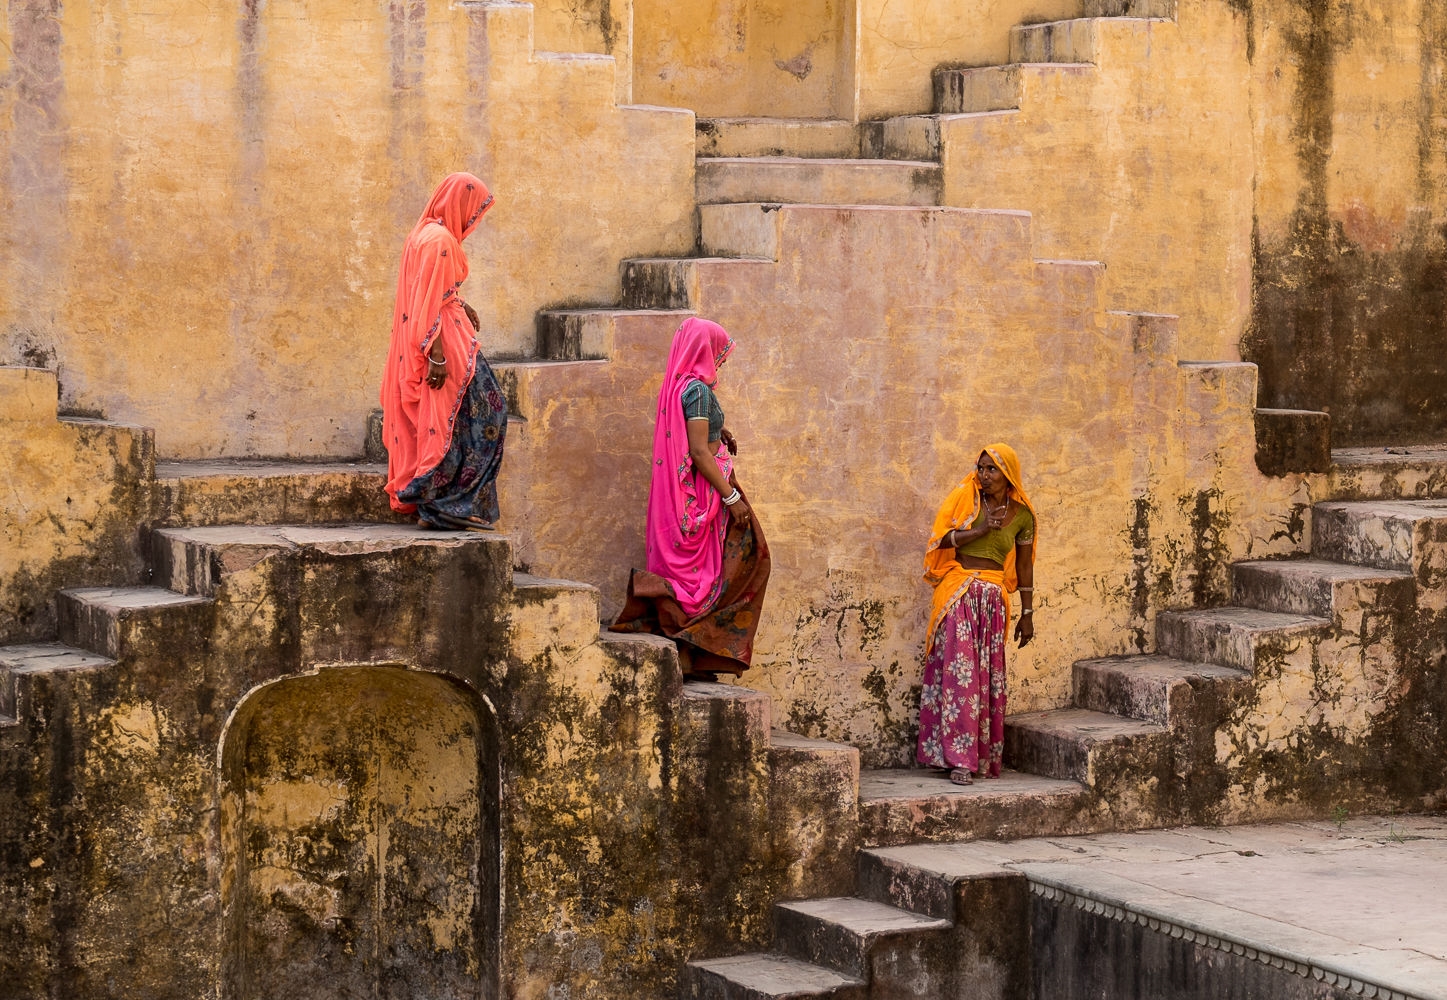
2.  You're mainly interested in nature photography, landscapes, cityscapes and how to postprocess these

The total value of the highlighted items is about $700. From previous 5 Day Deals, I remember the excellent quality of the stuff that people like Jimmy McIntyre, Klaus Herrmann and James Brandon put out, so I'm looking forward to discovering their new courses. Also, note that I've only counted items that have a direct relationship to landscape photography. There are lots of resources, like the many preset packs, that will without a doubt also be useful when you're editing your landscape images.

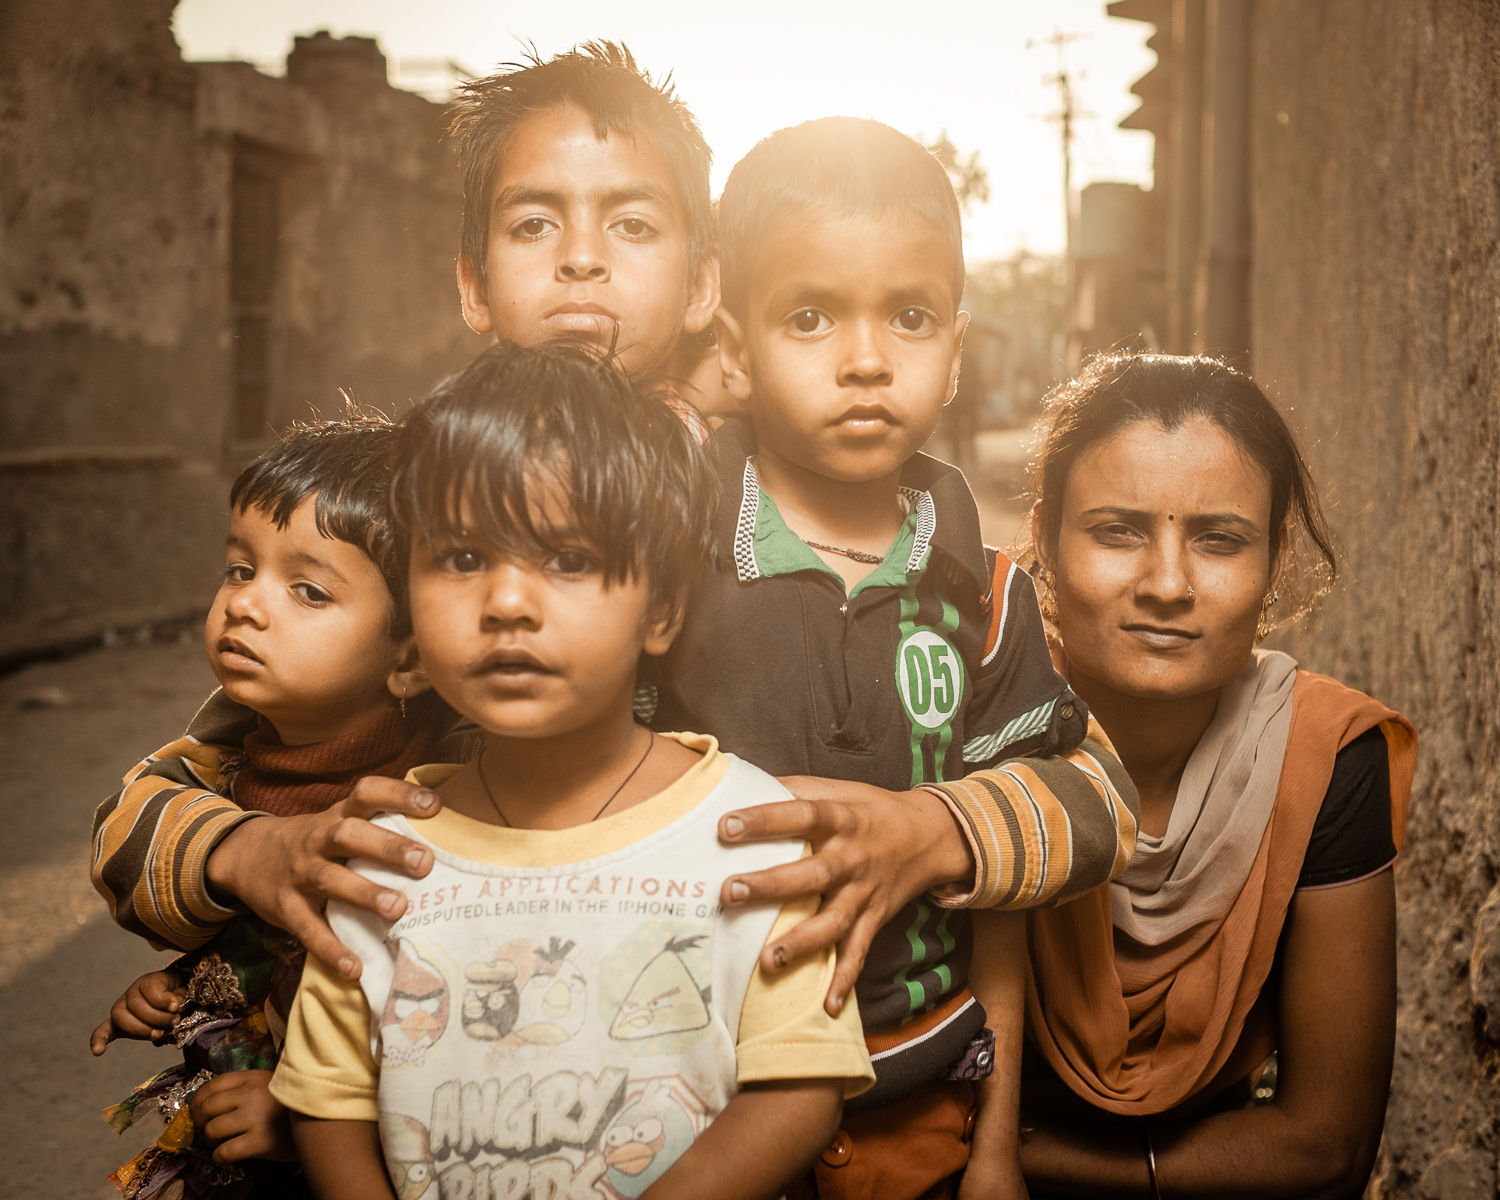
3. You're mainly interested in portrait photography and portrait retouching

The total value of the highlighted items is also some $700. Again, there are some hidden gems in this line-up. For example, I really enjoyed Serge Ramelli's no-nonsense approach to compositing: he photographs a model and then puts her in front of a different background. This course alone by itself normally costs double the entire 5 Day Deal bundle price.

Other areas of interest

But that's not all. There's also more general, introductory courses such as David duChemin's 26 part email course on the one hand but also some highly specialized ones on the other: how 'bout an in-depth course on Photo Mechanic (I know I can use one since I'm using this app more and more as a front-end to Lightroom). Or what about a course on how to photograph wine? It's all there.

If you're still in doubt, here's 5 final reasons why you should really consider this bundle:

The ever-funny-yet-to-the-point Zack Arias has written an eBook of over 100 pages with business advice for photographers. It's an excellent and at times hilarious read.

The ever-funny-yet-to-the-point Zack Arias has written an eBook of over 100 pages with business advice for photographers. It's an excellent and at times hilarious read.

  1. This way of learning is one of the cheapest to improve your photography skills, at your own pace, when and where you want it. Furthermore, there's always a couple of hidden gems in bundles like this. For example, I thoroughly enjoyed Zack Arias' 'Get To Work - Business Primer' eBook. It's not something I'd probably buy (in fact, I didn't know it existed), but it was included in the bundle anyway! 
  2. A lot of this bundle's resources are new and if they aren't new, at least they've never been in any other 5 Day Deal bundle, so there's no overlap with previous 5 Day Deal purchases.
  3. If you're more interested in the business side of photography, there's a couple of interesting items as well, like the afore-mentioned guide by Zack Arias. Zack's studio is doing great now, but he once was nearly bankrupt. So, he knows what he's talking about.
  4. The bundle is gone forever on October 19th, noon PST (that's 9 PM Brussels time).
  5. 10 percent of the entire turnover (not the profits, but the turnover, so almost $10 on every sale) goes to charity. Since the start of the 5 Day Deal in 2013, over $650.000 was donated to good causes. For this year, the 5 Day Deal team is hoping to achieve $250.000 of charity donations and they even silently hope to reach $350.000, which would bring their total over one million since 2013. To that effect, upon checkout, you can choose to pay an extra 10% ($9.7) which goes entirely to charity. And, as a token of good karma, you get an extra bonus-download worth $250. Some 50% of people who bought the bundle so far have chosen this option. It's called 'Charity Match', you'll see it on the 5 Day Deal page.

You see, I'm shutting up already. Yes. I'm that easy :-)

300 € cashback: To X-T1 or not to X-T1?

Met alle hype rond Fuji's nieuwe digitale middenformaatcamera GFX zou je bijna de 'gewone' X-camera's gaan vergeten. Recent nog lanceerde Fujifilm de X-T2, de opvolger van de immens populaire X-T1. Die laatste is overigens nog altijd te koop. De X-T2 (winkelprijs ca 1.700 euro body-only) kost sowieso ongeveer 500 euro meer dan zijn voorganger (1.200 euro body-only). Voor dat geld krijg je de helft meer megapixels, een beter kantelscherm, een handige joystick-controller, een gevoelig verbeterde autofocus en natuurlijk nog een resem kleinere verbeteringen.

Rock the Cashback!

Alsof dat het kiezen tussen beide toestellen nog niet moeilijk genoeg maakt, loopt er tot 31 januari 2017 nog een cashback-actie op de X-T1 waarbij zowel de zwarte als de graphite editie en zowel de body-only als de kit met de 18-55 en de 18-135 in aanmerking komen. Je kan maar liefst 300 euro terug claimen na aankoop. Dat brengt het effectieve prijsverschil op ongeveer 800 euro of anders uitgedrukt: de X-T1 kost momenteel ongeveer slechts de helft van de X-T2!

Is de X-T1 plots een slechtere camera geworden nu de X-T2 uitgekomen is? Natuurlijk niet! En met die 800 prijsverschil euro koop je al bijna een top prime objectief zoals de 56 mm f/1.2, de 16 mm f/1.4 of de 23 mm f/1.4 of... een vliegtuigticket naar een fotogenieke bestemming!

X-T1 of X-T2?

Fotografeer je graag snel bewegende onderwerpen, druk je graag op (echt) groot formaat af of wil je gewoon altijd het beste van het beste, dan zou ik eventjes door de appel bijten en toch maar onmiddellijk voor de X-T2 gaan. Je koopt dan een van de beste spiegelloze systeemcamera's die er momenteel op de markt is. Dat zeg ik trouwens niet, maar de EISA (de Europese foto-vakpers) die onlangs de X-Pro 2, het broertje van de X-T2, tot European Professional Compact System Camera van het jaar verkoos.

Indien je echter meer statische onderwerpen fotografeert en niet onmiddellijk op groot formaat afdrukt, dan is de X-T1 vandaag de dag nog altijd diezelfde goede camera als hij was bij zijn introductie. Eigenlijk is hij zelfs nog beter geworden, want hij heeft nog een aantal firmware updates gekregen. Ik heb fotoboeken gemaakt van 30 x 30 cm. Ik houd er daarbij van om één foto op een dubbele pagina te zetten zodat hij 60 x 30 cm afgedrukt wordt. Die afdrukken zien er fantastisch uit. Niemand die merkt de foto uit 'slechts' 16 megapixels bestond, waarvan ik er door de 2:1 uitsnede dan nog maar 12 gebruikte! 

De 16 megapixels van de X-T1 zijn groot genoeg om een dubbele pagina te vullen in een 30 x 30 fotoboek. Zelf maak ik die met Lightroom (natuurlijk!) en Blurb. Enkel de voor- en achtercover, die je hier ziet, maak ik op in Photoshop

De 16 megapixels van de X-T1 zijn groot genoeg om een dubbele pagina te vullen in een 30 x 30 fotoboek. Zelf maak ik die met Lightroom (natuurlijk!) en Blurb. Enkel de voor- en achtercover, die je hier ziet, maak ik op in Photoshop

De huidige cashback maakt de X-T1 ook een interessante keuze voor wie in het X-systeem wil stappen op een budgetvriendelijke manier en nog wat geld wil overhouden voor de lenzen.

Hieronder vind je een selectie van tien van mijn favoriete foto's die allemaal met de X-T1 gemaakt zijn. Als je er reiskriebels van krijgt: met het bedrag van de cashback raak je al tot in India! *

Meer info over deze actie (en hoe je de cashback kan claimen) vind je bij je Fujifilm-dealer.

* Een ticket naar India kost ca 600 €, met de cashback geraak je dus al op je bestemming! En er valt zoveel te fotograferen dat je toch niet onmiddellijk terug wilt... Of je moet twee X-T1's in met cashback kopen :-)

5 products that caught my eye at Photokina 2016

I have just returned from a bustling two days at Photokina, the biannual photographic gear lovefest that is held in Cologne, Germany. I was travelling in the exquisite company of fellow Belgian X-photographers Isabel Corthier and Ioannis Tsouloulis. I want to thank the people from Fujifilm Japan and Belgium for inviting us over. Trade shows like Photokina are as much about people as they are about products. So, it was great to reconnect with longtime friends such as Tom, Bert (who used Tom’s bald head as a reflector during his 'Small lights, big results’ demo on the Fujifilm stand), Rob, Damien (energetic as ever), the German ‘rock star’ trio Dieter, Jens & Peter and Marco, Julia, Shusuke and Kunio. I also had the privilige of being introduced to new people such as Patrick La Roque, Jens Krauer, Martin Hülle and their impressive work. Finally, I am happy I got to meet Rico Pfirstinger. He’s the author of the unofficial Fujifilm manuals. If you are struggling to get the most out of your camera, his books and workshops are among the best resources to turn to.

Now of course, apart from the social aspect, Photokina is obviously also about gear. Lots of gear! In fact, it's probably the most GAS (Gear Acquisition Syndrome)-inducing show on the planet. Even during those two days, I was unable to visit each hall, let alone each booth. Yet, there were a couple of products that caught my eye. Because the Internet loves lists, here's five of them, in no particular order. Well, except maybe for the first! 

1. Fujifilm GFX

The GFX looks like a beefed-up X-T2. Image © Fujifilm.

The GFX looks like a beefed-up X-T2. Image © Fujifilm.

Call me biased (I'm an X-photographer after all) but the Fujifilm GFX was the star of the Fujifilm booth and probably even of the entire Photokina. In case you've just returned from another planet, the GFX 50s is Fujifilm's first digital medium format camera. It has a sensor size roughly 4 times that of the other X series cameras and a pixel count of 51.4 megapixel. The GFX 50s will be available with three lenses at launch, which you should be ‘early 2017’. By end of 2017, another tree lenses should be available.

Literally everybody wanted to get their hands on the camera of which only a couple of prototypes exist. I was lucky enough to get to hold it in my hands for a couple of minutes. I was surprised at how well it focused even in the dark venue where I was and also at how lightweight it was: this beast of a camera weighs less than many a professional DSLR! If you want to read more about the specs (even more than is available on Fujifilm's own website) read this excellent article by Rico Pfirstinger.

The price of the GFX hasn't been set yet, but Fujifilm management did promise it would be 'well under $10.000' with the standard lens. We have yet to see into how many Euro that will translate...

Official press release here.

You'll be able to use two EVF viewfinders with the GFX: a regular one and one that can be tilted and rotated, allowing almost every imaginable capture angle. It will even be possible to use an external monitor.

You'll be able to use two EVF viewfinders with the GFX: a regular one and one that can be tilted and rotated, allowing almost every imaginable capture angle. It will even be possible to use an external monitor.

2. Phottix Spartan beauty dish

As you know, I use a lot of artificial (flash) lighting in my images, so I'm always eager to learn about cool new lighting accessories. One interesting modifier I came across was at the stand of Phottix. The Spartan beauty dish (full specs here) is a modifier that seems to come straight out of a Transformers movie: it's easy to set up and you can remove the disc in the center to turn it into an octabox. I also like the fact that it comes with a grid. More and more, I seem to be using grids in my own lighting. The Spartan comes in two sizes: 50 cm and 70 cm. Price for the latter is about $145. That is very affordable, considering that some companies charge about that much for just a grid!

3. SMDV BRiHT-360

The SMDV BRiHT-360 is a lightweight 360 Ws battery-powered barebulb flash with removable battery that slides into the main unit.

The SMDV BRiHT-360 is a lightweight 360 Ws battery-powered barebulb flash with removable battery that slides into the main unit.

Just as I thought I could finally finish the manuscript of the second edition of my Making Light e-book, I came across the SMDV stand... I could not help but notice their BRiHT-360 portable barebulb flashes (there were about 10 of them placed along the counter). As you may know from previous blog posts, I am a fan of their easy to set up (and even easier to break down) Speedbox series of softboxes. At Photokina, it was the BRiHT-360 that stole the show, though. As its name implies, this is a 360 Ws barebulb flash. What I like about it is that it's super lightweight at only 1.25 kg including the battery. The latter lasts about 300 full power pops. Basically, this thing produces the same amount of light as four Speedlights at the weight and price of only two. What I also like, is that it works well with SMDV's Speedboxes, who happen to be also very lightweight: the combination of the BRiHT and an 85 cm Speedbox only puts 2 kgs on the scale!

The BRiHT does TTL and HSS with Canon and Nikon cameras (using a compatible SMDV Flashwave 5 trigger) but luckily enough it also works in manual mode on my Fujifilm cameras. I am looking forward to testing this unit more in-depth and to see whether I might even be able to get some sort of HSS with my Fuji cameras by using the Cactus V6 Mark II triggers, which I reviewed here.

In the mean time, you can read the full specs of the BRiHT 360 here. In Europe, the BRiHT will be available through www.foto-morgen.de. Price should be somewhere around €700 / $750.

4. Godox

The AD600 exists in a Bowens and a Godox mount and in a TTL and manual version. All versions support HSS with Canon, Nikon and Sony (provided you use the matching Godox X1 trigger). Image © Godox.

The AD600 exists in a Bowens and a Godox mount and in a TTL and manual version. All versions support HSS with Canon, Nikon and Sony (provided you use the matching Godox X1 trigger). Image © Godox.

Godox, whose Lithium battery-powered Ving V850 speedlight I’ve reviewed here, also had a stand at Photokina. Their AD600B battery powered studio flash has recently been reviewed in Shoot, the Belgian photography magazine I write for (Dutch link here). This unit packs 600 Ws of power in an affordable package with TTL and HSS support for Nikon, Canon and Sony. By default, it comes as an all-in one light with a battery that attaches directly to the body of the flash. The advantage is that you don’t need cables and you don’t have a separate power pack to worry about (or carry around).

The potential disadvantage is that if you put your light on a boom stand, especially with a heavy modifier, the setup can get a bit top-heavy. Also, if you’re using an assistant instead of a light stand, it’s quite a workout to hold a setup like this in the air for any prolonged period of time.

Image © Godox

Image © Godox

So I was happy to see the 600 Ws Extension Head. This accessory allows you to separate the pack from the head. Just unplug the flash tube from the AD600, plug it in the Extension Head, connect the power cable to where the flash tube used to be and boom, you've transformed your all-in-one into a pack-and-head system.

Godox also had a 1200 Ws Extension Head on display: this accessory has a special, more powerful flash tube which effectively allows you to turn 2 AD600s into one 1200 Ws pack-and-head system. With so much power, you can overpower the sun even when using larger modifiers. Or, you can benefit from faster recycle times.

Finally, Godox also had an AC adaper on display which allows you to turn the AD600 into a mains-powered flash. The adapter includes a fan as well.

If you live in the US, note that the AD600 is sold by Adorama under the Flashpoint XPLOR 600 brand name.

Image © Adorama

Image © Adorama

The 600 Ws Extension Head ships without a flash tube because you use the one that comes with the AD600. Price is around $80. Image © Adorama.

The 600 Ws Extension Head ships without a flash tube because you use the one that comes with the AD600. Price is around $80. Image © Adorama.

The 1200 Ws one has a special flash tube which actually consists of two 600 Ws tubes. Price is around $300. Image © Adorama.

The 1200 Ws one has a special flash tube which actually consists of two 600 Ws tubes. Price is around $300. Image © Adorama.

5. 3 Legged Thing Albert Tripod

I have been using the Three Legged Thing Brian tripod during my travels for the last couple of years. The main reason is that it is a lightweight travel tripod that still can be extended really high. For me, it serves a dual purpose: I can use it as a traditional tripod for long exposure photography (in which case I obviously don't extend it all the way up) but I actually use it a lot more as an impromptu light stand. Having this versatility (transformability really seems to be a theme in the products I selected in this blog post) allows me to travel with less weight without compromising on photographic opportunities. Alas, the Brian is no longer available. At Photokina, I was introduced to his successor: Albert. The Albert was improved on a number of points but still shares the Brian’s adventurous and multi-purpose DNA. Price of this carbon-fibre travel tripod system is about GBP 400 (including a ballhead).

Full specs here.

The Brian used as a light stand.

The Brian used as a light stand.

So there you have it, a quick round-up of some of some of the products that caught my attention at Photokina. If you were there, I’d love to hear what caught yours!


Tutorial review: The Complete Guide To Portraiture by Sandro Miller

When I first heard about ‘The Complete Guide To Portraiture & Building A Body Of Work For Print & Publication’ I knew this was one I just had to watch. After all, it’s about all the things I love in photography: travel, portraiture, lighting and retouching. So I contacted the guys over at RGG EDU (that's short for Rob and Gary's Great EDUcation), the producers of this video, and they were kind enough to set me up with a review copy and a really cool discount code for readers of this blog. Full details are at the end of this post but basically, it means that as a reader of my blog, you can get RGG EDU's newly released 6 hour Capture One Pro training video as a free bonus when you purchase the Sandro Miller tutorial.

UPDATE: the discount code no longer works, but there is currently (until May 29th, 2017) a 66 percent discount on this tutorial, making this an even much better deal than the one I had for you back when I originally wrote this review...

This tutorial follows internationally acclaimed photographer Sandro Miller from start to finish on a project in which he photographs indigenous tribes in the remote and sometimes downright dangerous parts of Papua New Guinea. Here's the official trailer below.

This day and age, everyone and his dog seem to be producing video tutorials geared towards photographers. As I can tell from my own area of expertise, Lightroom training, there’s a lot of chaff amongst the wheat. Yet, the videos from RGG EDU, a relatively young photography tutorial website, definitely fall in the ‘wheat’ category. Having bought, watched and highly appreciated their ‘The Complete Guide To Composite Photography, Color & Composition with Erik Almås’, I knew I could expect high quality, and I wasn’t disappointed. By the way, here's an in-depth (Dutch-only, unfortunately) review of the Erik Almås tutorial.

Sandro Miller

One of Sandro's most recent books is the result of a seventeen-year collaboration between photographer and subject. I'll try and keep that in mind the next time I make a one-minute portrait of someone :-)

One of Sandro's most recent books is the result of a seventeen-year collaboration between photographer and subject. I'll try and keep that in mind the next time I make a one-minute portrait of someone :-)

To be really honest, I did not know Sandro Miller. At least not by name. But I did know some of his work, and chances are you do, too: just google his latest book Malkovich Malkovich Malkovich, which features photographs that Sandro made during his 17 year friendship with this incredibly versatile actor.

Incidentally, this is just one of the things this tutorial taught me: getting a book published takes time and patience. Sandro visited Cuba 14 times before he did a book on it. But... it is not undoable, especially after watching this tutorial...

What’s in this tutorial?

In this tutorial, we get to follow Sandro while he is preparing a new book project: a series of portraits of tribal people in Papua New Guinea. 

Obviously, the highlight of the tutorial is the actual documentary in which you get to see him set up a makeshift studio, set up his lights and interact with the people he photographs. If this tutorial where a five course dinner: this would be the main course. But the appetizers, served as 'prerequisites' and desserts (the compositing tutorials and final interviews) are just as... mouthwatering.

Gear and Lighting Prerequisite 

First of all, there are a number of so-called prerequisites or series of introductory videos: there's one about the gear that Sandro uses and then another series of videos about lighting where you can see how he puts that gear to use in his studio in Chicago. The contrast between the high-end equipment (Sandro's studio looks like a mix of a Profoto and Broncolor flagship store) and what he used in Papua New Guinea could not be bigger. It’s another proof that it’s the photographer matters more than the gear, or as the publisher of my own eBooks, David duChemin would say: Gear is good, Vision is better!

The idea of the prerequisite videos is to teach you some of the basics so that you can follow along better when the tutorial shifts to a higher gear. To that effect, we see Sandro make 2 portraits: a moody male portrait and a fashion portrait of a woman. During these sessions, Sandro explains why he uses a certain light and how he modifies it with flags. We also get to see that lighting is often a game of inches...

‘I can create a novel in a man’s face by the way that I light it’
— Sandro

I found it interesting to see the progression in the images: from ‘I can do that, too’ to ‘Damn, that’s a setup I have to remember’. It was also kind of comforting to see that even a highly respected portrait photographer has to work a scene and a model to get to great results. Success does not come easy. In fact, if there’s one theme that recurred throughout the work of Sandro Miller in general and this tutorial in particular, it’s the importance of practice, perseverance and attention to detail. I really picked up lots of little nuggets from those prerequisites.

Digitech prerequisite

Another thing that I found really interesting was the interview with Shad Wilson. Shad works - amongst others - as a so called Digitech: a digital tech assistant. He even has his own custom truck stacked to the roof with tripods, pelicases and light stands. Sandro being a high-end photographer, he can afford the budget for a Digitech to come along on this project.

'I'll be in the shed...' Shad WIlson talks Gary from RGG EDU through how he turned a regular Pelicase into a sun-shielded laptop case.

'I'll be in the shed...' Shad WIlson talks Gary from RGG EDU through how he turned a regular Pelicase into a sun-shielded laptop case.

But even for mere mortals like you and I, this section has some really interesting advice on backup and workflow that can be helpful when you have to be your own Digitech. I also learned an interesting idea from this section: Sandro already had a specific idea from the start as to how the final images should look. He created that specific style in Photoshop and then gave that file to the Digital Tech. Shad emulated the look in Capture One so that he could apply it to the images while shooting tethered.

Postprocessing and retouching prerequisites.

As this tutorial is as almost as much about postprocessing as it is about photography, there’s also a couple of introductory videos on postprocessing and retouching.

In these videos, we get to know Pratik Naik of Solstice Retouch. Pratik is a world renowned retoucher and another example that RGG EDU will only work with people who really know their stuff.

Pratik has some interesting ideas on how to redefine some of Photoshop's shortcuts so they are grouped together better for retouching. Even though these prerequisite tutorials were primarily aimed at beginners, I picked up a couple of interesting ti…

Pratik has some interesting ideas on how to redefine some of Photoshop's shortcuts so they are grouped together better for retouching. Even though these prerequisite tutorials were primarily aimed at beginners, I picked up a couple of interesting tips, not in the least about Capture One, which I I'm not so familiar with as I am obviously more of a Lightroom user. Yet, the things I learned definitely made me want to check out Capture One more in detail.

Again, the idea is to get you up to speed for the ‘real’ postprocessing sections towards the end of the video, where the Papua New Guinea portraits that were taken on a green screen are composited into the backgrounds which were also photographed on location, but separately.

Sandro shot the backgrounds separately. At first, I had a hard time understanding why but after seeing the whole series come together, it made sense!

Sandro shot the backgrounds separately. At first, I had a hard time understanding why but after seeing the whole series come together, it made sense!

I have to admit that at first, I thought it was a strange idea to be shooting people against a green backdrop and then, sometimes as little as 100 feet further, shoot the actual backdrop separately, only to combine them later in Photoshop. I mean, why not just put your subject against the backdrop of your choice and photograph him right there and then, right?

It's what I have been doing so far with all of my travel portraits. It was only after viewing a number of finished images that I understood why this at first sight overly complicated procedure made sense: by having separate control over the background and the foreground and by also being able to exactly control the lighting of the subject in his makeshift studio (much more than under the glaring Papuan sun), the resulting photographs work much better together as a series. This in turn makes the work better suited for a book. It's definitely something I might also try in the future. 

The actual Papua New Guinea documentary

Although ‘only’ slightly over an hour, this is obviously the ‘pièce de résistance’ of this tutorial. Here we get to see Sandro created the raw material (pun intended) that will form the basis of an actual book project. We see Sandro check out locations that can either be suitable to create his makeshift studio or as a so called black plate, a background for compositing.

The setup (left) and the resulting raw file (right). Sandro used a digital Hasselblad on this shoot so he has virtually unlimited postprocessing options in terms of recovery and dynamic range.

The setup (left) and the resulting raw file (right). Sandro used a digital Hasselblad on this shoot so he has virtually unlimited postprocessing options in terms of recovery and dynamic range.

To me, the most important take away from this video was that you don't need expensive or complicated lighting setups to create really impactful images. Everything was done within a relatively simple, double diffused soft box. No rim light, no reflectors, nothing.

The video below has some behind-the-scenes footage and it gives you a good idea of what to expect in the full-length tutorial.

For me, the tutorial also re-emphasized the importance of having a good fixer on location. When you spend a lot of money on a location project in an area or a country that you're not familiar with, it really is a good idea to set some money aside and hire someone who can help you, not only logistically but most importantly help you scout interesting locations and faces and interact with them.

In terms of makeshift studios, it does not get much more makeshift than this :-)

In terms of makeshift studios, it does not get much more makeshift than this :-)

On my most recent trip to India, I did exactly that: we hired a really great local guy who helped us find interesting people and locations and who at the same time could translate  as my own Hindi is limited to ‘Hello’ and ‘Look this way’ and ‘Look that way’.

I would rather buy an f/1.8 portrait lens and have some money left for a fixer, than buy the most expensive lens there is and not have any budget left for travel, let alone a fixer. If you're interested, below you can find a short video with some of my own location lighting work. Although it's not in the Hasselblad range, I'm very happy with the dynamic range of my Fujifilm X-Pro 2 and I'm even happier its price isn't in the Hasselblad range, either!

The Compositing videos

As much as I liked the actual on location video in Papua New Guinea, I was even more looking forward to the compositing videos. And again, I was not disappointed. Pratik does a really good job of explaining how to blend these rather complex subjects with all their feathers and beads into the background. I found his explanation on how to get rid of the green fringes that remain (shooting against a green backdrop is no miracle solution) and how to use the blur and smudge brushes to tweak the mask, invaluable.

Before... As you can see from the screenshot, the original mask leaves a lot of problems in terms of green fringing. Pratik shows a couple of really interesting tips that I have never seen before (and Lord knows I've watched my share of compositing …

Before... As you can see from the screenshot, the original mask leaves a lot of problems in terms of green fringing. Pratik shows a couple of really interesting tips that I have never seen before (and Lord knows I've watched my share of compositing videos) on how to get rid of those.

And after... The final image is dark and moody. Yet, by keeping everything nicely organized in layers, adjustment layers and groups, everything can still be changed should the photographer prefer a different blend of foreground and background, or a …

And after... The final image is dark and moody. Yet, by keeping everything nicely organized in layers, adjustment layers and groups, everything can still be changed should the photographer prefer a different blend of foreground and background, or a different white balance. By the way, these quick screen grabs don't do the images much justice...

As a photographer, you have to have your own characteristic style. Part of that style is obviously created during capture, but this tutorial really made clear that an important part is also added in postproduction. The original files were rather dark and flat. Using a bunch of adjustment layers and filters, Pratik turns them into very moody portraits. As a nice extra, the tutorial includes a number of backgrounds and original raw files so you can follow along with the compositing videos. And I really recommend you do because it's the best way to learn anything. 

Two images waiting to be combined into one...

Two images waiting to be combined into one...

Another advanced technique I picked up was how to use Photoshop's Blend If options to restrict the effect of an Adjustment layer to specific areas.

Another advanced technique I picked up was how to use Photoshop's Blend If options to restrict the effect of an Adjustment layer to specific areas.

The printing videos

In these videos, we see Sandro meet up with his longtime friend and printer, Jon Scott of JS Graphics. We get to see Jon prepare the final images for print and if you have ever printed on a large format printer yourself, you'll recognise the mix of anxiety and excitement that you feel when an expensive large-format print comes rolling out of the printer. This section wasn't as in-depth as I wanted it to be but on the other hand, you could probably easily fill another 11 hours with just a printing tutorial.

Sandro and Jon inspecting a large format print. As an interesting side-note, this image, which was shot with available light and was not composited, is one of my favorite images of the entire series.

Sandro and Jon inspecting a large format print. As an interesting side-note, this image, which was shot with available light and was not composited, is one of my favorite images of the entire series.

Final interviews: hug a book!

This tutorial wraps up with two more interviews: the first is with Sandro’s publisher, Martha Hallet from Glitterati. It's an interesting talk about the publishing business and all of the artistic, financial and marketing considerations that go into  publishing a book. I chuckled when I heard Martha say that Sandro wanted to use seven inks for the Malkovich book (compared to the standard of four) and how they finally settled for five.

I dont’t want to look at a book on an iPad. That’s ridiculous. You want to feel a book. You want to hug a book!
— Sandro

This section really is an ode to the printed photo book and rightly so. One thing I found missing was some insight as to how to actually layout a book like this. The publisher goes briefly into it but an interview with the graphic designer would really have interested me, too. Well, I guess the RGG EDU guys had to draw the line somewhere!

The final interview not only gives an insight in Sandro's career, which spans four decades, but also in his amazing collection of photo books, which seems to span 40 feet!

The final interview not only gives an insight in Sandro's career, which spans four decades, but also in his amazing collection of photo books, which seems to span 40 feet!

That ode continues in the last interview with Sandro about his life and career. Sandro is filmed against a bookshelf that literally contains hundreds of photo books. After all the tech talk of the previous videos, this more inspirational interview is a great way to end a great tutorial.

Conclusion

As you may have guessed by now, ‘The Complete Guide To Portraiture & Building A Body Of Work For Print & Publication’ is an excellent tutorial in my opinion. If you're into location portraiture, postproduction and the entire process of working towards a published book, whether it's self published or with a publisher, this is something you must watch and then... probably watch again.

Everything is relative
— Einstein

Update: the discount codes in the next paragraph are no longer valid but as mentioned in the introduction, there is currently (until May 29, 2017) a Memorial Day discount on this tutorial that offers no less than 66 percent off, making the price only $98. And, even better, if your total bill exceeds $99 (in other words, if you buy two tutorials), code REMEMBER gets you an additional 25 percent off your entire bill AND if you spend more than $300, code REMEMBER35 shaves 35 percent off your total bill! Only for two more days!

Two fantastic RGG EDU discount codes for readers of this blog

Now... about the price. At first sight, $299 isn't cheap but as Einstein said: 'Everything is relative'. For the price of a camera bag, you get 11 hours of very well produced, in-depth, concise and above all very motivating training that will probably do more for your photography than any camera bag ever will!

Knowing what it already takes to produce a relatively simple Lightroom or Photoshop tutorial, I can only imagine the planning, effort, time and money it has taken to create the Sandro tutorial. So I would say that although not cheap, the price is more than fair for the length, quality and production value of the tutorial.

With code MTW25, you basically get RGG EDU’s new 6 hour Capture One Pro tutorial for free!

And if $299 is too much to pay in one go, you can even finance it in monthly installments of $29.

Better still, I’ve got two very cool discount codes for you, my dear readers: code MTW10 gets you 10 percent off the Sandro tutorial (or any other RGG EDU tutorial, for that matter). Code MTW25 even gets you 25 percent off on any order that's over 375$. That basically means you can get RGG EDU's freshly announced Capture One tutorial (a $79 value) completely free: the trick is to add both tutorials in your shopping cart, enter the code MTW25 and you'll pay less for both than the regular $299 price of the Sandro tutorial alone! But don't wait too long, because these codes expire end of August, 2016.

Before I forget: the RGG EDU contest!

When you buy the tutorial, you also get access to a private Facebook group and you get to enter the Sandro Portrait Photography Contest which RGG EDU specifically set up for this tutorial. The contest has $50.000 in prizes! I told you these RGG EDU guys don’t do half work… Find out more about the contest here.

Subscribe to my newsletter and get my '10 Tips for Better Travel Photographs' for free.

Subscribe to my newsletter and get my '10 Tips for Better Travel Photographs' for free.

And - shameless plug to end this long review - if this tutorial gets you in a traveling mood, don’t forget to subscribe to my newsletter: you’ll receive my 10 tips for better travel photographs absolutely free.

Finally, if you want to do more than just read about travel photography, Matt Brandon and I have just announced the 2017 edition of our Location Portraiture and Lighting Masterclass in Delhi and Varanasi, India.

Honoured, humbled, frightened and excited: 2 months with the X-Pro 2

When a while back, Fujifilm offered me the opportunity to test a pre-production sample of the upcoming X-Pro 2, I felt honoured, humbled, frightened and excited all at the same time.

Honoured, because I was one of a limited number of photographers worldwide to receive an early sample. Humbled, because the list of the others included big name photographers that I regard very highly, such as Damien Lovegrove, David Hobby and Zack Arias, to name but a few. Compared to these guys, I'm just a grown-up kid with too many cameras, too many lenses and waaaay to many flashes. I felt like taking a shower with the highschool football team. When I had just been out in the freezing cold...

You know the old joke ‘How many photographers does it take to change a light bulb?

Frightened because I had a tight deadline to give Fujifilm four images, preferably from different shoots. Four images that would be looked at, pixel-peeped, scrutinized by the whole world. Four images of which Fujifilm would choose one to display during the Fujifilm X Series Five Year Anniversary Exhibition in Tokyo. You know how photographers can be ruthless for each other’s work. I couldn’t help but think of the old joke: "How many photographers does it take to change a light bulb?" The answer is: "Eleven: one to actually fix the bulb and ten to comment afterwards about how that one guy could have done it better."

Charleroi, one of Belgium's old industrial cities. I scouted this cool location without ever leaving my house, thanks to Google Maps and Google Street View. The actual hike up the hill made me appreciate a lightweight camera system like the X-Series…

Charleroi, one of Belgium's old industrial cities. I scouted this cool location without ever leaving my house, thanks to Google Maps and Google Street View. The actual hike up the hill made me appreciate a lightweight camera system like the X-Series even more. Hills definitely look lower from Google Earth than they do when you're standing in front of them! My original plan was to do a Long Exposure here, but the wind was so strong I could not keep the camera steady enough.

Excited

But I also felt excited: I had been slaving away at my new Lightroom book for months (the Dutch version is available now and the English version is in layout) and I hadn’t really been photographing a lot. This opportunity and the deadline it included gave me a much needed kick in the butt. So I rustled up some models, fired up Google Maps and Google Street View to scout some cool locations, charged the battery of my Jinbei flash, dusted off my Formatt Hitech ND’s and my B+W Vari ND's (Dutch link, English link) and planned a couple of shoots.

Shooting JPEG (and actually liking it)

It was freezing cold but model Stéphanie was a real champ. Shot with one of my favourite lenses: the 10-24 mm. I used the Jinbei HD600 II and the Phottix Luna Folding Softbox. In very contrasty, backlit situations like these, it's good to have an Op…

It was freezing cold but model Stéphanie was a real champ. Shot with one of my favourite lenses: the 10-24 mm. I used the Jinbei HD600 II and the Phottix Luna Folding Softbox. In very contrasty, backlit situations like these, it's good to have an Optical Viewfinder, too. Especially the X100T-like one, where you can still have a small EVF inserted in the bottom right corner to help you with your composition. The X-Pro 2 also has a 1/3rd stop faster sync speed than the X-T1, which comes in very handy when you're trying to overpower the sun in bright daylight.

The camera being a pre-production sample, the camera’s firmware was also still beta, so there were a couple of limitations. First of all, the ‘Preview Exposure and White Balance in Manual Mode’ feature was not working on my sample. It’s a feature I rely on heavily when using flash, because it lets me easily set the desired ambient exposure. However, my model will generally be too dark in this mode, so once I’ve determined how dark or bright I want the background to be, I will switch this mode off.

I use the ‘Preview Exposure and White Balance in Manual Mode’ so much that I’ve assigned a function button to it.

I’ve even dedicated one of the function buttons to it. To assign a function to a function button, press and hold it for a couple of seconds and then choose the desired function from the list that appears. When off, the EVF goes to a normal brightness level so you can choose your composition and your focus point more easily. Being able to switch between both views and having a live histogram is one of the key advantages of mirrorless cameras. Needless to say, the feature will work as expected on shipping X-Pro 2’s.

Another thing that slightly worried me was the fact that there was no RAW support yet. In fact, there still isn’t (as is always the case with new cameras). As a Lightroom user, author and trainer, I eat RAW files for breakfast. Although I love the quality of Fuji’s out-of-camera JPEG files (they’re probably the best in the whole camera industry), I prefer to shoot at least RAW + JPEG for the added postprocessing leeway that RAW files give me. Partly, that’s for creative reasons, as I like to edit my images quite elaborately but partly it’s also to cover up for the underexposure mistakes I sometimes make while shooting. When you know your way around Lightroom, you run the risk of becoming a sloppy photographer because you know the tricks to cover your ass after the shoot.  

Just like David DuChemin, I firmly believe in Vision-Driven Postprocessing. I always try to maximise the mood in my images to make them convey what I felt at capture time. As you can see from the behind-the-scenes shot, this image was actually taken…

Just like David DuChemin, I firmly believe in Vision-Driven Postprocessing. I always try to maximise the mood in my images to make them convey what I felt at capture time. As you can see from the behind-the-scenes shot, this image was actually taken during the day, but I thought the loneliness I felt from shooting from the top level of a parking lot, would be better expressed by a "dusky" postprocessing. I used one of my Colorific Colour Grading presets.

Old X-Pro 1 shoots new X-Pro 2 :-) This is what the scene really looked like. The dusky atmosphere was added in post. I was surprised to see that even a JPEG could survive this much postproduction, so that's very promising for the RAW files!

Old X-Pro 1 shoots new X-Pro 2 :-) This is what the scene really looked like. The dusky atmosphere was added in post. I was surprised to see that even a JPEG could survive this much postproduction, so that's very promising for the RAW files!

For that reason, I chose to shoot with the Standard Profile, rather than with Classic Chrome which I normally prefer: that film simulation blocks the shadows and without the fallback option of a raw file, I preferred to keep my options open. The X-Pro 2 also has a new Black & White film simulation and a new grain feature, but I did not test that for the same reason.

In this blog post, I will list my top 10 favourite features of this incredible new camera. To conclude this post, I was amazed with the quality of the JPEG files and the flexibility they still offered in terms of further processing. It almost made me wish Fuji would offer an option to save images as 16 bit TIFFs: you would get the benefit of near-raw like editing options along with the beautiful out-of-camera film simulations.

So, these were the four images I submitted to Fujifilm. I’m as curious as you to know which one they picked for the 5 Year X anniversary exhibition. I hope they picked at least one. And even if they haven't, I still had a hell of a time shooting! For me, the X-Pro 2 is already a fantastic camera: it made me get up from my couch and go shoot. Isn't that what all good cameras should do?

This location, an abandoned cooling tower, had been on my to-do list for quite some time. But writing books, magazine articles, creating Lightroom presets and changing the occasional diaper kept coming in the way. The X-Pro 2 deadline was the necess…

This location, an abandoned cooling tower, had been on my to-do list for quite some time. But writing books, magazine articles, creating Lightroom presets and changing the occasional diaper kept coming in the way. The X-Pro 2 deadline was the necessary kick in the butt to finally load up my F-Stop Loka UL backpack and go explore. And that's probably what I like most about Fujifilm cameras: they inspire me to just go out and shoot, experiment, learn from my mistakes and shoot some more.

My trusted F-Stop Loka UL backpack and me at the foot of the hill overlooking Charleroi.

My trusted F-Stop Loka UL backpack and me at the foot of the hill overlooking Charleroi.

My favourite new camera with my favourite old lens: the 10-24. I think I make about half of my shots with that lens. In fact, three of the four images on this page were shot with it.

My favourite new camera with my favourite old lens: the 10-24. I think I make about half of my shots with that lens. In fact, three of the four images on this page were shot with it.

All images in this blog post are JPEG images coming from a pre-production X-Pro 2. They were processed in Adobe Lightroom with my Colorific Lightroom presets. A big thanks to Serge from www.fotografieblog.be for the behind-the-scenes shots (made with an X-Pro 1).


Wirelessly tethering your camera into Lightroom with an Eyefi MobiPro SD Card

In a previous blog post, I did a review about the new Eyefi MobiPro SD Card. You might want to read that blog post first before watching this video. One of the conclusions was that for real-life tethered shooting (e.g. in a studio), wirelessly sending over raw files is just too slow (unless you're paid by the hour). So, in this follow-up article, I want to investigate an alternative workflow, which is a lot more efficient. Basically, I use this technique to wirelessly tether my 3 year old Fujifilm X-Pro 1 into Lightroom and it works like a charm! You can pretty much use this technique with most cameras that use SD cards.

The main workflow is as follows:

  1. Set your camera up to shoot raw + JPG
  2. Only transfer the JPG files wirelessly from the Eyefi card to your computer (that's the default Eyefi setup anyway)
  3. Use Lightroom's Auto-Import feature to import the wirelessly transferred JPG files into Lightroom
  4. Make any edits, add star ratings, keywords and pick or reject flags to the JPG files during your tethered shoot
  5. At the end of the shoot, copy the raw files over from the SD card to the same Lightroom folder the jpg files are in, 'the old fashioned way', i.e. manually using Lightroom's regular Import dialog
  6. (And this is the magical part) Have Lightroom automatically synchronise any edits (except for cropping) and metadata from the jpg files to the corresponding raw files, using John Beardsworth's Syncomatic plugin.

That's the short and sweet version. You can get the full lowdown in this video. 

Review: Eyefi Mobi Pro 32 GB wireless SD card

Eyefi kindly sent me a Mobi Pro 32 GB wireless SD card to review. The timing was right, because I had been looking for a way to create a tethered workflow in which I can send images I take with my Fujifilm cameras to Lightroom. Although Fujifilm have announced a tethering solution, it is not yet available and once it will be, it will still require you to use a cable.

What is it?

The Eyefi Mobi Pro 32 GB wireless SD card is, as its name implies, a 32 GB SD card that includes a wireless transmitter so you can send your photos wirelessly to your smartphone, tablet or computer. It's priced at about $99 / €89. Eyefi also has a cheaper wireless card, the Eyefi Mobi, that exists in 8 and 16 GB versions. The difference between both is that the Pro version can...

  • also transfer raw files
  • has an option to only transfer selected photos (the regular Mobi transfers all photos)
  • use its own wifi network but also be integrated in your existing home or office network

Note that these options are off by default, but you can enable them by putting your card in your desktop computer's card reader and going into the Eyefi Desktop App's preferences. More about that later.

Working with mobile devices

The Mobi Pro not only allows you to transfer raw files to your computer, you can also send images (JPEG only, if I'm correct) to a mobile device. You only have to install the Eyefi Mobi app, enter the card's serial number in the app and connect your mobile device to the wifi network that the card emits. It was really nice to see the images that I was shooting with my wifi-less X-Pro 1 appearing on my iPhone. 

 
My X-Pro 1 now has wifi capabilities, thanks to the Eyefi Mobi Pro!

My X-Pro 1 now has wifi capabilities, thanks to the Eyefi Mobi Pro!


So, if nothing else, this card enables you to transfer images that you shoot with a non-wifi equipped camera to a tablet or phone, from which you could then share them to Instagram, Facebook or edit them in an App such as Snapseed. Heck, if you're a Lightroom CC user, you could even have them automatically imported in Lightroom mobile and that way have them wind up in your desktop version of Lightroom, too. Lots of possibilities there! 

The Mobi Pro turns (almost) any non-wifi equipped camera into a camera that lets you share images to your mobile devices
On your mobile device, select the Eyefi Mobi Card's network and you're good to go!

On your mobile device, select the Eyefi Mobi Card's network and you're good to go!

By default, the card sends out its own ad hoc wifi signal, so you can even do this in the middle of nowhere: you just have to select the card's wifi network in your phone's wifi settings and you're good to go. As mentioned, by default it sends all the images over but you can configure it (computer required) to only transfer those that you mark on your camera as locked or protected. On the X-Pro 1, when in playback mode, press the OK key and choose the 5th option from the Playback menu: Protect. 

So far, so good. I was starting to think it would be nice to use this setup during workshops: I do a lot of teaching and it would be fun to have the images appear on an iPad that I could then pass around to the students. It sure beats looking at a camera LCD or viewfinder (especially the X-Pro 1's EVF)!

The (jpg) images transfer nicely and relatively quickly to the Eyefi Mobi App

The (jpg) images transfer nicely and relatively quickly to the Eyefi Mobi App

However, that's where things didn't quite go as hoped: each time the camera went to sleep, I had to reestablish the wifi connection. So I set the camera to not go to sleep, but then the card's internal settings wrecked havoc: apparently, to conserve power on the camera, the card will shut down the connection after 1 to 2 minutes of non-use. Which is too soon for a real world tethering workflow. I've looked around but there seems to be no easy fix to this. According to Eyefi Customer Care, this cannot be changed. Which is a bummer, because it makes the card unusable for the teaching use I had in mind. Mind you that this auto-disconnect issue does not seem to happen when you shoot to a laptop or desktop computer.

Eyefi Cloud

The Eyefi Mobi Pro also comes with a complimentary free year of Eyefi Cloud: this service lets you upload an (unlimited) amount of images to the Eyefi servers, from where you can also share them or you can use this service as a cloud backup (you can even upload old photos so the service isn't limited to photos you took with an Eyefi card). Eyefi Cloud lets you display your images in a timeline no matter which device you used to take them with. The pictures are shared across all your devices and available for viewing even when there's no internet connection. Of course, you can also share pictures with other people.

Although the concept sounds nice enough, I personally won't be using this service as I already have a full computer backup through backblaze.com and I use Lightroom mobile to display and sync my images online across different devices.

Tethering to a desktop or laptop computer

Being able to transfer images to a phone or tablet is nice, but the main reason I was interested in this card was to wirelessly transfer my raw files to a watched folder on my computer, and have Lightroom pick them up from there using the Lightroom's Auto Import feature. This way, I was hoping not only to shoot tethered into Lightroom, but to do so wirelessly!

The first time you use your card, you have to enter the activation code and then take a couple of test shots. Once your card is recognised, you're good to go. This setup procedure only has to be done once. Make sure to save the card with the activat…

The first time you use your card, you have to enter the activation code and then take a couple of test shots. Once your card is recognised, you're good to go. This setup procedure only has to be done once. Make sure to save the card with the activation code in case you change computers or want to use the card with a different computer, too.

I installed the Mobi Pro Desktop App (make sure you have the latest version of that specific app - the version that works with the regular Eyefi Mobi card will not support the extra features of the Mobi Pro card) and set the card up to transfer raw files, too. You have to insert the card in your computer to make that change. A nice touch for raw + jpeg shooters is that you can send both file types to different folders if you want.

The Pro card offers the ability to add up to 32 Home Networks, transfer raw files and enable selective transfer of files.

The Pro card offers the ability to add up to 32 Home Networks, transfer raw files and enable selective transfer of files.

Again, so far, so good. Just like with the iPhone, after the initial setup procedure is over, you select the card's wifi signal in your computer's list of available networks and you're good to go. However, then came the disappointment: it took about 30 seconds to download a 30 megabyte raw from the X-Pro 1. On top of that, sometimes, the desktop app would not immediately start to download after I made a shot. So I would shoot again and then both shots would be downloaded from the card together. Oddly enough, the second shot would sometimes arrive on my computer before the first, making it hard to judge my shoot's progress. I checked this with Eyefi's (excellent and quick) customer support and they said the maximum speed of the card, using the card's own network, is between 10 to 15 megabit per second, which means that theoretically, that raw file could download in about 15 seconds. But even that is quite long a wait in the heat of a shoot. Eyefi also recommends to keep the card close to the receiving device when transferring. If you're using a megapixel monster like the D800 then those times would easily double.

One of the other exclusive features of the Pro version of the card is that it can also work via your own WIFI network: in fact, you can store up to 32 different networks in the card and it will then default to any of those if it finds one and otherwise it will fall back to creating its own ad-hoc network. This has two advantages: it keeps you from having to switch back and forth between your own network and the card's network and you can use your computer for things such as internet browsing while using the card. I had hoped that the transfer speed might improve, too but I was unable to confirm that. In fact, when I tried the card over my own wifi network, transfer speed was slower than through the card's own ad hoc network. Working via my own network did give me one (important) advantage: even if I put the camera down for a while, I could just pick it up again and start shooting and the files would automatically transfer again. When using the Eyefi's ad hoc (own) wifi signal, just as with my iPhone, the network connection dropped after a minute or two. It's really a pity though that we cannot configure this timing. I would be interested to hear other user's experience with this.

Back to jpgs, then?

So I decided to try how fast a jpg would transfer. FINE jpgs from an X-Pro 1 are about 3 megabyte and those downloaded in 3 seconds. A burst of 10 shots downloaded in half a minute. Unless you're shooting very fast, I consider that workable. So at least, when I'm in a situation where I can use another network than the card's own (because of the reason explained at the end of the previous paragraph), I seem to be able to tether jpg files to the computer steadily enough.

Conclusion

Unless you're a very slow and deliberate shooter, raw tethered shooting in a professional environment is possible in theory, but not in practice, IMHO. Does that mean I won't be using the Mobi Pro? No, on the contrary: I find it to be a valuable tool, as long as you set your expectations right, which was the point of this blog post.

First of all, I like the fact that I can transfer selected shots from my X-Pro 1 to my iPad or iPhone for social sharing or quick editing. And as far as tethered shooting to a computer goes: whenever there's a shoot where I feel I can benefit from shooting wirelessly straight into Lightroom, I will shoot raw + jpg on the card but transfer only the jpg files wirelessly and import those into Lightroom. I will do my ratings, flags and possibly some minor editing on those jpg images. After the shoot, when the client or the model have gone home, I will copy the raw files over the old-fashioned way: by putting the card into my computer!

And before you pity me for having to manually copy over my edits from the jpg to the raw files or even worse, doing everything over again, don't: I've got a trick up my sleeve that I will share in next week's blog post. Stay tuned!

UPDATE: 'next week's blog post' is now live, here! In this blog post, I'll show you how to automatically import your images into Lightroom and how to transfer any edits you've already performed on the JPGs to your raw files.

Cons

  • wireless raw transfer too slow for tethered shooting use in studio or outside, using jpg is recommended
  • auto-disconnects too quickly when used with iPhone / iPad for tethered use with these devices

Pros

  • turns cameras without wifi into wifi-enabled cameras
  • works with Mac and Windows, iOS and Android
  • wireless transfer of raw files, ok for one-offs
  • option to transfer only selected files
  • if configured, works with your own network
  • fast customer support